
Stuck asking: “Why are my AirPods not working”? This guide will teach you everything you need to know about troubleshooting the 15 most common AirPod problems.
AirPods, as we know, are supposed to work intuitively and connect seamlessly with devices, especially with Apple devices. But with Murphy’s Law at work, we understand the disappointment when they are not working as expected.
It can be frustrating when your AirPods won’t turn on or connect in times you need to answer a call or even switch between your Apple devices. After all, AirPods can be expensive so you only expect them to be worth what you paid for.
That’s why we came up with this in-depth guide to identify the common problems and present you with detailed steps and proper solutions to get them working again. Read on!
In This Article
- How to Reset Your AirPods
- AirPods Won’t Pair
- AirPods Are Connected but Have No Sound
- One AirPod Not Working
- AirPods Always Pair With the Wrong Device
- AirPods Won’t Connect Properly With Mac
- AirPods Won’t Connect With Non-Apple Device
- AirPods’ Audio Quality Is Poor
- Calls Keep Dropping When Using AirPods
- Automatic Ear Detection Stopped Working
- AirPods’ Gestures Are Not Working
- AirPods Won’t Charge
- AirPods Keep Falling Out of the Ear
- AirPods Keep Disconnecting
- AirPods Are Lost
- AirPods Mic Not Working on PC
- When Should You Call for an Apple Genius?
- Conclusion
How to Reset Your AirPods
Before going through each problem in detail, it’s best to first try the universal solution — resetting your AirPods.
A simple reset removes all the errors on your AirPods’ firmware, ultimately helping them function as good as new.
The good thing is, like how all Apple products are designed, they too are relatively easy to reset. However, you must remember that, when you reset your AirPods, the settings for your AirPods are also reset. That means you’ll have to reconfigure the controls, and pair them with your devices again.
Here’s how to reset your AirPods:
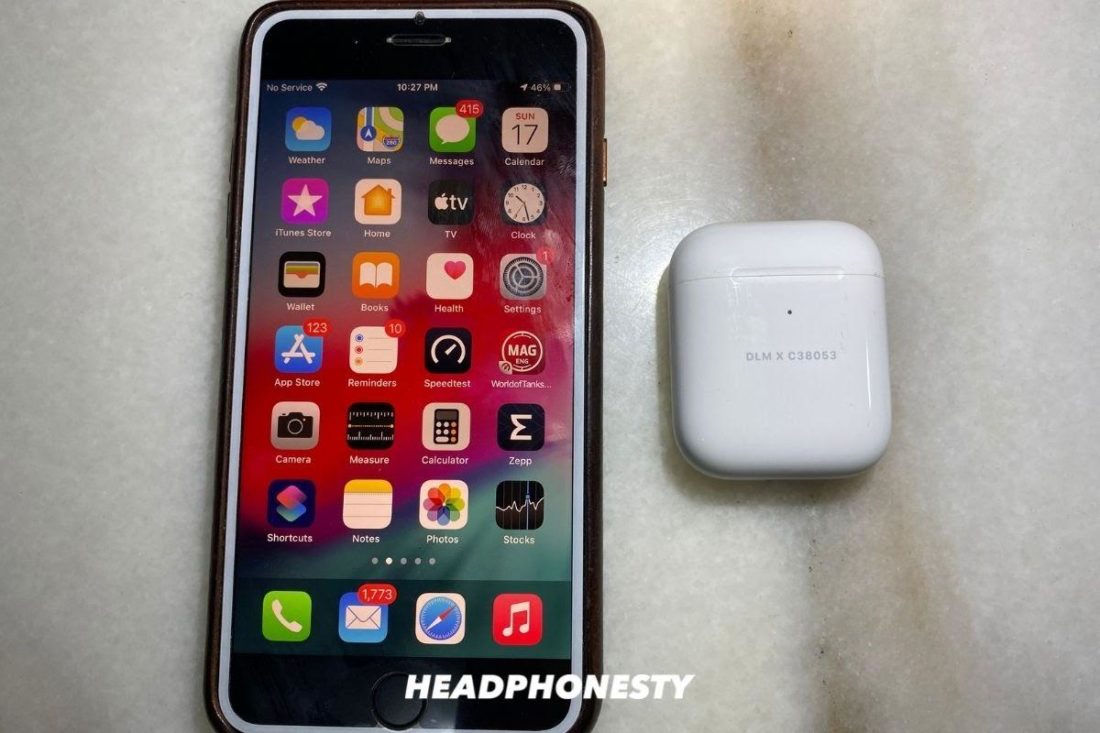
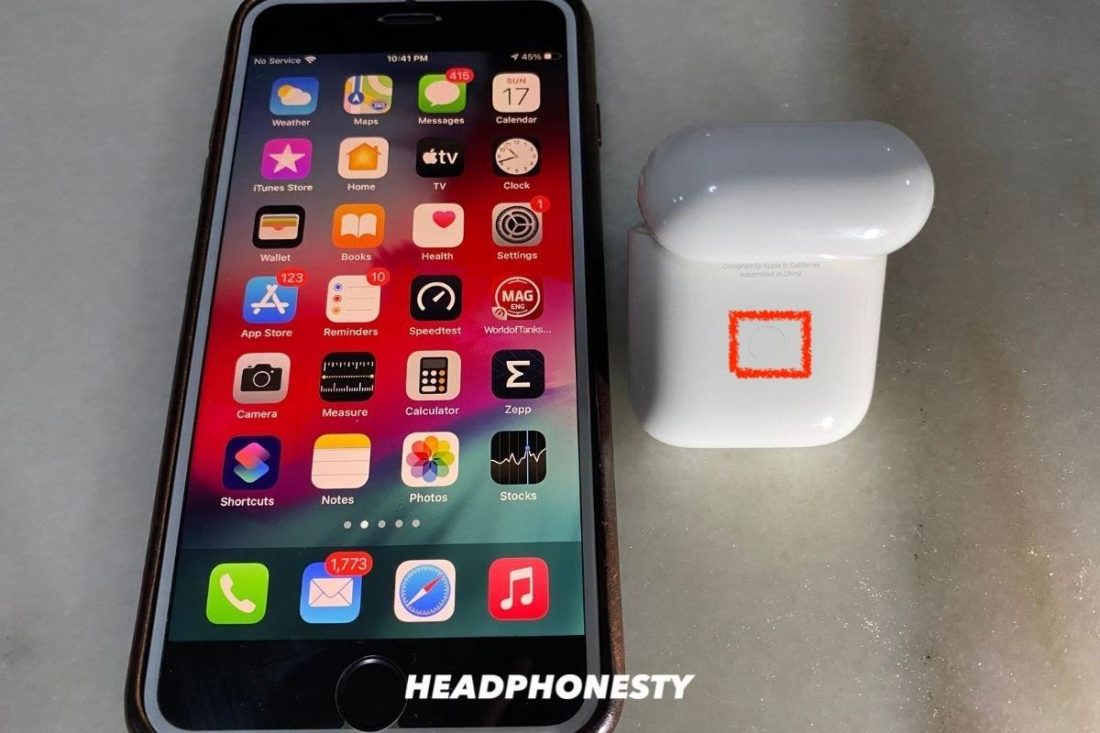
- Put your AirPods back into the charging case and close the lid for at least 30 seconds.

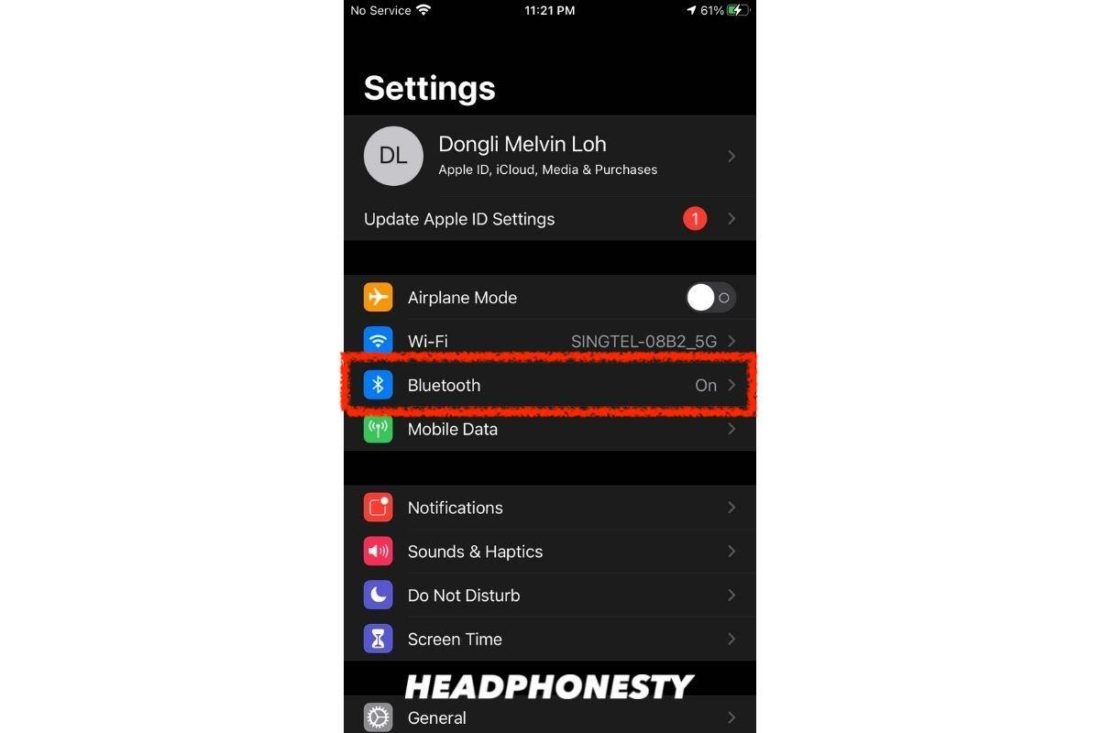
AirPods in case with lid closed next to iPhone 7 Plus. - On your iOS device, under Settings, select Bluetooth.
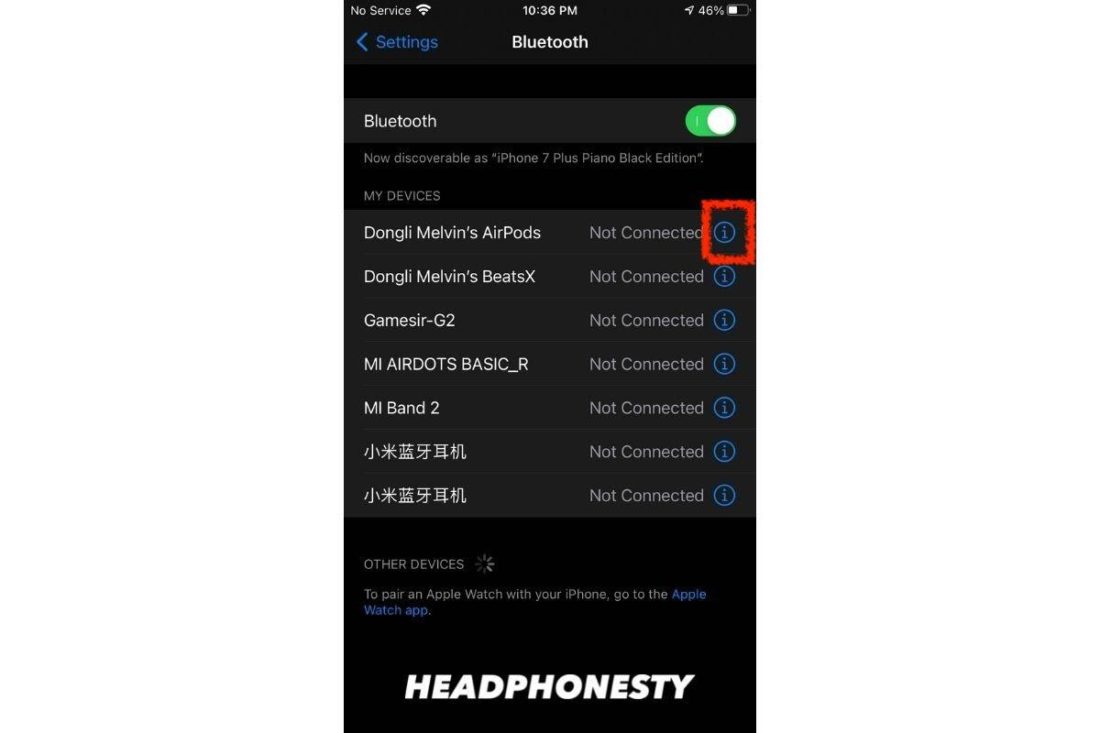
Access Settings and Bluetooth. - Tap on the “i” icon next to your AirPods.
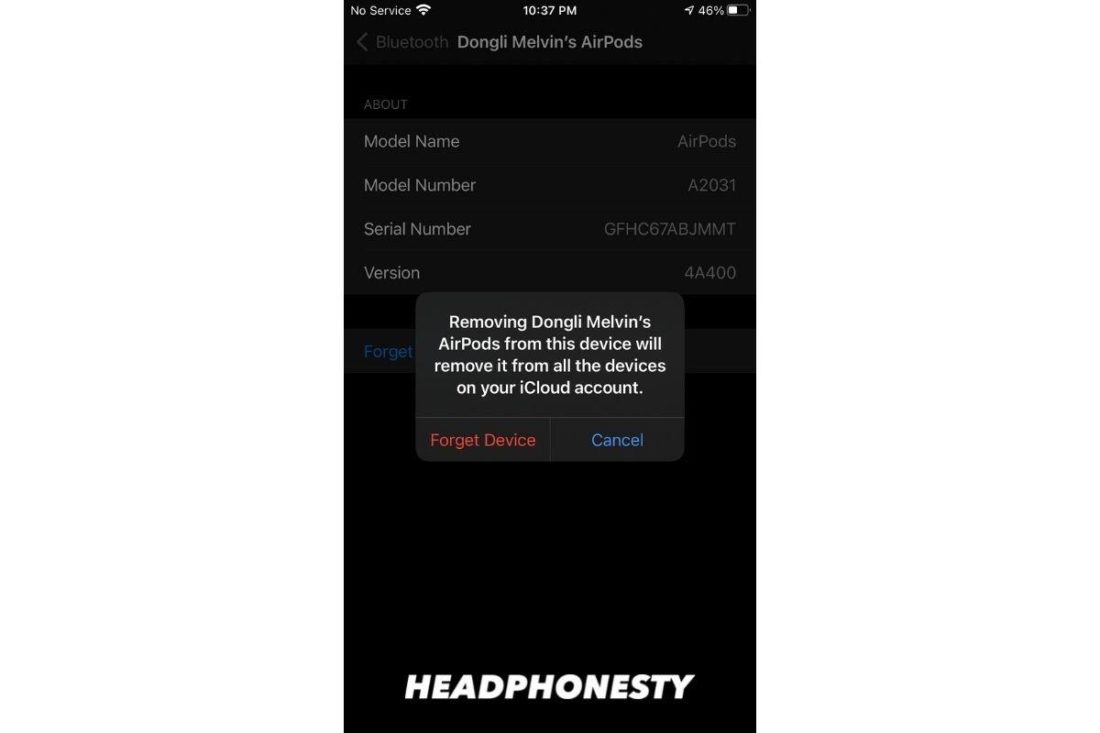
Tap the “i” icon. - Select Forget This Device and once more to confirm.
Forget the device. - Press and hold the setup button on the back of the case for about 15 seconds while the lid is open until the status light changes from amber to white.
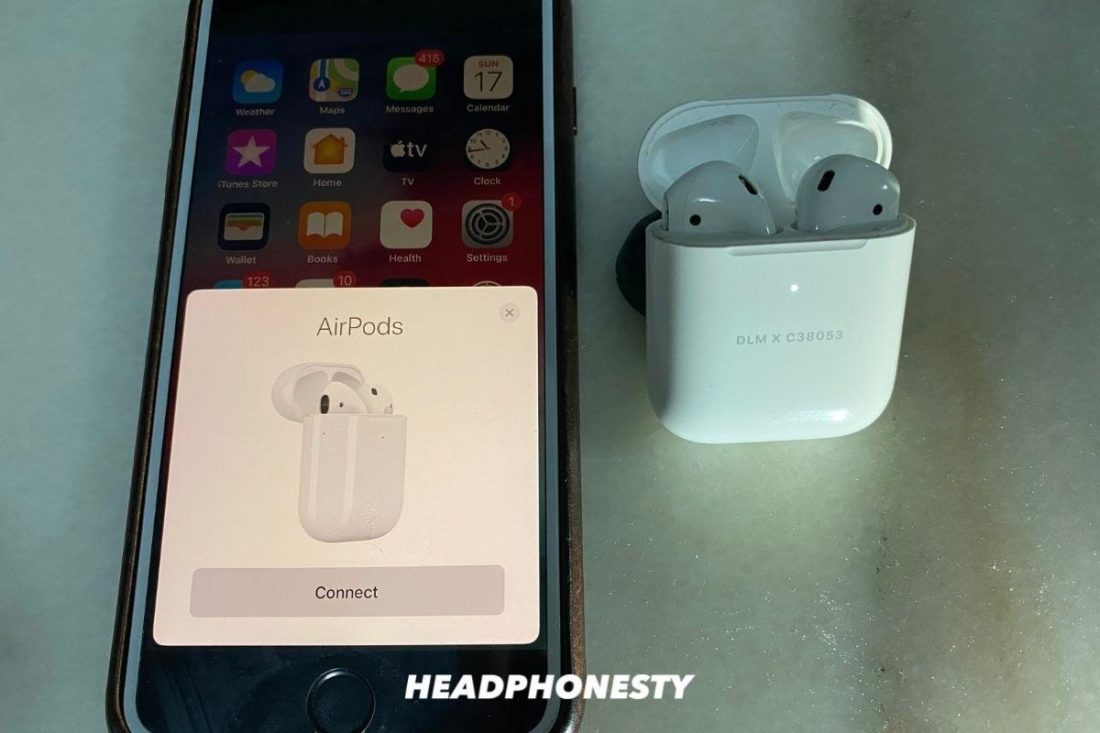
Reset AirPods until status light turns from Amber to White. - With the lid still open, place your AirPods close to your Apple device to reconnect.
Keep the lid open and sync your AirPods.
In most cases, a reset should work. But if it doesn’t, read on to find out the recommended fixes to get you sorted out.
AirPods Won’t Pair
Although AirPods are designed to pair with ease, they are not always free from connection issues. But you shouldn’t jump to conclusions that they are faulty, yet.
Bluetooth pairing is a connection between 2 devices establishing a communication. Knowing which of the 2 devices is causing the problem is crucial to achieving a resolution.
Here are some things you can do to check which device is faulty:
- Try connecting your AirPods to other devices; if they are working fine, we can safely assume that the issue doesn’t lie with your AirPods.
- Try connecting a different pair of Bluetooth headphones to the intended device; if they won’t pair as well, then you can confirm that the problem truly lies with your intended device.
Remember that some devices like PlayStation consoles have Bluetooth capabilities but do not support Bluetooth audio. That’s why, when pairing your AirPods to such devices, you got to try something innovative instead! Check out our ingenious hacks on how to connect AirPods to PS4, PS4 Pro or PS5, for some samples.
Alternatively, you can explore our tested and proven solutions to when AirPods won’t connect with PC, Mac, iPhone, & Android.
AirPods Are Connected but Have No Sound
Hearing your AirPods’ connection chime when you place them in your ears, means that they are successfully connected. So, if you can’t hear any sound after that, be sure to check your volume settings.
Otherwise, check if your AirPods are selected as the default playback device. This is one common setting that gets overlooked often, especially if you regularly switch between multiple Bluetooth audio devices.
Here’s how to set AirPods as the default playback device on Mac:
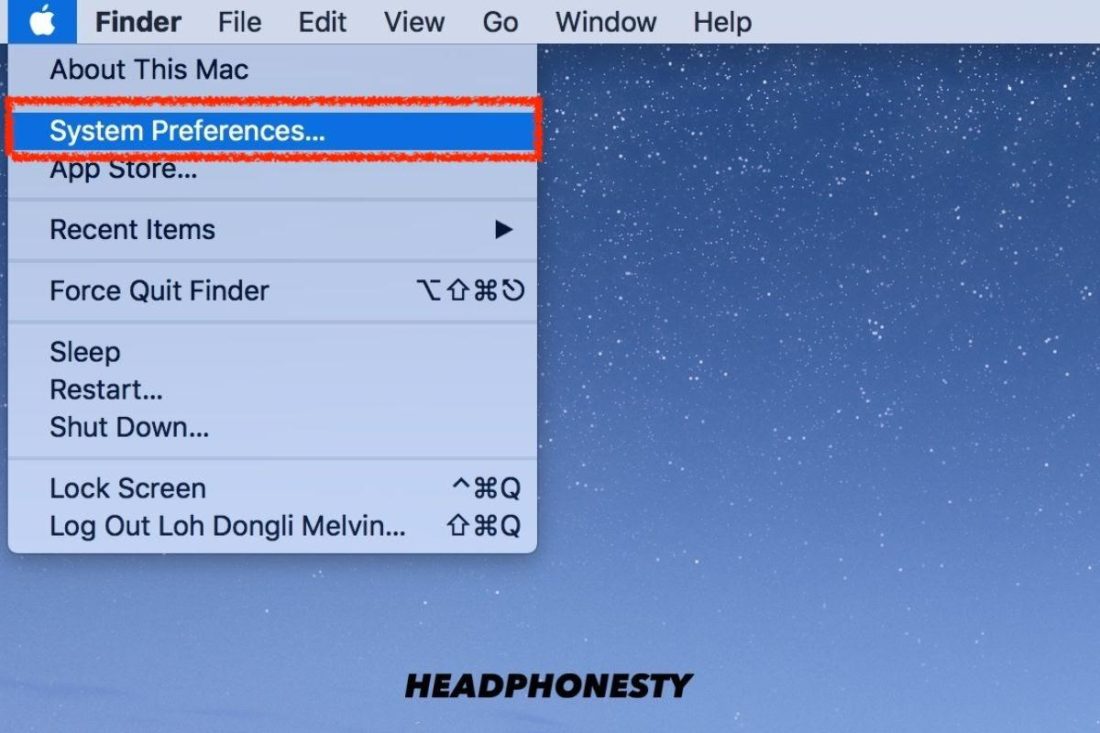
- Click the Apple icon on the top left and select System Preferences.
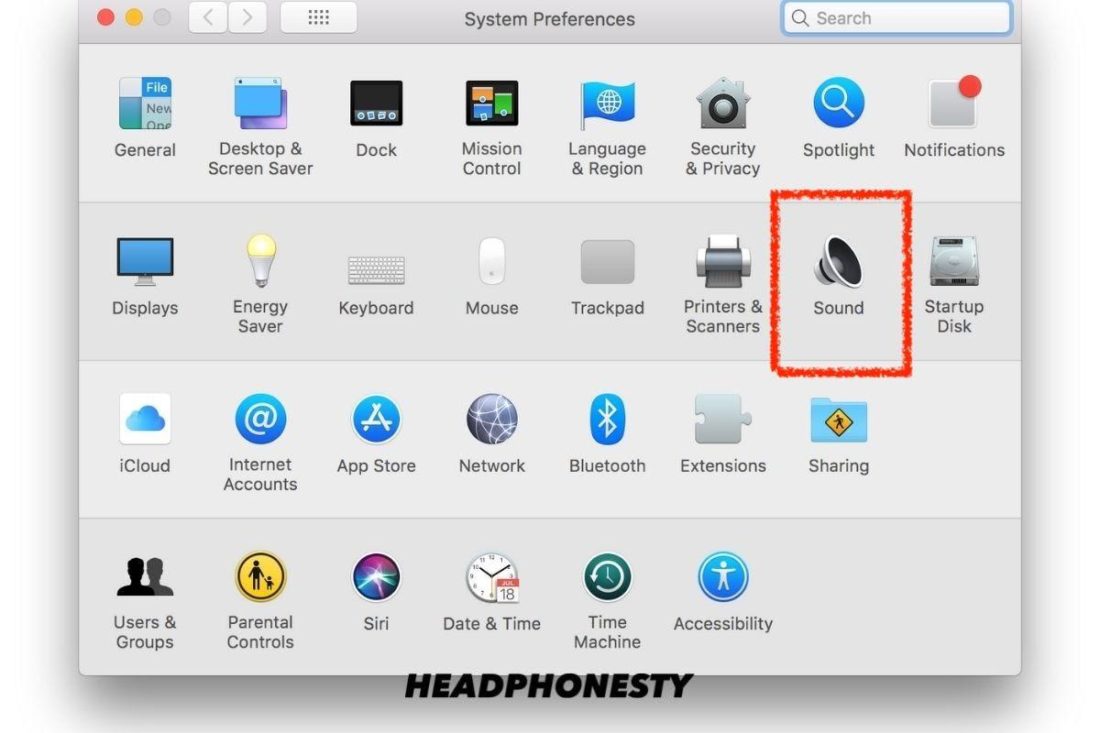
Getting to System Preferences from the Home Screen. - Select Sound.
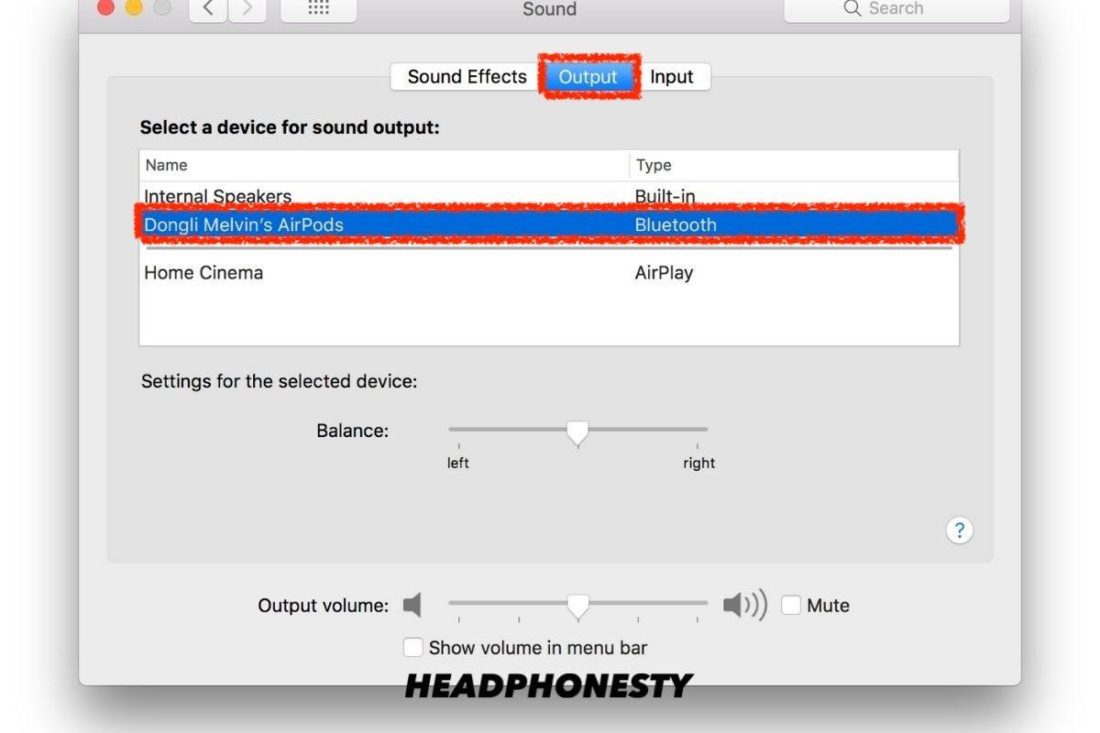
Selecting the Sound icon shown in System Preferences. - Select the Output tab and click on your AirPods to configure it as the default playback device.
Configurable options for your Output devices.
This issue is common, especially with TWS devices like AirPods. If the suggestions above won’t work, be sure to check out our guide on how to fix Bluetooth headphones connected but no sound.
One AirPod Not Working
Another common scenario encountered is when only one AirPod is working. And one of the most common reasons for this is improper stereo balance settings.
Most devices have audio settings that allow you to shift sound all the way to the right or left AirPod. This can be very helpful for people with impaired hearing; such as when hearing is better in one ear than the other. These adjustments allow customisations of left and right volume so they can find their appropriate balance.
However, unintentional adjustments or misalignments of the stereo balance slider can cause one AirPod to seem like it’s not working properly. Luckily, this can be solved with the following steps:
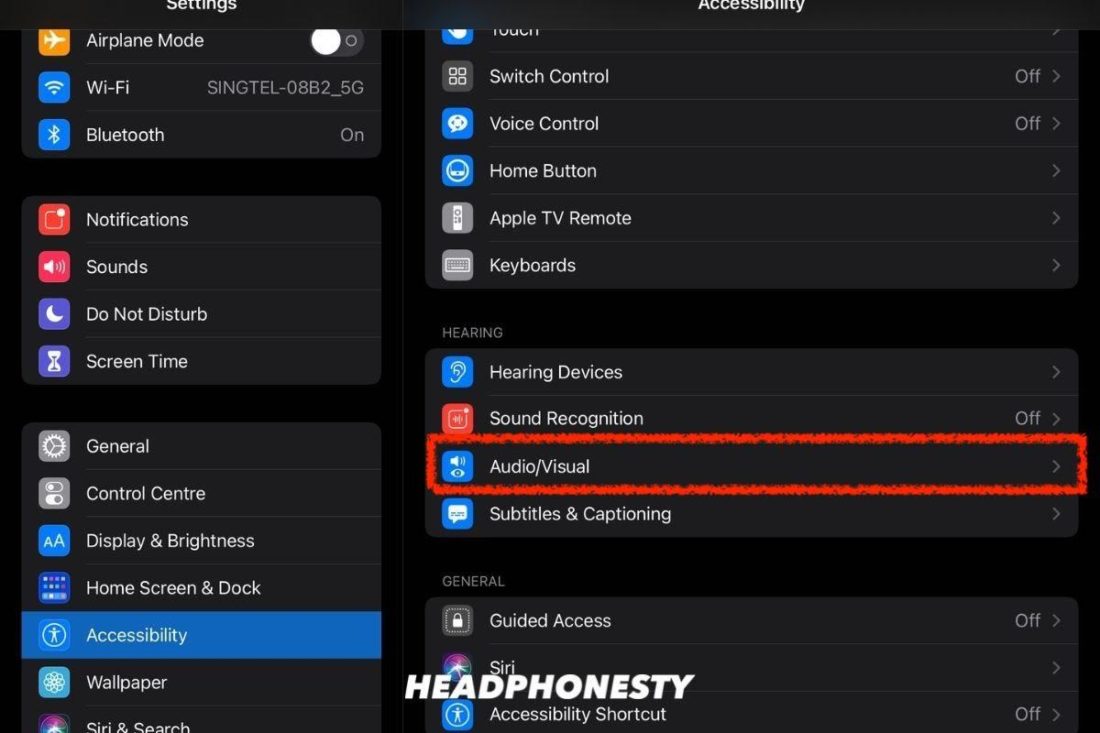
- Go to Accessibility in Settings and select Audio/Visual.
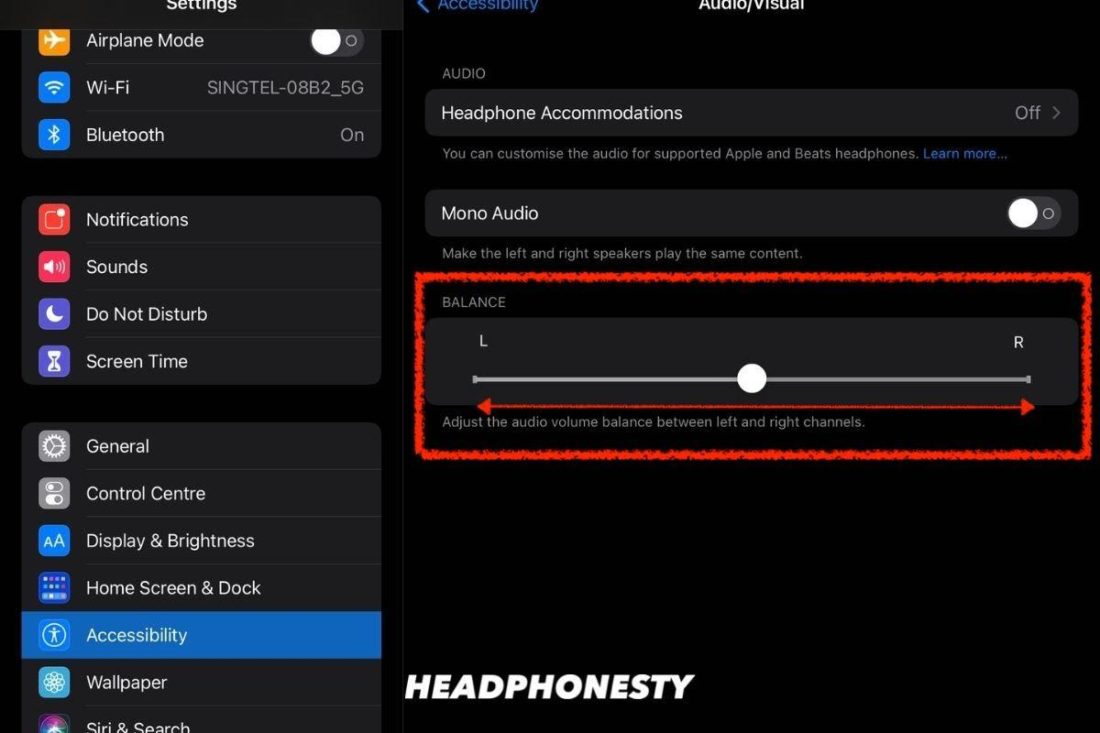
Select the Audio/Visual option in the Accessibility menu. - Check the stereo balance slider and adjust if necessary.
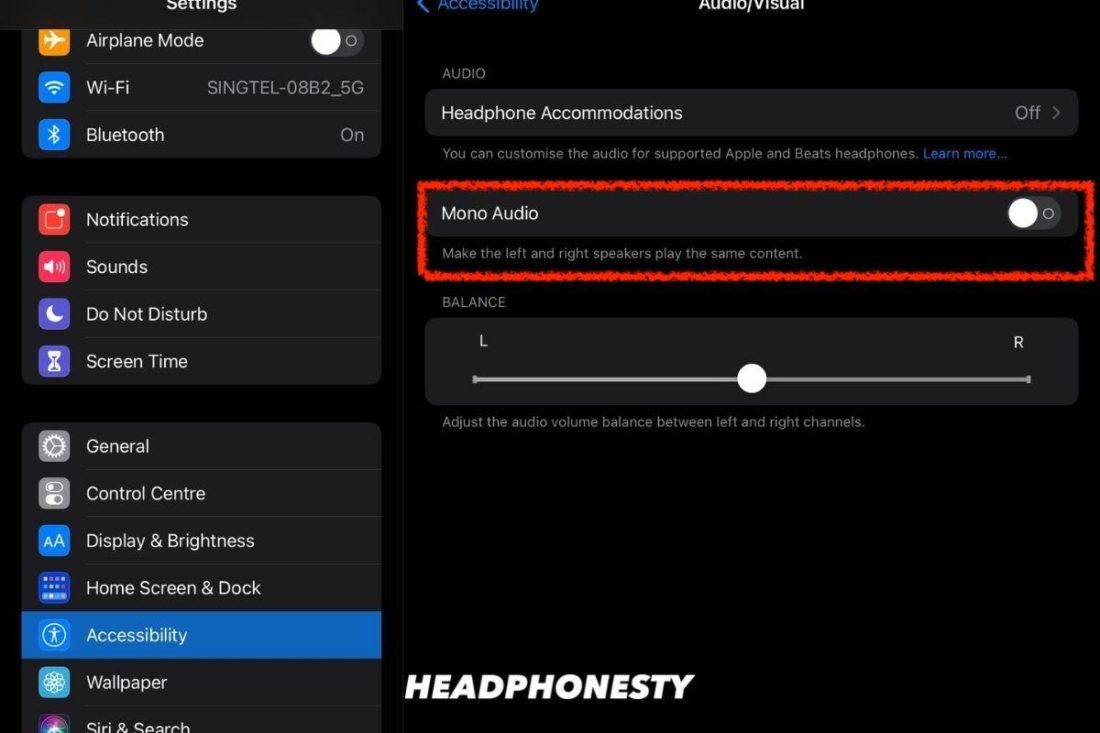
Adjust the stereo balance slider if necessary. - Lastly, toggle Mono Audio to Off to utilize stereo audio.
Toggle the Mono Audio.
Should you have ruled out device setting issues, don’t be quick to deduce that your AirPods are ready for the bin. Check out our detailed guide on how to fix your “lonely” AirPod for other tips on how to get them working as a pair again.
AirPods Always Pair With the Wrong Device
With the release of iOS 14, iPadOS 14, and macOS Big Sur, Apple has brought a new feature to AirPods by default. They can now connect automatically to whatever devices you’re listening to, provided they are signed in with the same Apple ID.
This feature may be convenient to some but it can also be annoying, especially if they keep connecting to the wrong device.
Thankfully, you can change this default setting with these steps:
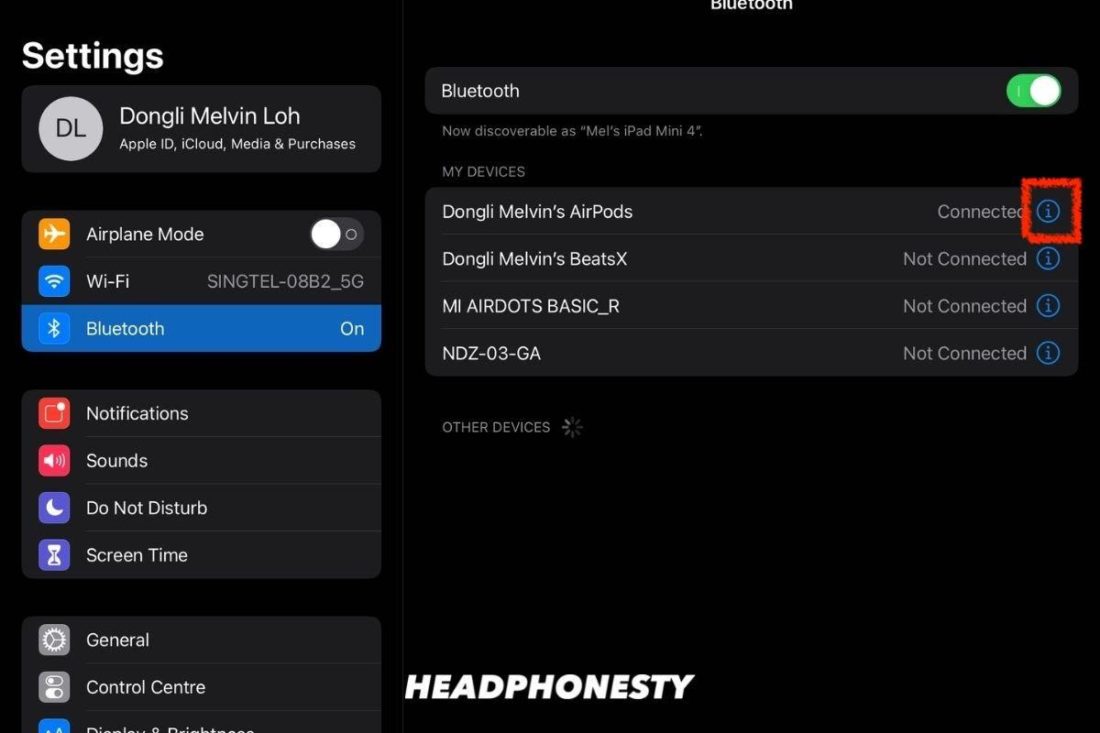
- With your AirPods connected, tap the “i” icon next to your AirPods in Bluetooth Settings.
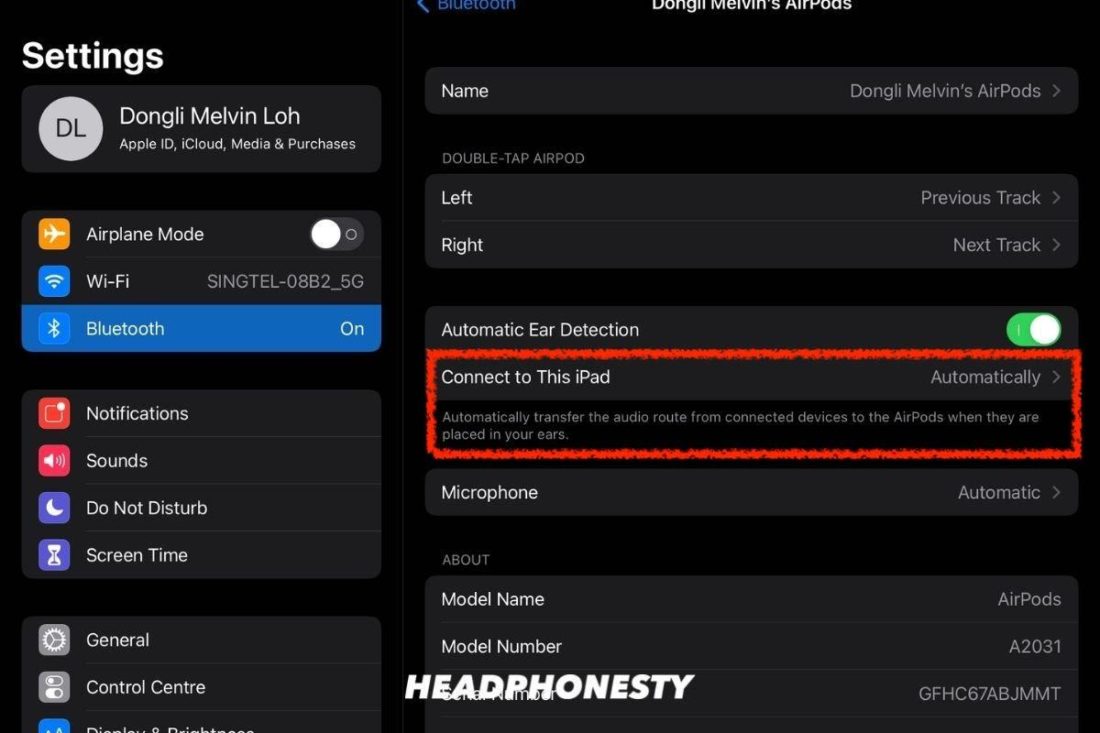
Additional settings menu for your AirPods. - Tap Connect to This iPad.
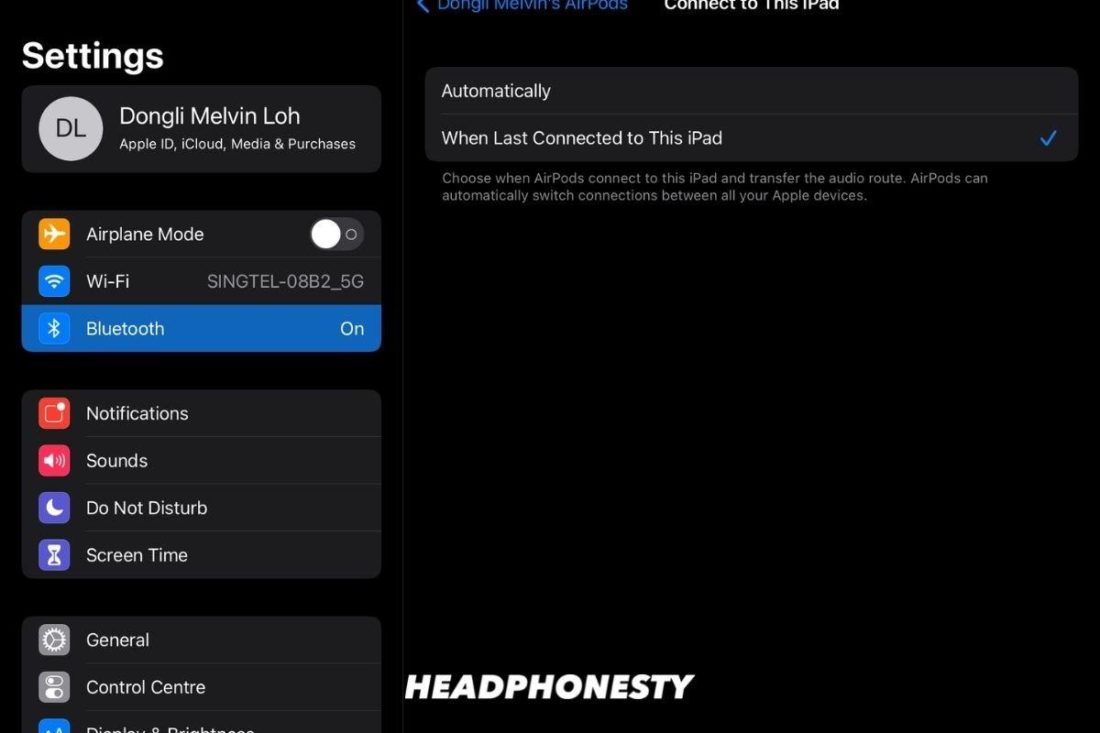
Tap Connect to This iPad. - Instead of Automatically, select When Last Connected to This iPad.
Select When Last Connected to This iPad.
AirPods Won’t Connect Properly With Mac
Unlike newer Macs with Apple silicon, maintaining a Bluetooth connection can be problematic with older machines. The same can be said for new Macs with outdated software.
Start by making sure what version of macOS your Mac is currently running:
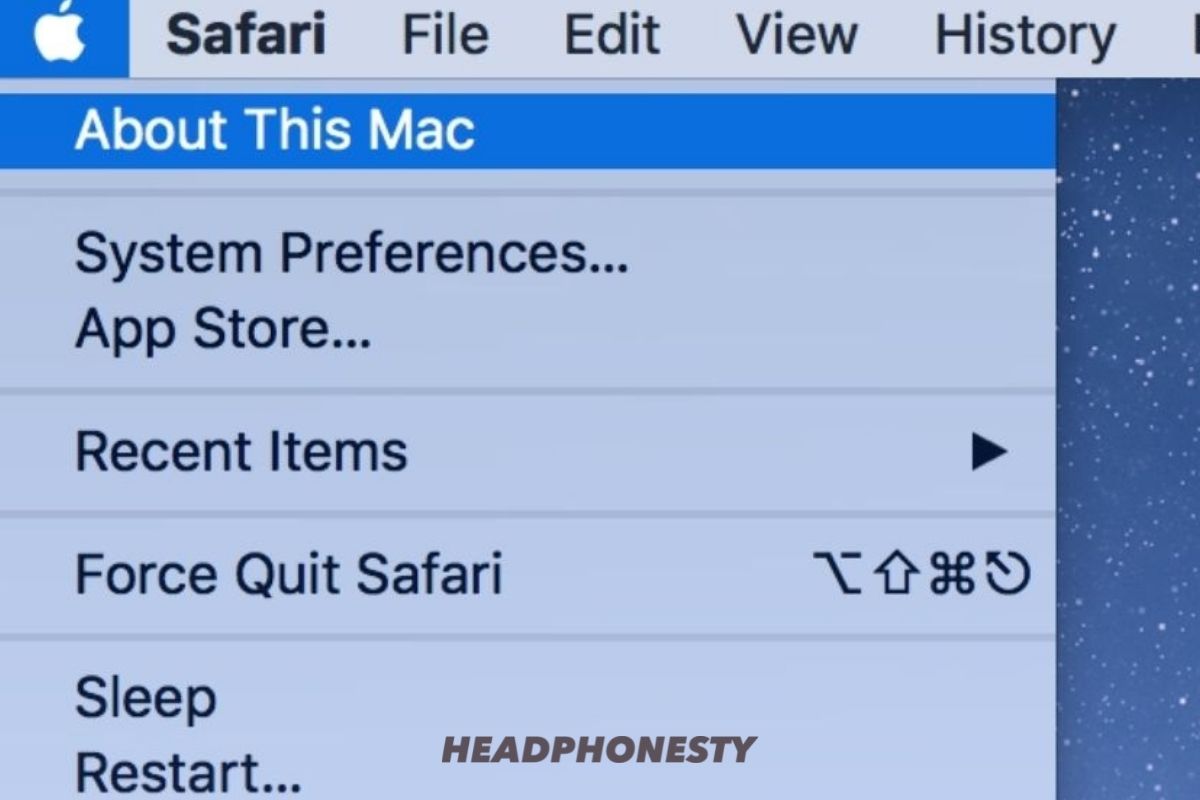
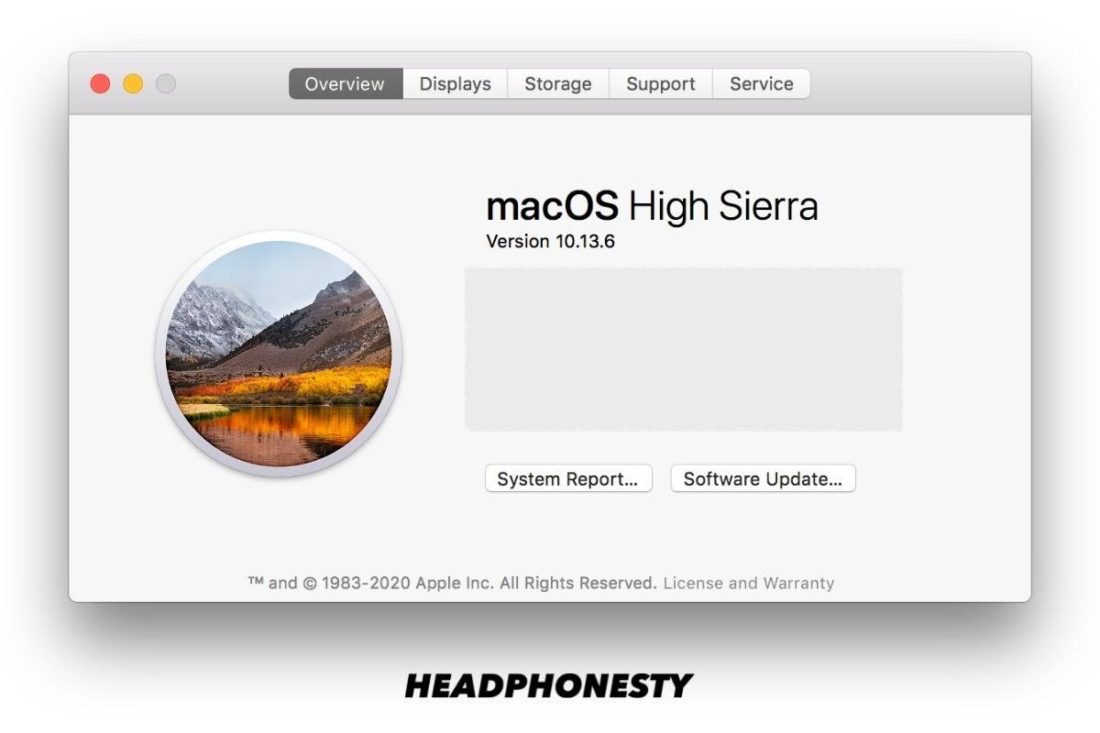
- Click the Apple icon on the top left and select About This Mac.

Getting to About This Mac from the Apple menu. - This shows the current version of the macOS your Mac is running.
Overview of your Mac.
To update your macOS, follow these steps:
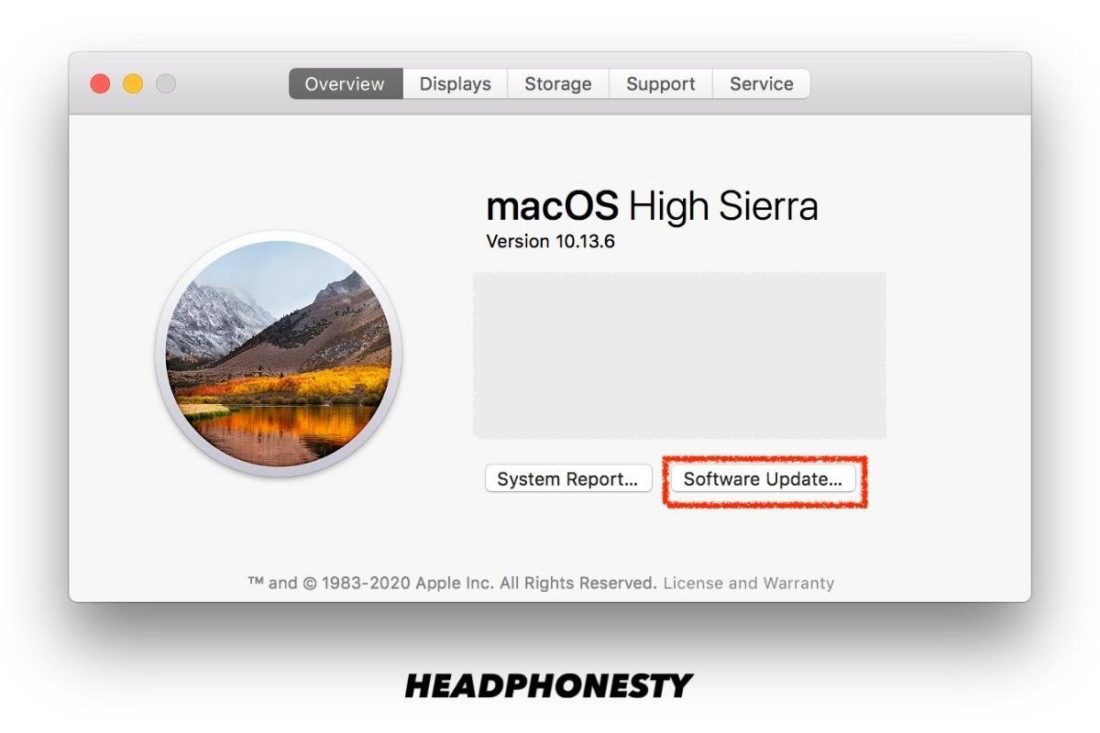
- Click on Software Update… to be redirected to the latest version of macOS available for download in the Mac App Store.
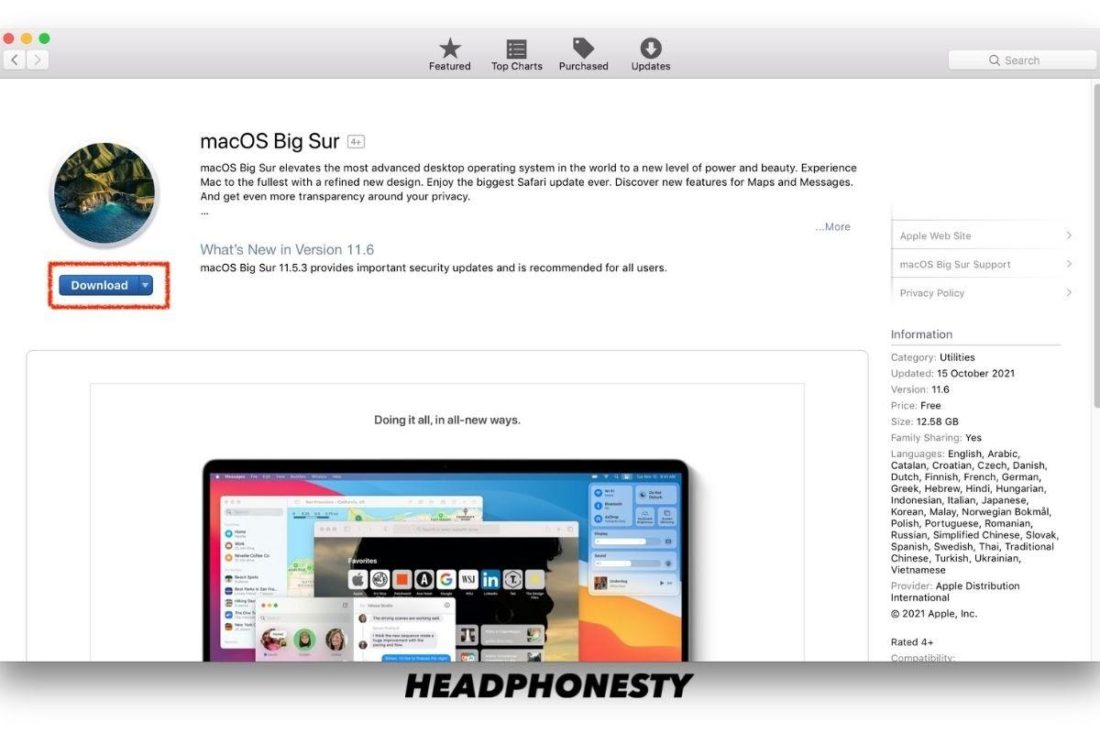
Updating your software from Overview of Mac. - Select Download.
macOS Big Sur in the Apple App Store.
AirPods also connect via Bluetooth, which can be affected by many variables. If you still can’t connect your AirPods with Mac, try checking out our comprehensive guide on how to connect any Bluetooth headphones to Mac.
AirPods Won’t Connect With Non-Apple Device
Bluetooth technology on AirPods isn’t proprietary to Apple so they should work with any devices, including Android devices.
However, the W1/H1 chips in AirPods enable certain features unique to Apple devices. That includes ear detection, customized commands for tapping, Siri, battery notifications, etc.
Not forgetting the Automatic Device Switching feature introduced in iOS14, AirPods are more ready than ever to work with Apple devices. But this feature can also hinder them from connecting to your Android devices.
If your AirPods aren’t discoverable in your Android device’s Bluetooth list for pairing, or if it’s listed but can’t establish a connection, check if it’s already connected to an Apple device.
If that’s the case, you might want to either switch off the Apple devices’ Bluetooth or make them ‘forget’ the AirPods entirely
That being said, the incongruities between AirPods and Android devices will always be present. After all, AirPods work best with Apple devices. That’s why we came up with this guide to let you know what to expect when using AirPods with Android.
AirPods’ Audio Quality Is Poor
Several factors should be considered before being disappointed with your AirPods’ audio quality.
For one, you should wonder when you cleaned them last. All the more so if you constantly sharing them with others.
Cleaning your AirPods is part of maintaining them to function properly. While the mesh is meant to protect the speaker elements, it can collect dirt. This can clog the mesh, preventing audio from coming out properly and producing a muffled sound.
A bad fit can also affect your AirPods’ audio quality. Remember that, your ear tips should seal your ear canal well. This ensures better noise cancellation, and better bass sound.
For this, you can try the Ear Tip Fit Test to get the best possible sound quality and noise cancellation.
Lastly, it could also be due to the audio file format settings. Your AirPods’ connection to Mac might make using your AirPods’ mic a default setting. This concurrent use of your AirPods input/output sets its sample rate and bit depth at 16kHz/16-bit.
You can improve audio quality by switching to 44.1kHz/32-bit with these steps:
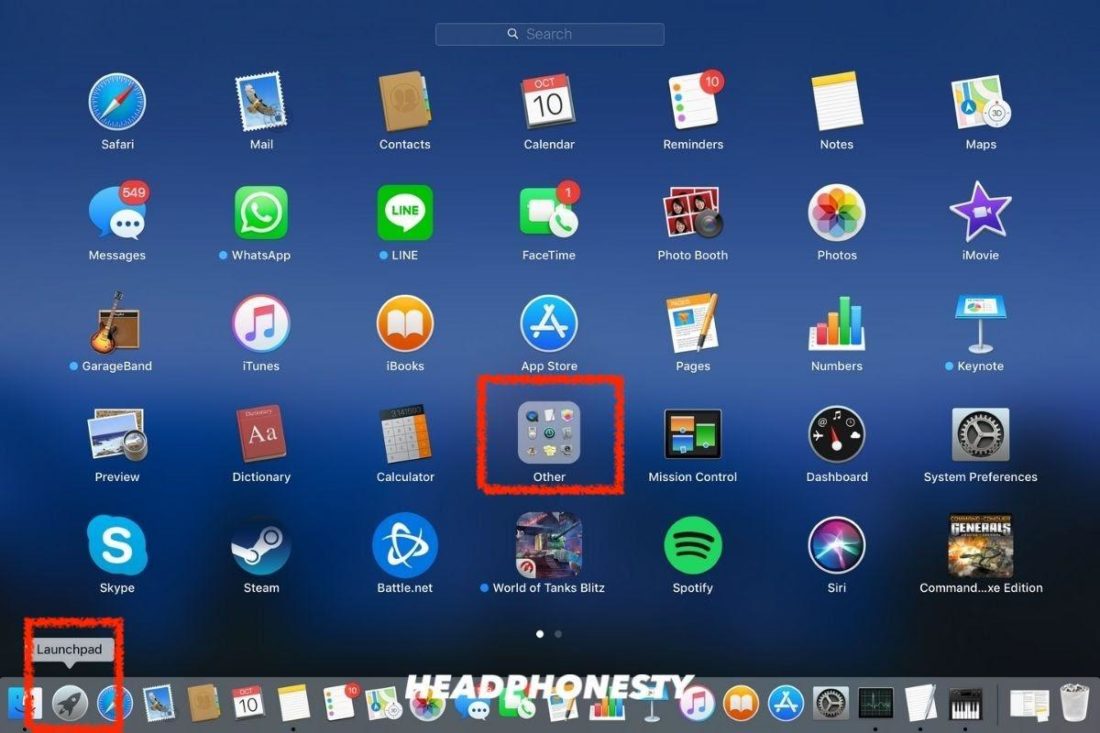
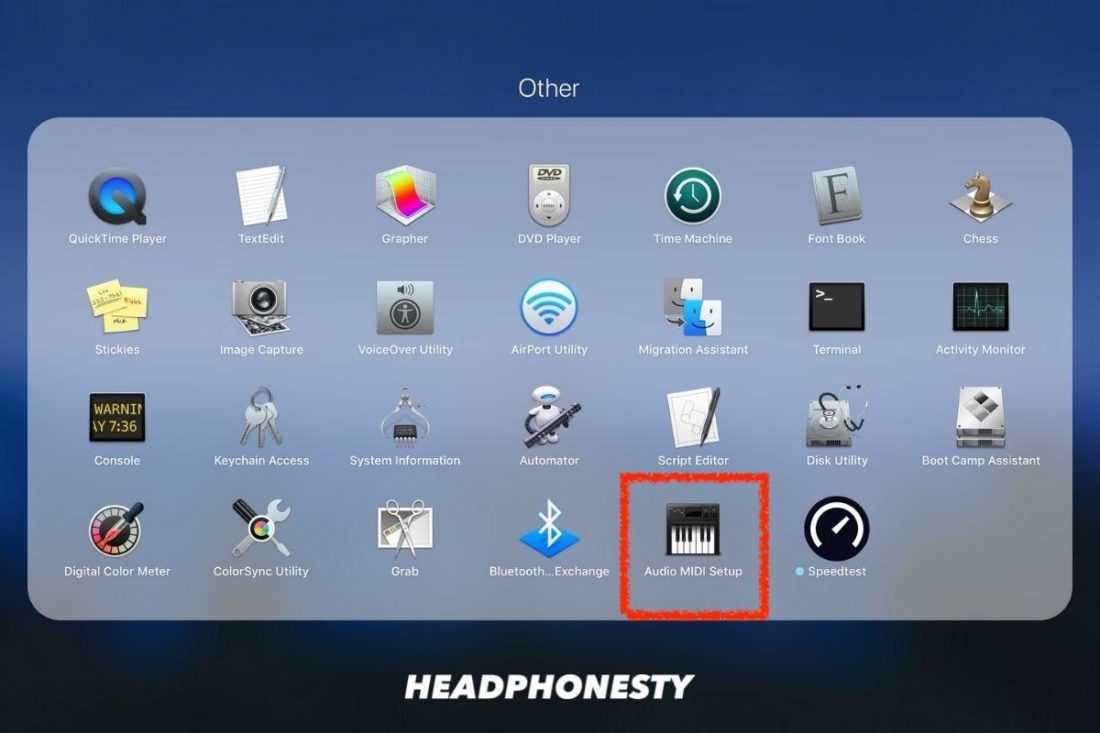
- Open LaunchPad and select Other.
Select Other icon in LaunchPad. - Click Audio MIDI Setup.
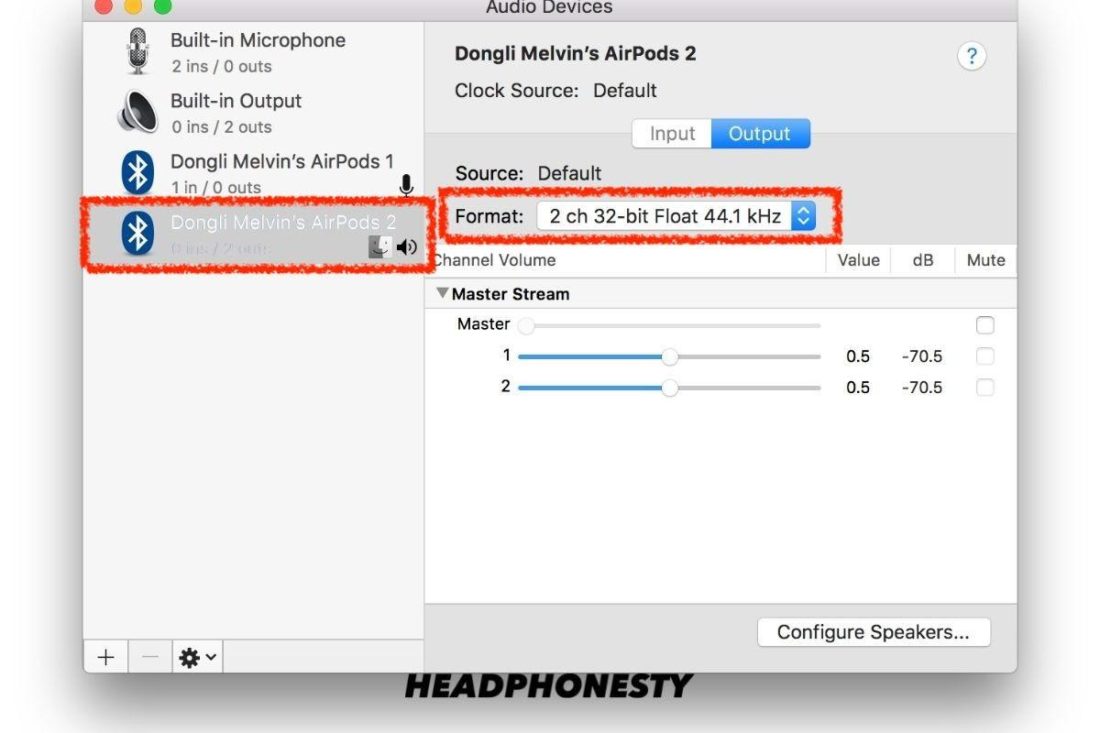
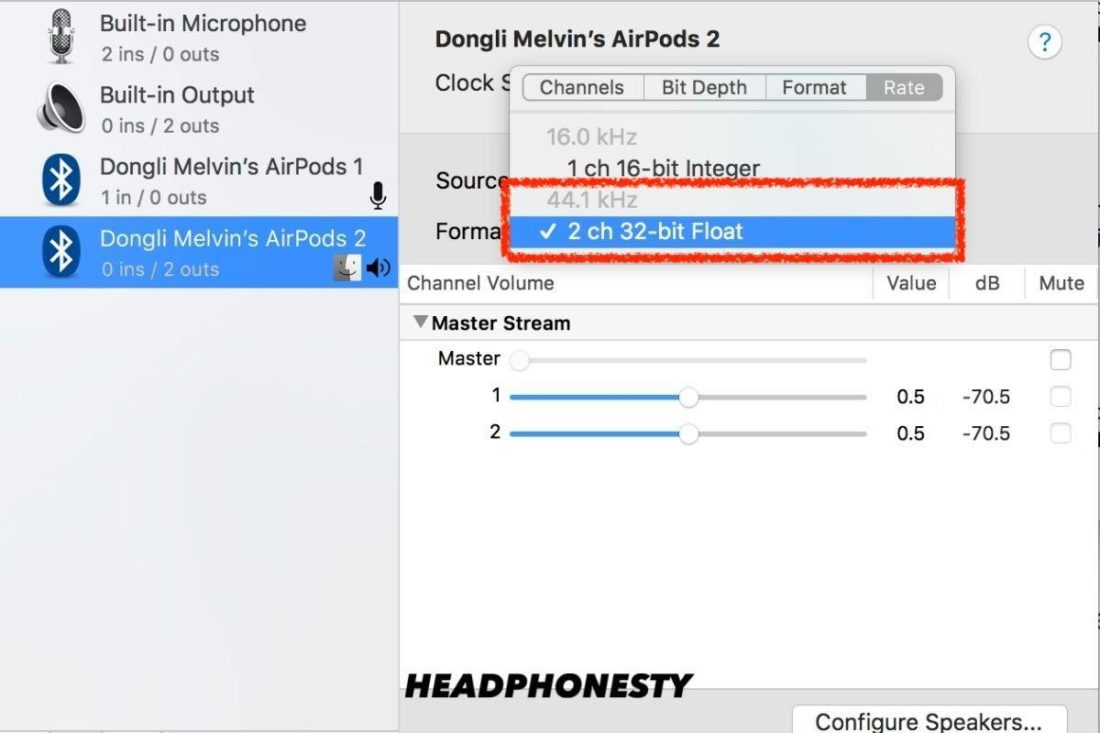
Audio MIDI Setup icon. - Select your AirPods and click on the Format drop-down box.
Current Audio File Format. - Set it to the 44.1kHz/32-bit option for better audio quality.If your audio quality is fine, but you’re experiencing low audio in one of your AirPods, you can also check out our guide for ten solutions on how to fix it.
Setting audio format to 44.1kHz for better audio quality.
Calls Keep Dropping When Using AirPods
More often than not, calls get dropped when you receive them while listening to music on your AirPods. This problem has been distressing many AirPods users since 2017. Though the cause of it was never made known, some believe these are caused by software issues that can be resolved by future updates.
Instead of waiting for updates, though, try turning off Automatic Ear Detection or taking calls with only one AirPod in your ear.
If that doesn’t work, you can set your AirPods’ microphone manually with these steps:
- Go to Bluetooth in Settings and select “i” icon next to your AirPods.
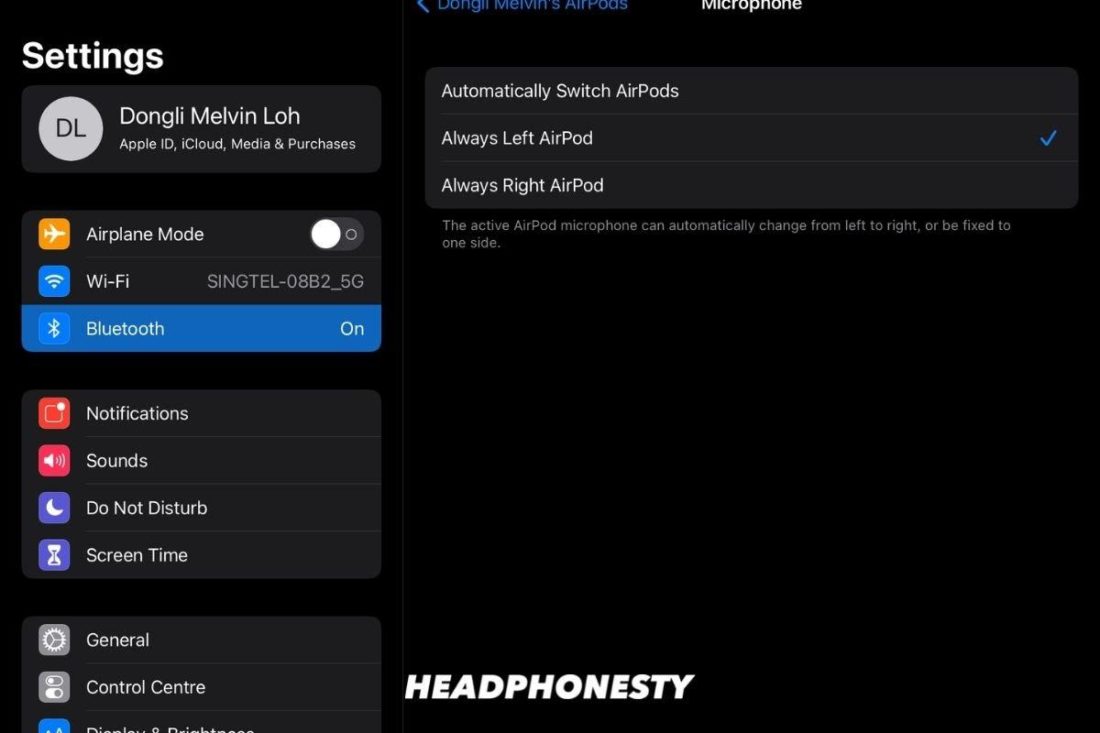
Entering the additional settings menu for your AirPods. - Select Microphone.
Select Microphone. - Set it to either left or right.
Setting your AirPods’ microphone to either left or right.


Automatic Ear Detection Stopped Working
AirPods have sensors in them to detect when you are using them. This feature automatically transfers the audio route from your connected device to the AirPods when they are placed in your ears. Because of that, you may also experience issues with this feature if your AirPods are dirty.
But before blaming it on dirty sensors, check if the feature is on with these steps:
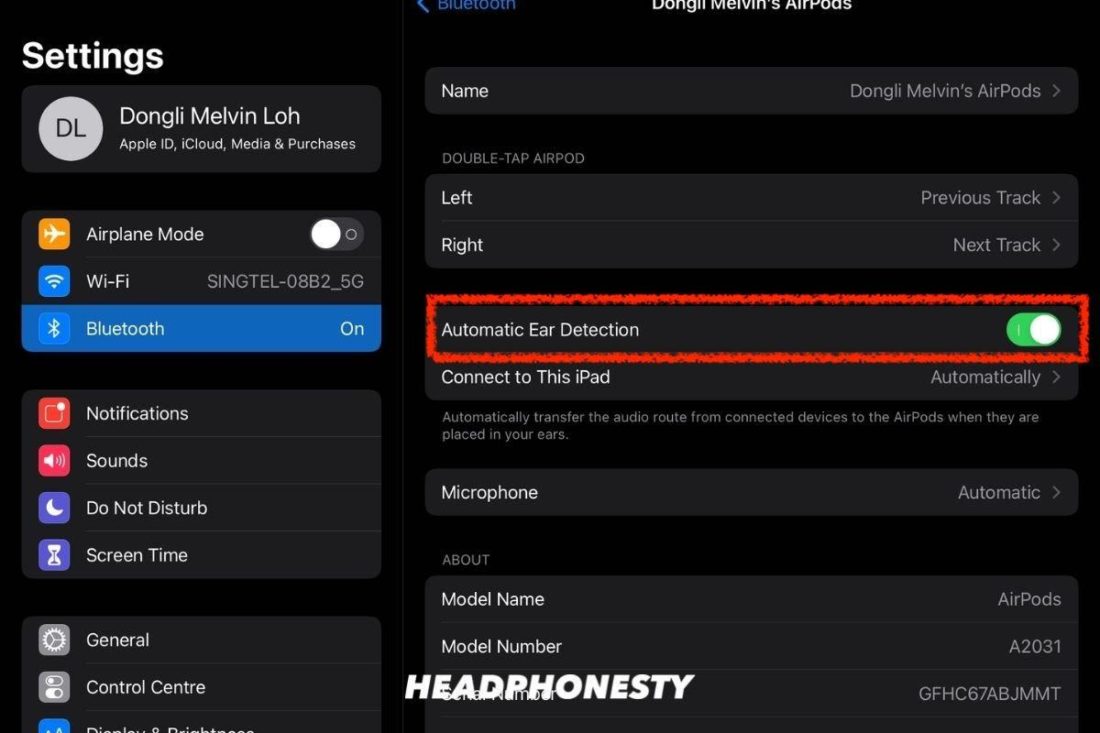
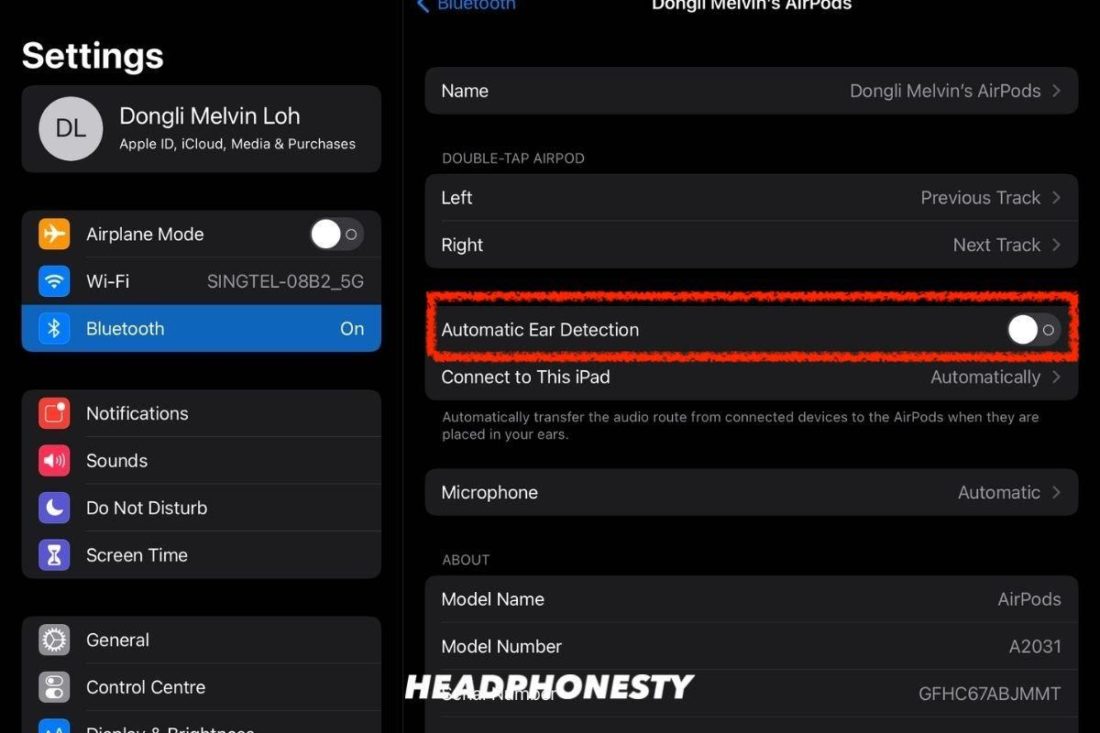
- Go to Bluetooth in Settings, select “i” next to your AirPods.
Entering the additional settings menu for your AirPods. - Check if Automatic Ear Detection is on.
The Automatic Ear Detection feature is toggled on.

AirPods’ Gestures Are Not Working
Another unique feature of AirPods when paired to Apple devices is the ability to customize gestures for each AirPod.
If you’re not getting any feedback from the gestures, follow these steps to check if it’s enabled:
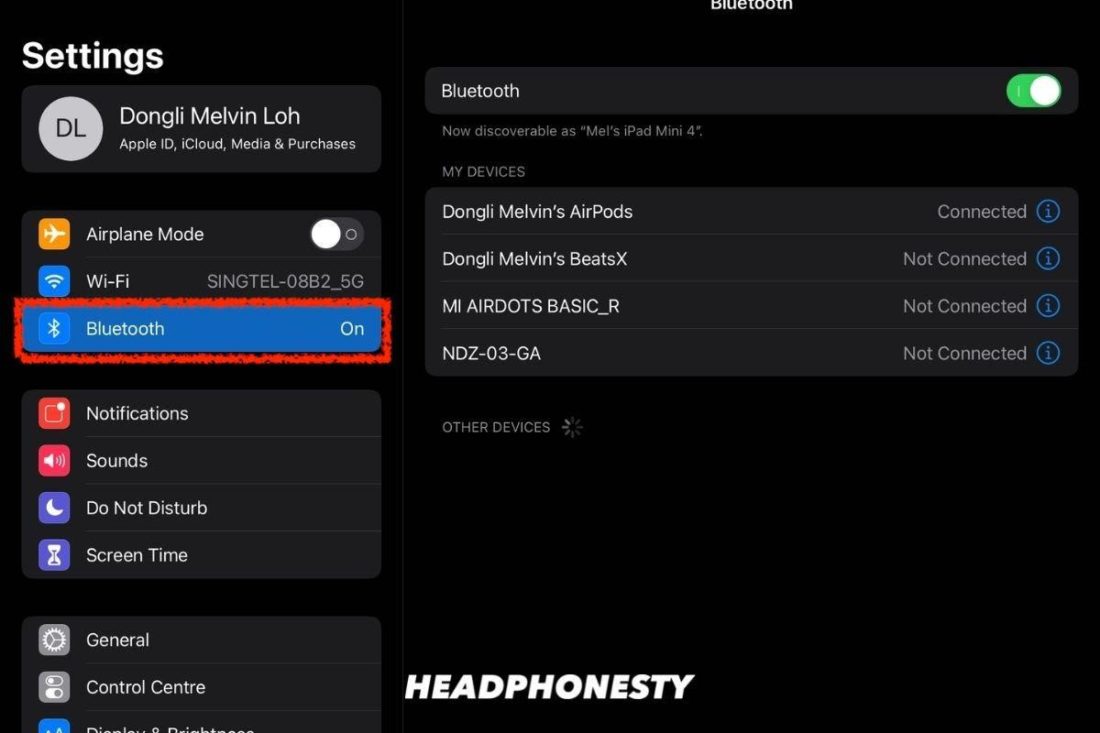
- Head to Bluetooth in Settings after your AirPods are paired.
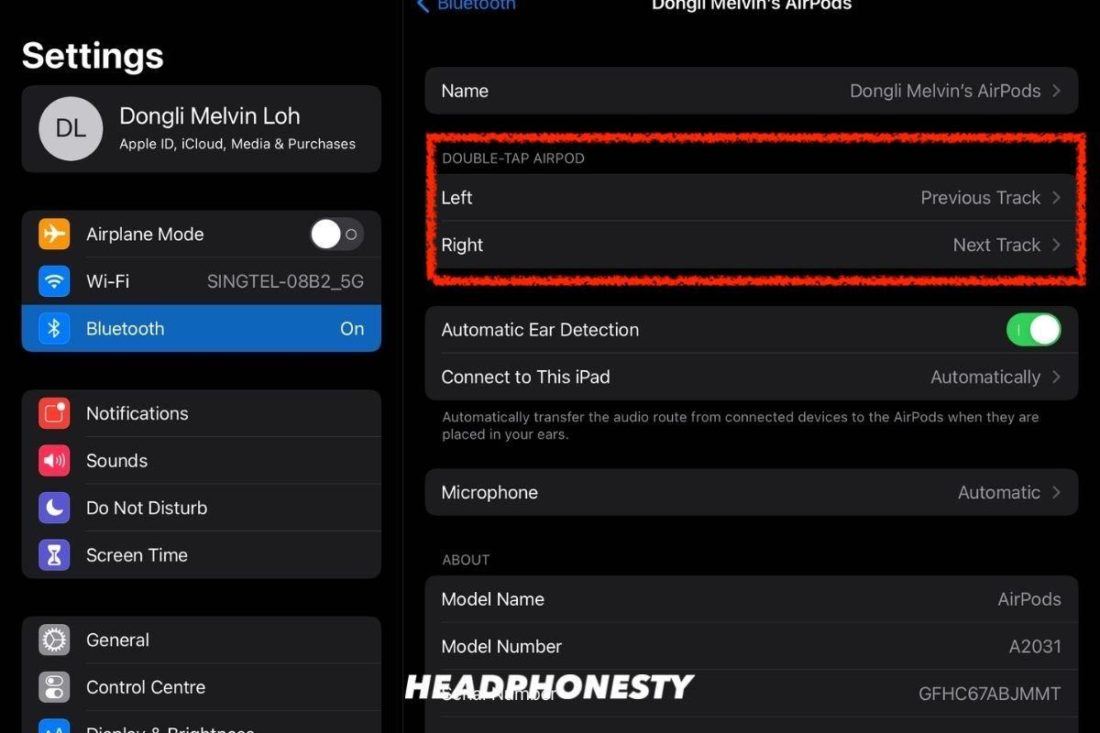
Bluetooth devices connected to the device’s Bluetooth. - Select the “i” icon next to your AirPods.
Entering the additional settings menu for your AirPods. - Under the Double -Tap AirPod, you can choose gestures for your left and right AirPods.
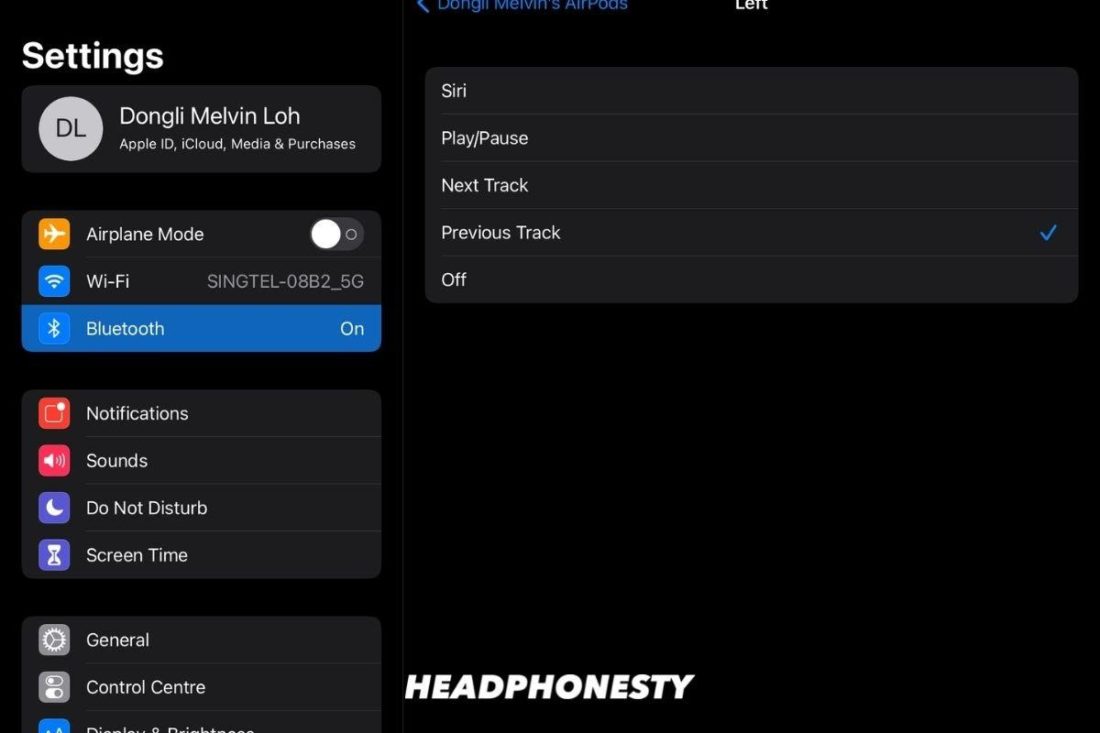
Gestures selections for your left and right AirPods. - You can summon Siri, play or pause the track, skip to the next track or go to the previous one. You can also turn them off completely if the gestures become a nuisance.
Select your gesture functions.

AirPods Won’t Charge
AirPods can only be charged when in their charging case. If they’re not charging, make sure the changing case has more than 10% battery. Anything less than that won’t have enough power to charge your AirPods.
If not, try cleaning the contact points to remove any dust or build-up. Dust and grime may build up preventing the AirPods from making contact with the charging pins in the case. This is a common cause of one AirPod not charging.
To understand more about why your AirPods aren’t charging, check out our one-stop solutions guide on what to do when AirPods won’t charge.
AirPods Keep Falling Out of the Ear
AirPods are based on an award-winning design. The AirPods’ shape and curves mimic the contours of human ears for ease of use without ear fatigue. But one standard design cannot fit the unique shapes of ears people have. So we understand the distress when they keep falling out of your ear.
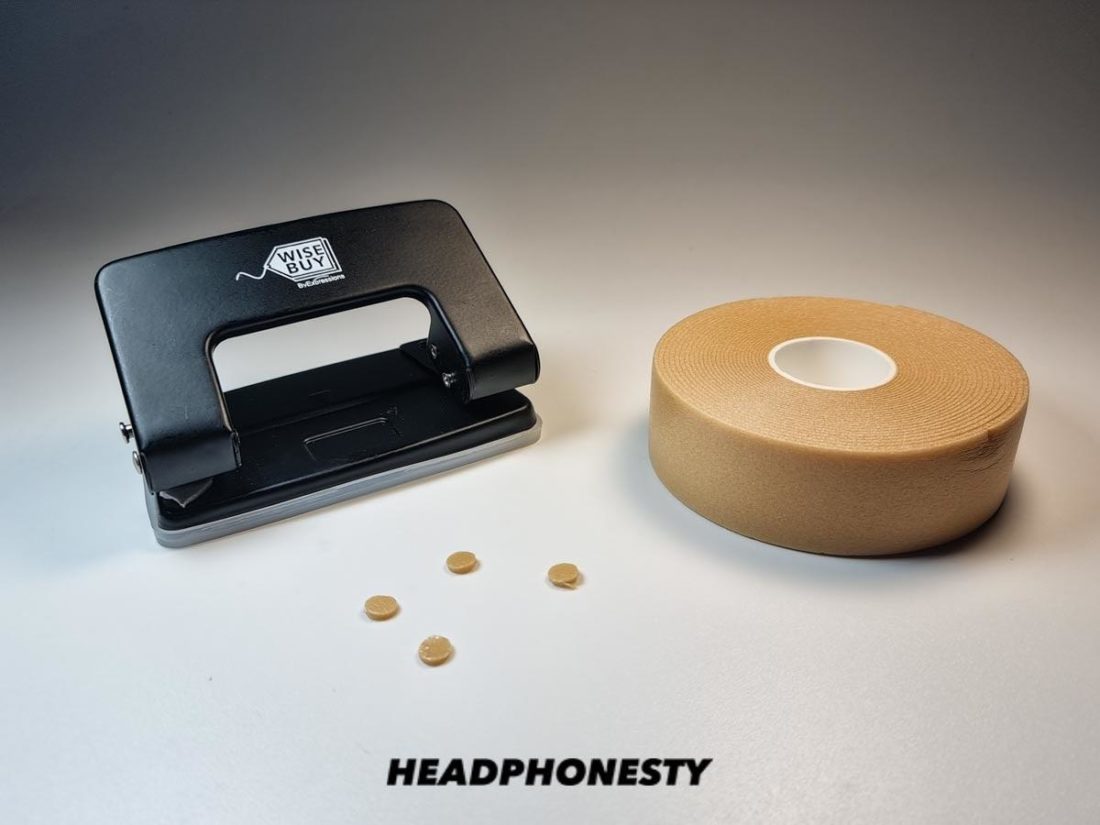
You can keep them from falling out with this waterproof tape hack:
- Punch out a couple of little dots from the waterproof tape.

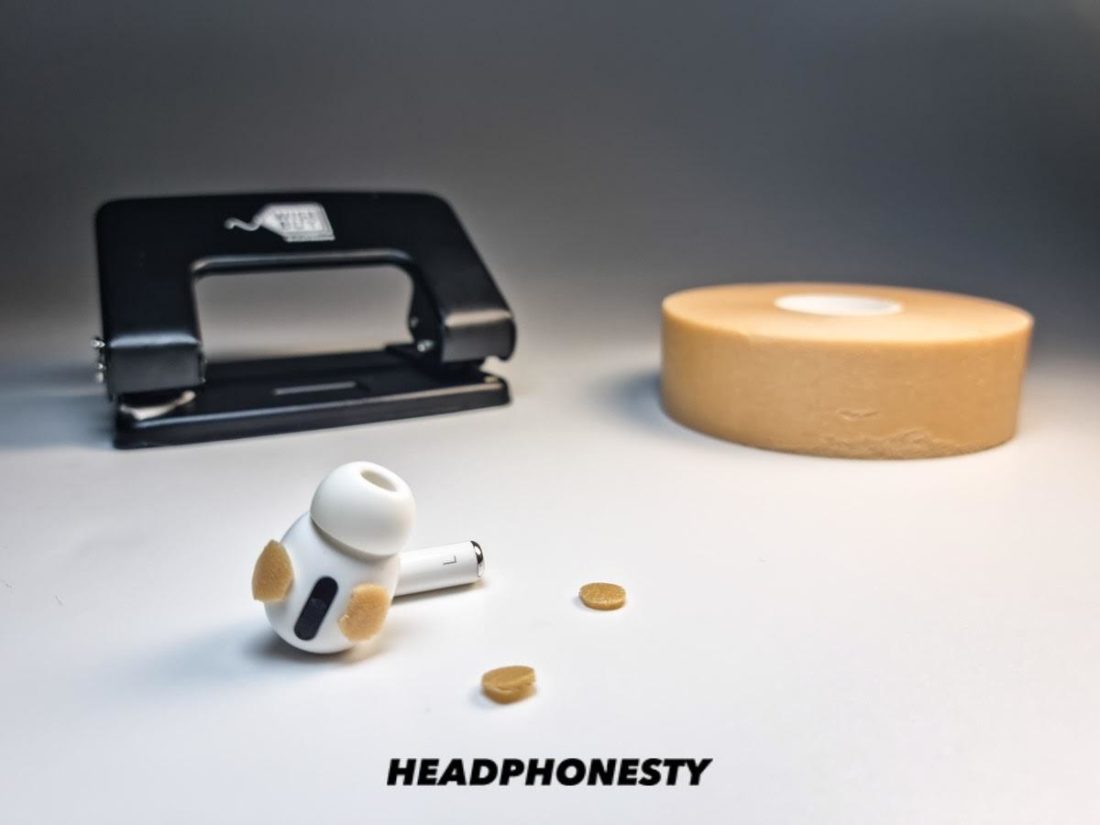
Punched out circles from silicon tape. - Place the tape below and above the black sensor dot.
AirPods with waterproof tape dots attached for grip.
Fancy something unconventional? Learn more ways to keep them in your ears.
AirPods Keep Disconnecting
There are many reasons why your AirPods keep disconnecting from your devices but the most common reason, especially after several resets, is due to the automatic ear detection feature.
Each AirPod has sensors to determine if you’re using them. When these sensors have trouble detecting if they’re in your ears, disconnections happen in an attempt to save power.
It’s worse when your AirPods are loosely fitted. A slight change in position may trigger the Automatic Ear Detection and cause disconnection.
You can turn them off by:
- Head to Bluetooth in Settings.
Bluetooth devices connected to the device’s Bluetooth. - Make sure your AirPods are connected and select the “i” icon.
Entering the additional settings menu for your AirPods. - Toggle the Automatic Ear Detection off and see if your AirPods respond.
Toggling off your AirPods Automatic Ear Detection feature. - If they do, toggle them back on again and see if your AirPods remain working.
Toggling on your AirPods Automatic Ear Detection feature.


Wondering why your AirPods’ disconnections only occur with specific devices? Clear your doubts with our guide to find out what causes them and its respective fixes.
AirPods Are Lost
We understand how easy it is to lose your AirPods. Besides, they are small by design and they’re not attached to anything but your ears.
Apple is aware of this; that’s why they integrated AirPods into Find My app so if you ever misplace your AirPods, you can locate it with these steps:
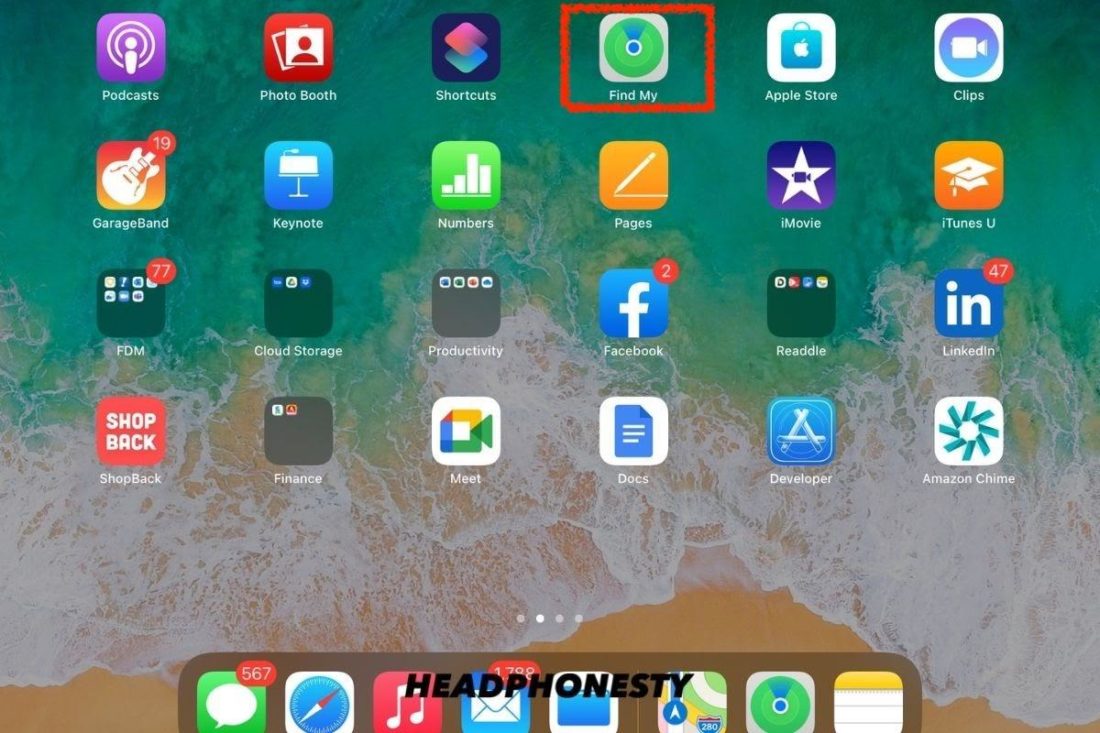
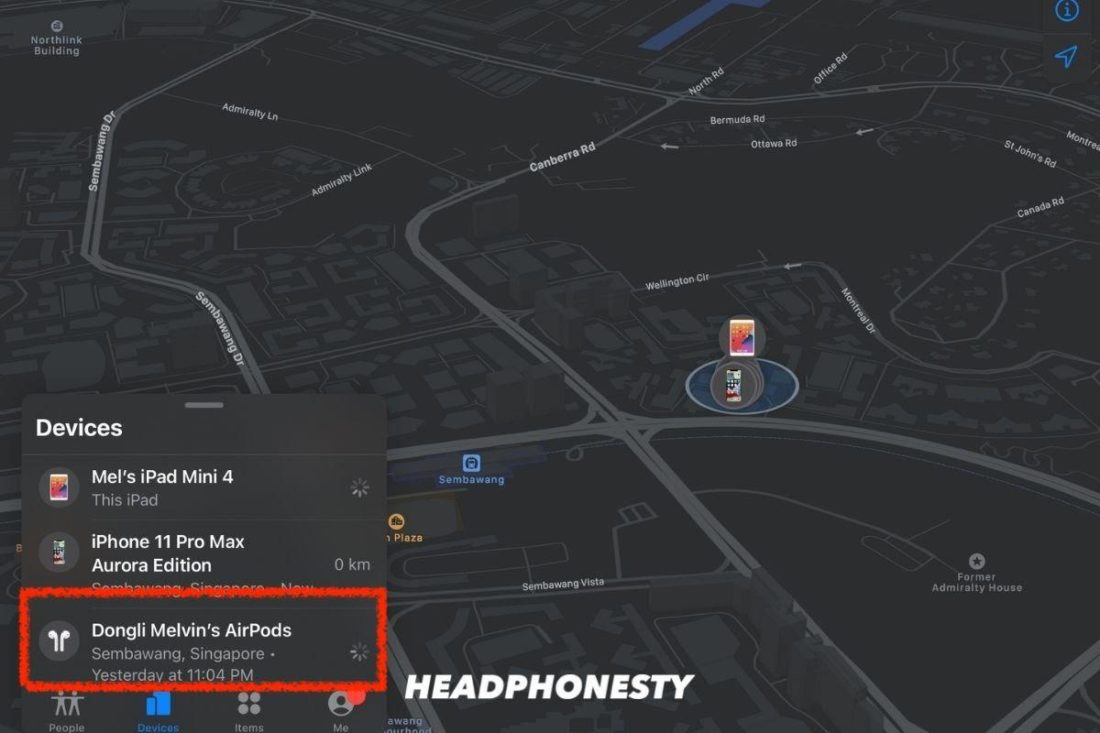
- Launch the Find My app on your iOS device.
Launching the Find My app on the Home Screen of your iOS device. - Under the Devices tab, select your AirPods.
Select your AirPods under the Devices tab. - You will see a map showing where they are or their last location before they were powered off.
Location of your AirPods with options to play sound on them or route to them. - You can play a sound to locate them.
Options to play sound on your AirPods. - Select Directions to open maps to route to your AirPods.
Maps app showing routing directions to your AirPods.


Don’t have your iOS device with you? Check out our holistic guide on how to find your lost AirPods.
AirPods Mic Not Working on PC
AirPods have dual beamforming microphones and speech-detecting accelerometers that recognize when you’re speaking. But it can be annoying if you can’t get them to work for your calls and applications on your PC.
In this case, here’s what you should do:
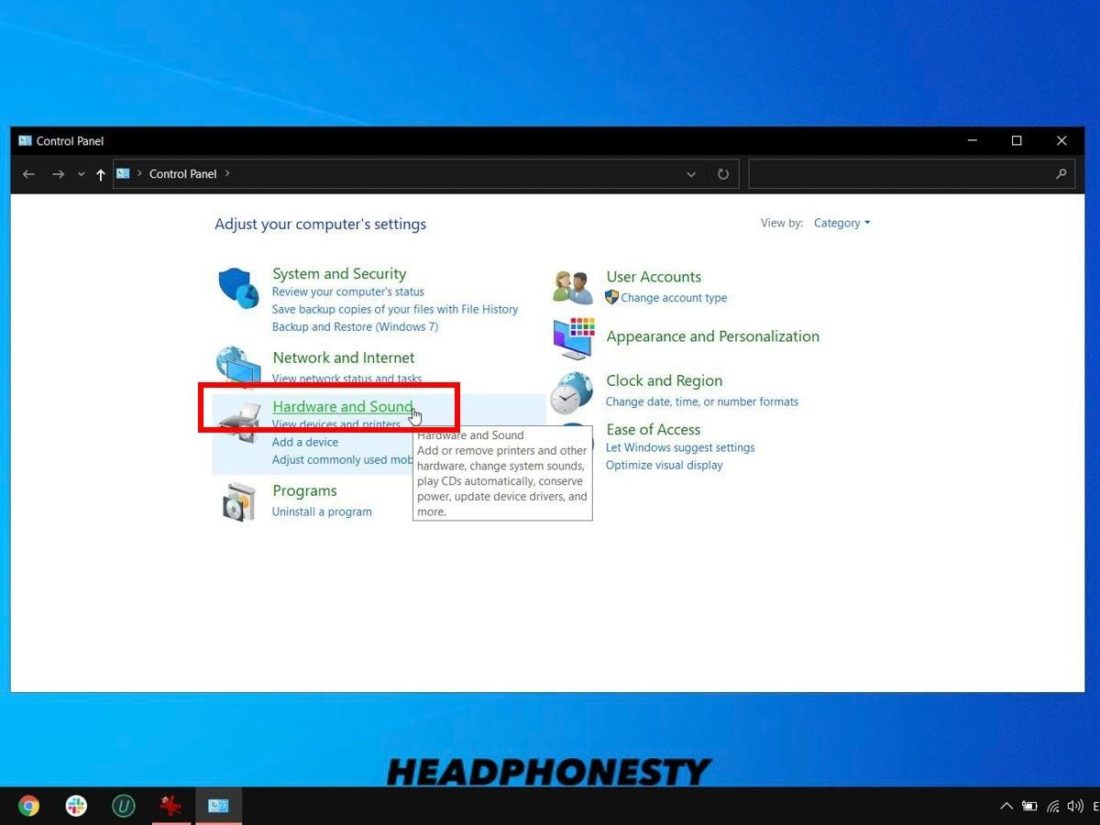
- On the Control Panel, locate and click on Hardware and Sound.
Hardware and Sound. - Click on Sound or Manage audio devices.
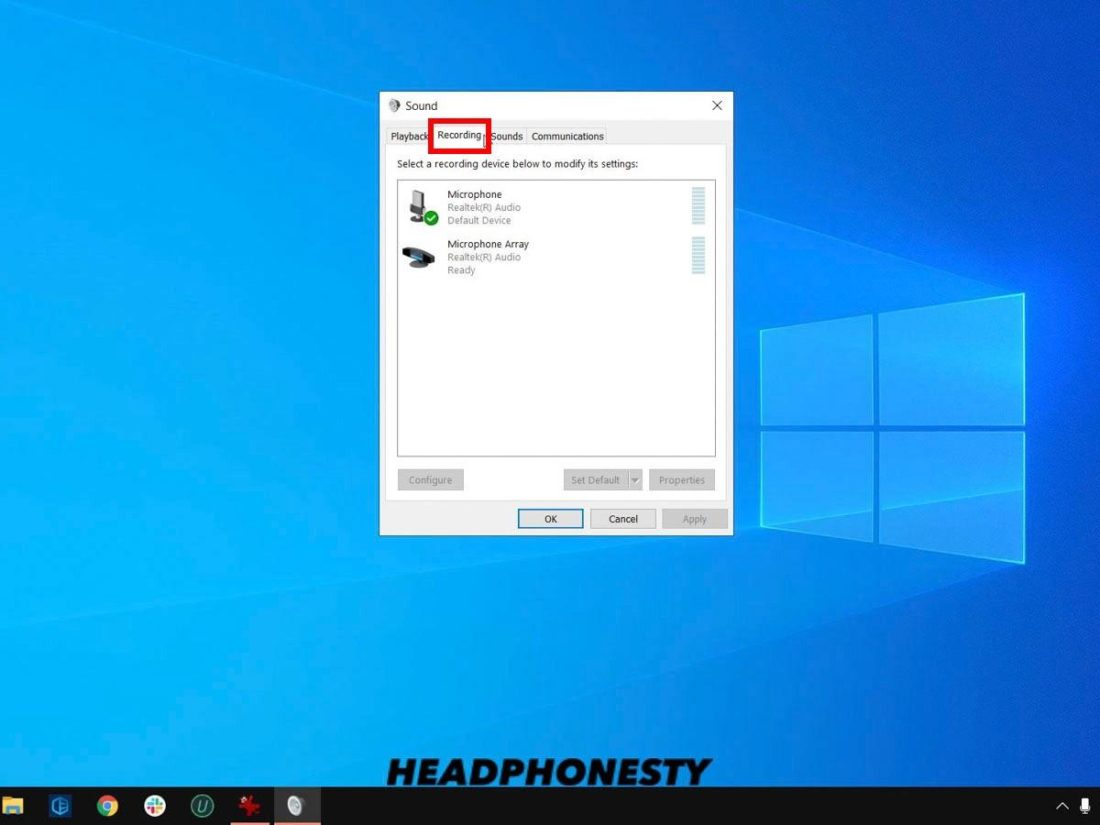
Go to ‘Manage audio devices’. - On the Sound window, click on the Recording tab.
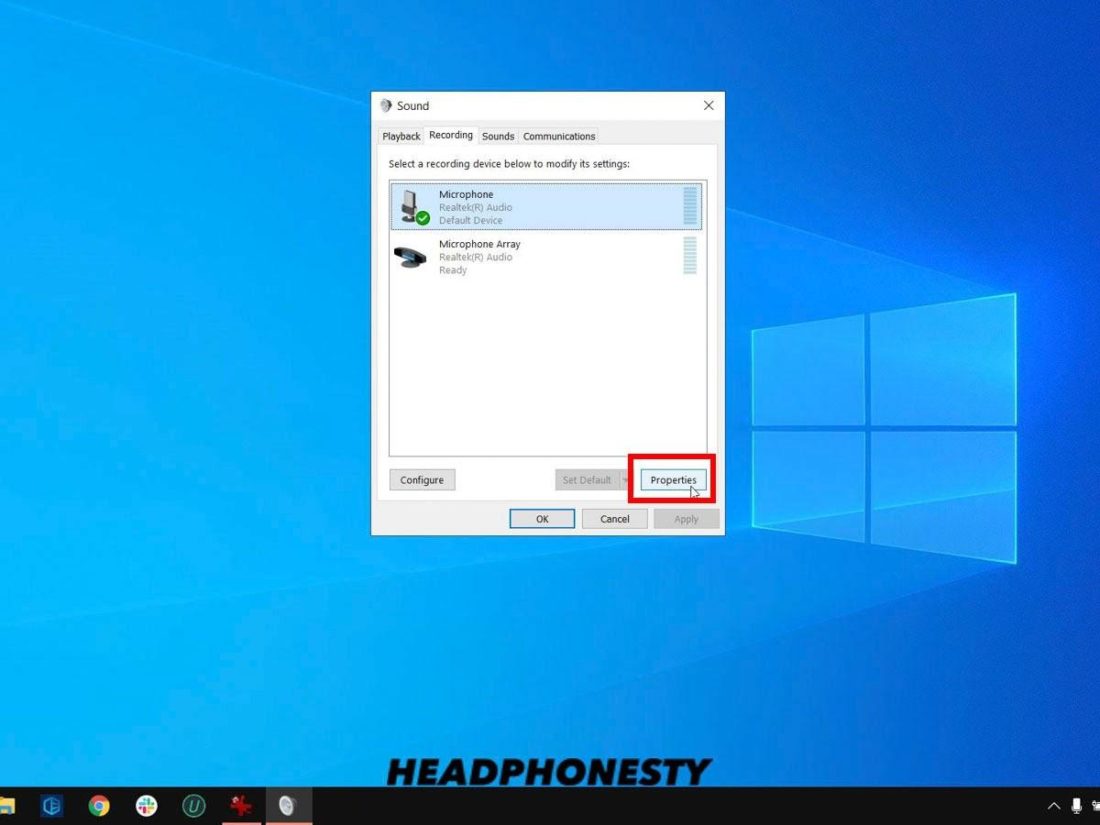
Device Recording tab. - Left-click your Apple headphones (usually named as “High Definition Audio”) and click on the Properties button.
Opening the microphone properties of your Apple headphones. - On the Microphone Properties window, click on the Driver tab.
Realtek Sound Driver tab. - Lastly, click on Update Driver if there’s any update available.


When Should You Call for an Apple Genius?
If the problems with your AirPods aren’t listed above or if you can’t get them to work at all, it may be time you approach an Apple Genius.
You can do so by visiting the Apple Support page to find the best support option, chat or schedule a call to book an appointment.
All Apple devices come with a 1 year international warranty. You’re lucked out if your AirPods are less than 1 year old.
Similarly, if you have bought AppleCare+ for your AirPods, your warranty coverage would be extended to two years from your AppleCare+ purchase date. In addition, there’s up to two incidents of accidental damage protection every 12 months, each subject to a service fee of $29, plus applicable tax.
Otherwise, you’ll need to pay an out-of-warranty fee for the required repairs or replacements. Fortunately, you can replace specific damaged items such as an individual AirPod or just its charging case.
The best part is you can get your replacements within a week!
Conclusion
We know how popular AirPods are and the convenience it brings you. With this guide, you now can gain some insights and nifty skills to bid farewell to your AirPods woes.
Most importantly, preventing Murphy’s law from acting on your AirPods and frustrating yourself over it.
Were you able to find your fix in this guide? Did we miss out any other possible cause? Let us know in the comments below and we’ll be glad to help out!
Great. Very comprehensive guide on the airpod.
Very precise instruction which is well written and easy to understand . Good graphics and screen shots which enable me to follow the steps and trouble shoot it accordingly .
Thank you for the article .
Very well written article which is easy to understand . Good screen shots and graphics illustration which enable me to troubleshoot the issue accordingly
Very precise instruction which is well written and easy to understand . Good graphics and screen shots which enable me to follow the steps and trouble shoot it accordingly .
Very well written instructions. Not too deep and easy to understand. Thanks and you save my day!