
Here are the tested and proven solutions for when your AirPods won’t connect to your iPhone or iPad.
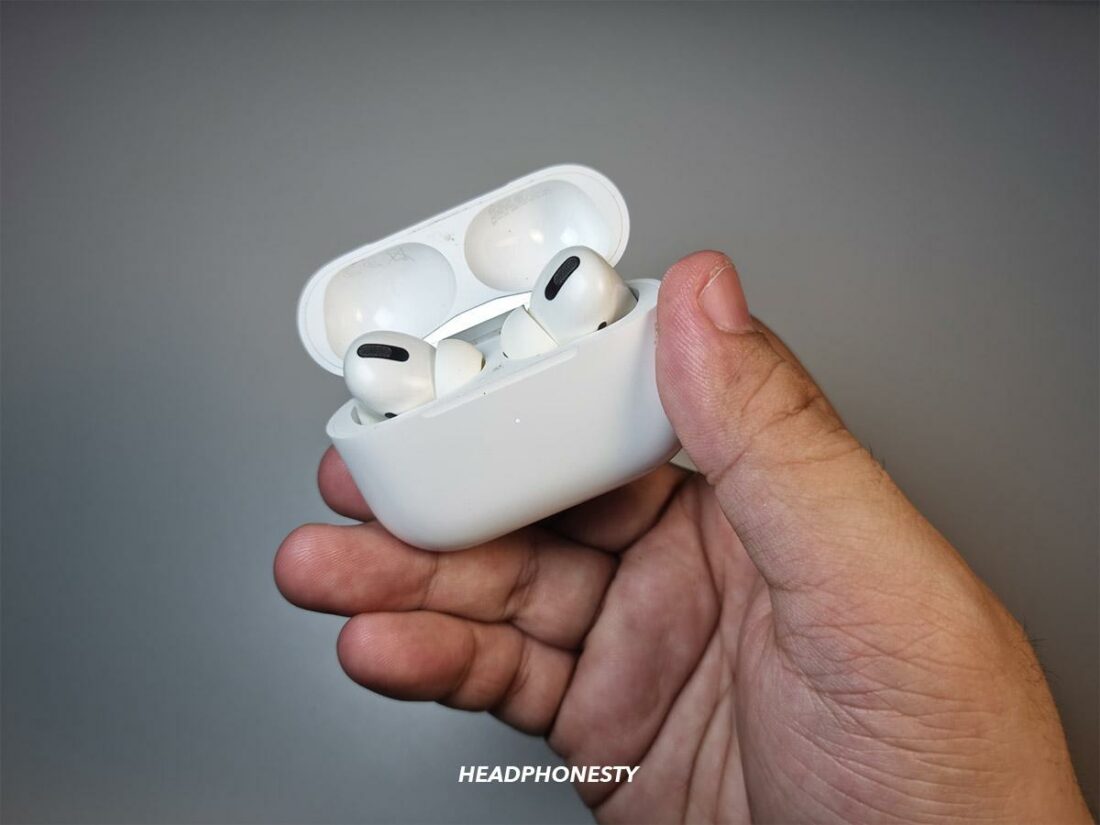
Connecting AirPods with other Apple devices is simple. All you have to do is open the case next to your iOS device and wait for the connection prompt to pop up.
However, some customers claim that this feature doesn’t always work because of dirt or firmware issues. Some even report that their AirPods used to work just fine but suddenly stopped connecting to their iPhone or iPad.
Fortunately, resetting or cleaning the AirPods and performing some basic software troubleshooting can easily address this AirPods connection problem. Read on as we go through each of these solutions below!
In This Article
- 1. Make Sure Your AirPods Have Enough Charge
- 2. Reset Your AirPods
- 3. Clean the AirPods
- 4. Update Your AirPods’ Firmware
- 5. Disable Other Apps
- 6. Restart Your Audio Source
- 7. Manually Connect AirPods to Your iPhone
- 8. Check Your iOS/iPadOS Version
- 9. Clear the Bluetooth Connection List
- 10. Turn Off Automatic Switching
- 11. Turn Off ‘Low Power Mode’
- 12. Reset Network Settings
- 13. DFU Restore Your iPhone
- 14. Contact Apple Support
- Conclusion
1. Make Sure Your AirPods Have Enough Charge
Though not always the case, a low battery percentage can cause connectivity issues on AirPods. If your AirPods are low on battery, they may disable some functionality, sometimes leading to a failed Bluetooth connection.
As such, ensuring your AirPods have enough charge left is a good idea. Here’s how to check your AirPods’ battery status:
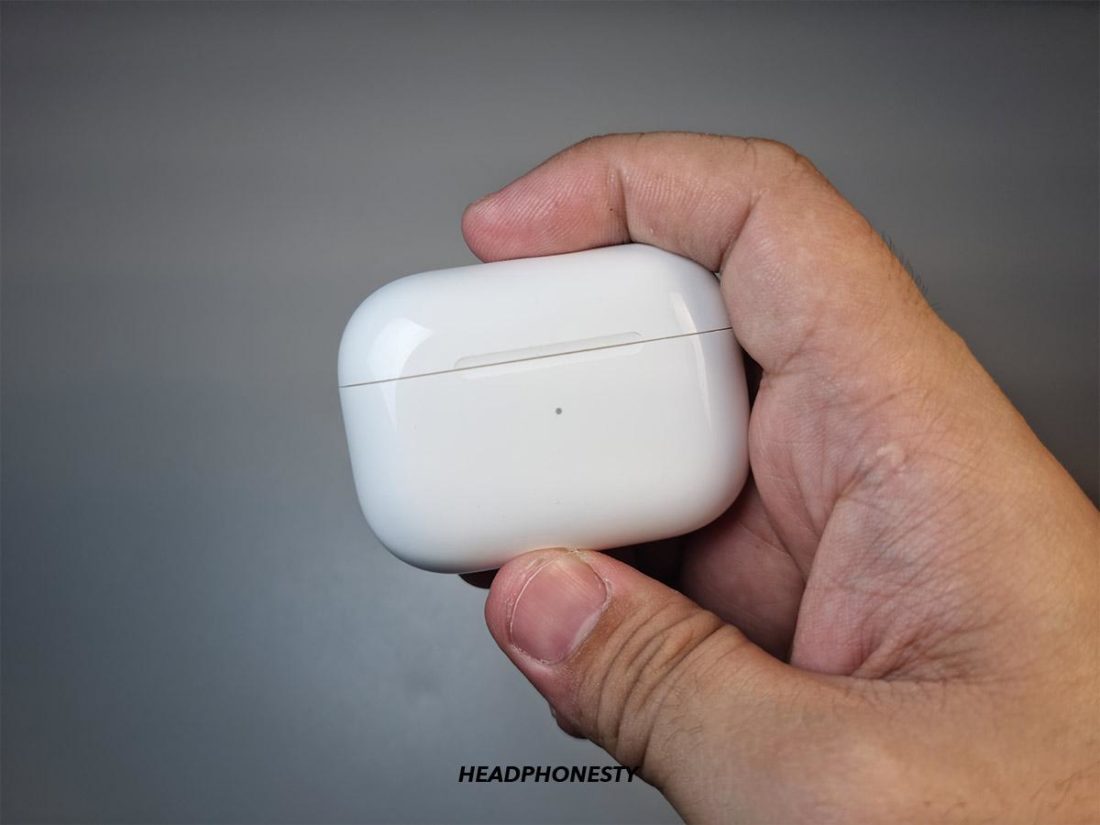
- Open the charging case lid with both AirPods inside. The status light on the charging case will light up, indicating how much battery is left in the AirPods. The status light for the AirPods Gen 1 and 2 is located inside the charging case (between the AirPods). For the AirPods Gen 3 and AirPods Pro, you can find the status light in front of the charging case.

Open the AirPods charging case. - Check the color of the status light. A green light means the AirPods are fully-charged, while amber means they have less than a full charge left. However, if there’s no light, it means the AirPods’ batteries are dead.
AirPods charging case showing green status light.
2. Reset Your AirPods
Resetting your AirPods is the most basic but effective solution you can try. As you use your AirPods, settings and firmware-related issues will eventually happen.
Here’s how to reset your AirPods:
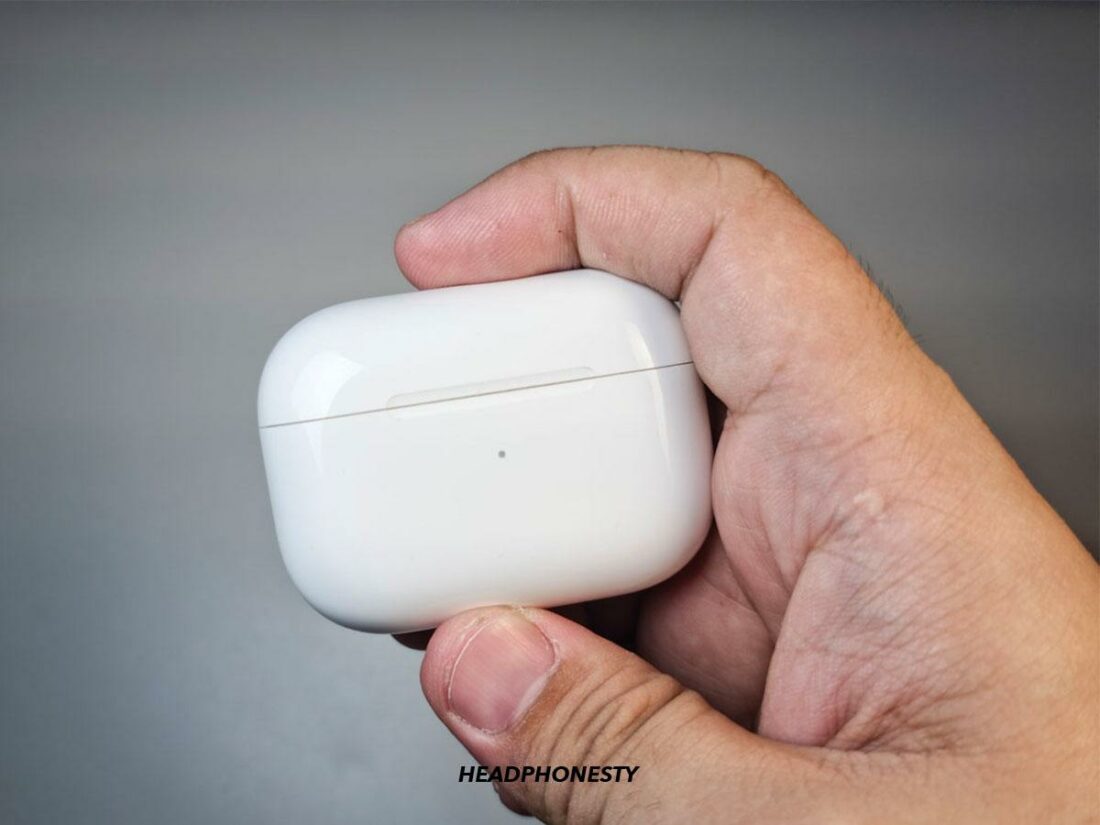
- Put your AirPods in their case and close the lid. Wait for 30 seconds.
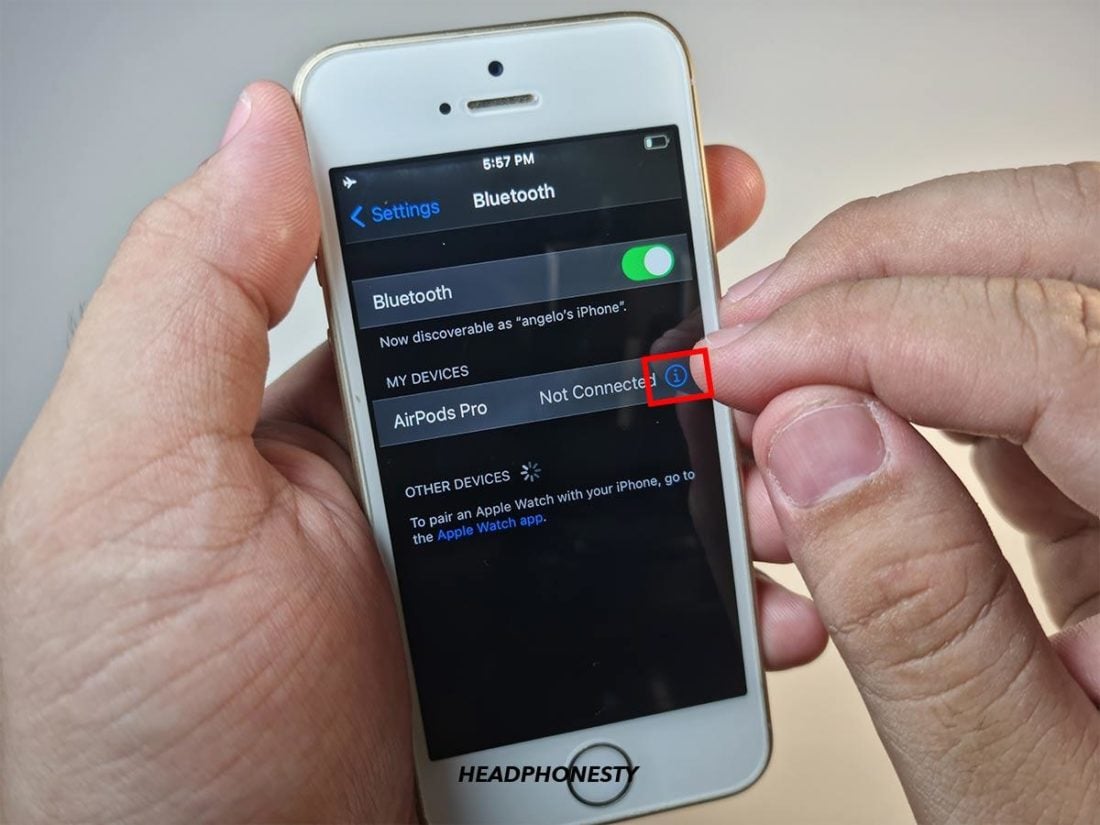
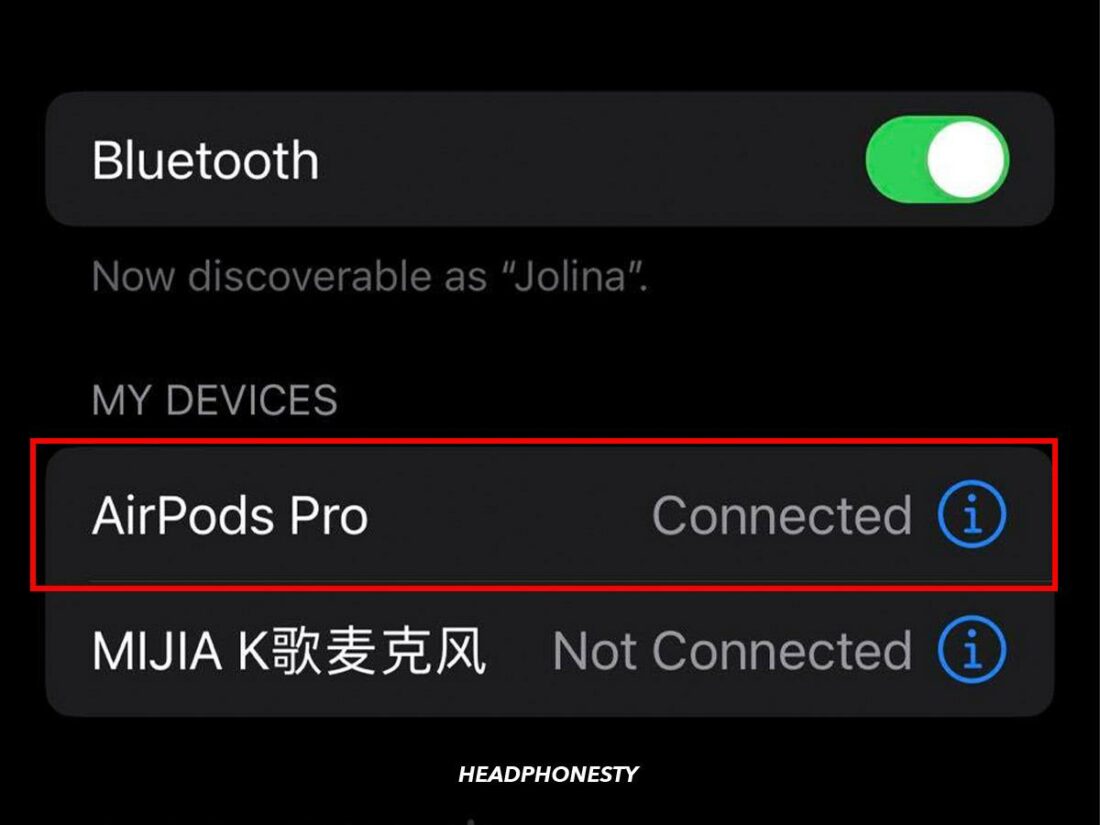
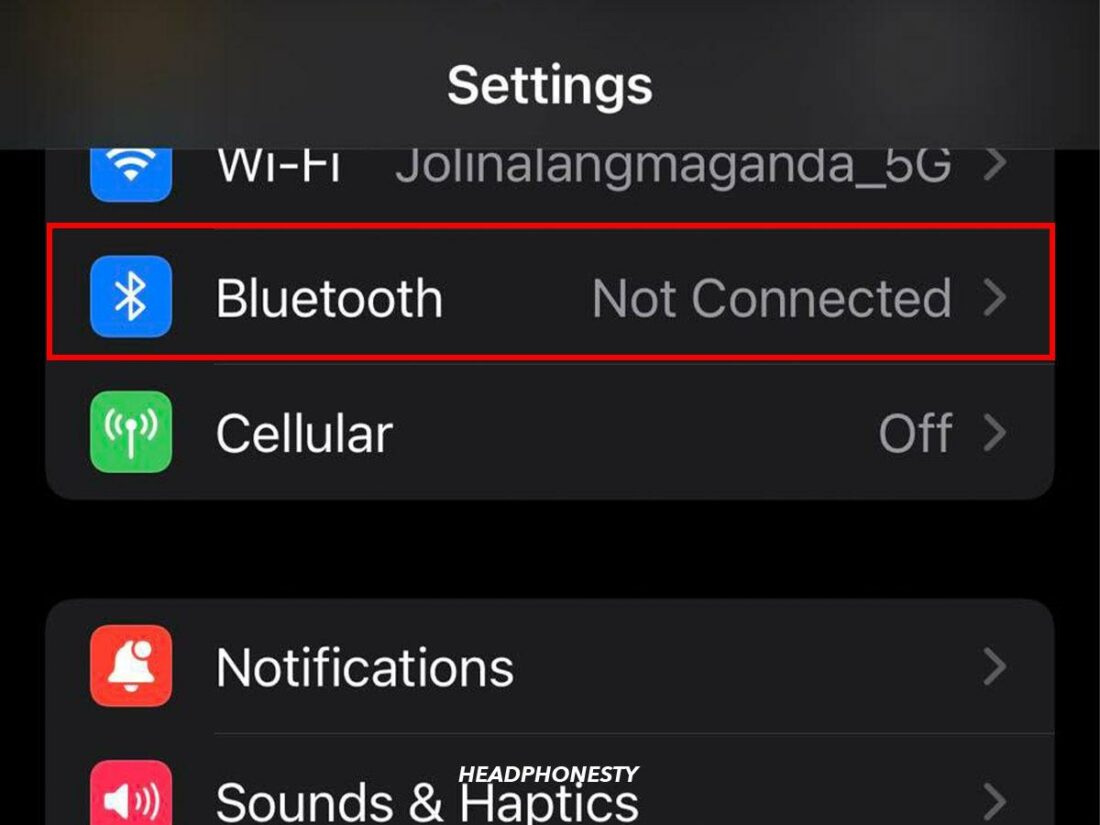
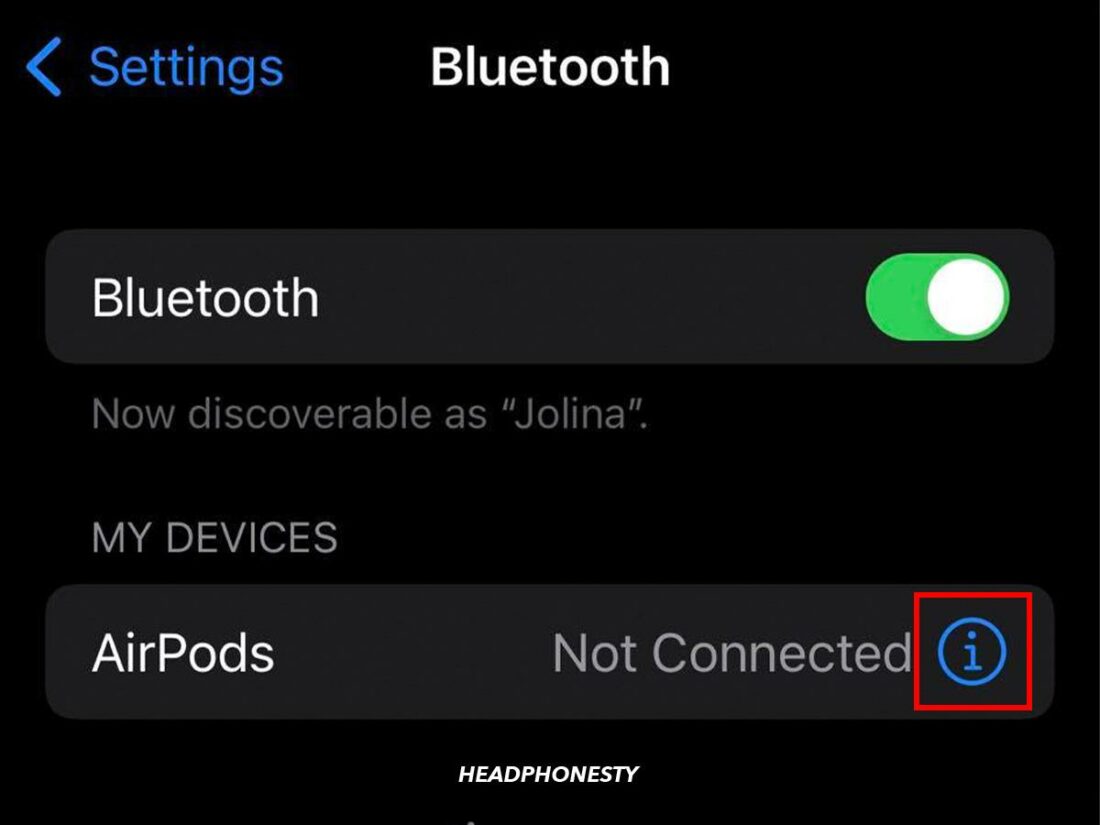
AirPods inside closed case - On your iOS device, go to Settings > Bluetooth.
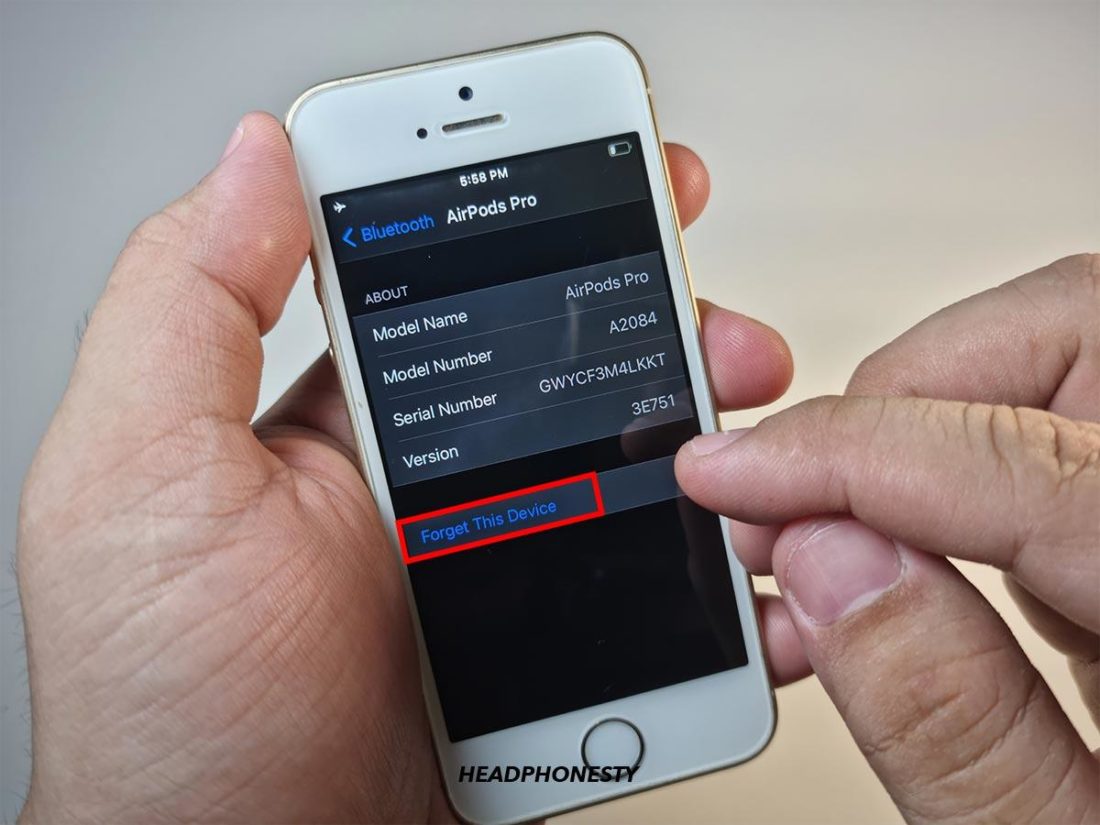
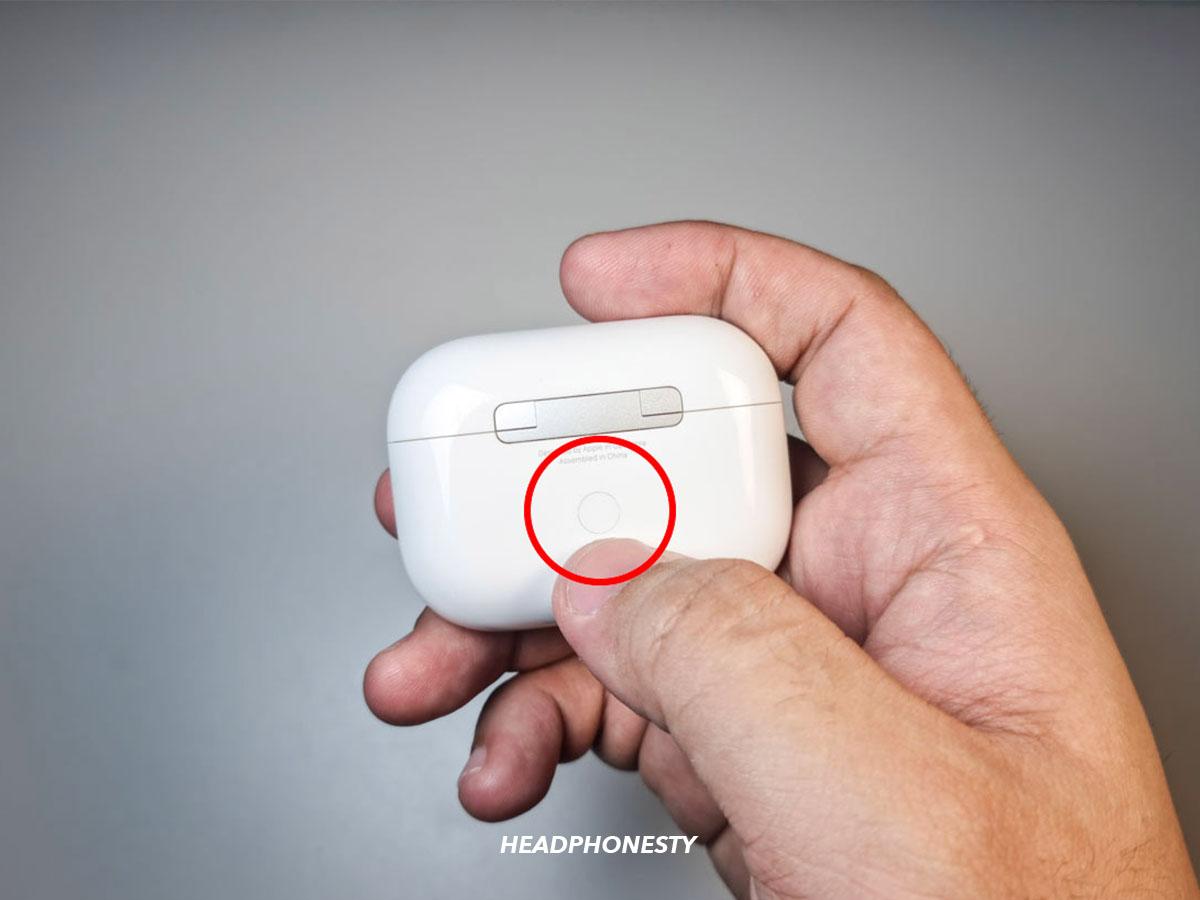
Going to AirPods settings on iPhone - Tap the (i) icon beside your AirPods. Select Forget This Device and confirm.
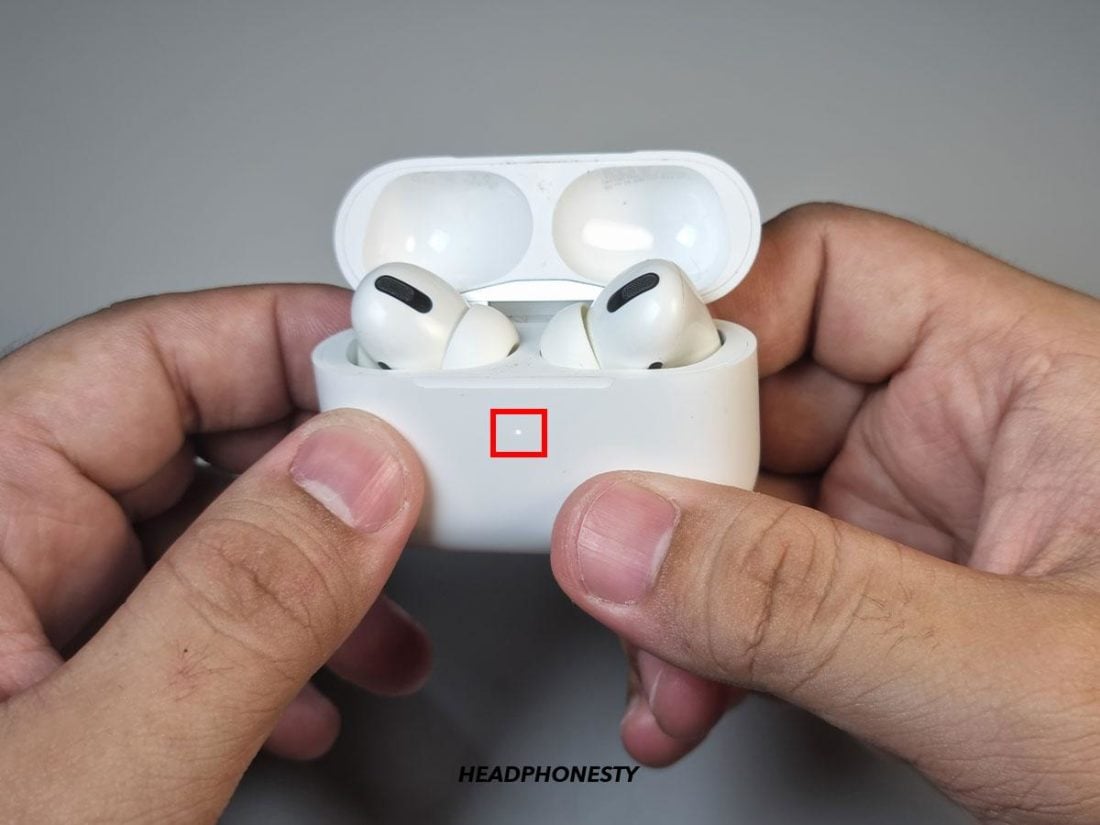
Forgetting AirPods on iPhone - Open the charging case and hold the setup button until the status light flashes amber, then white.
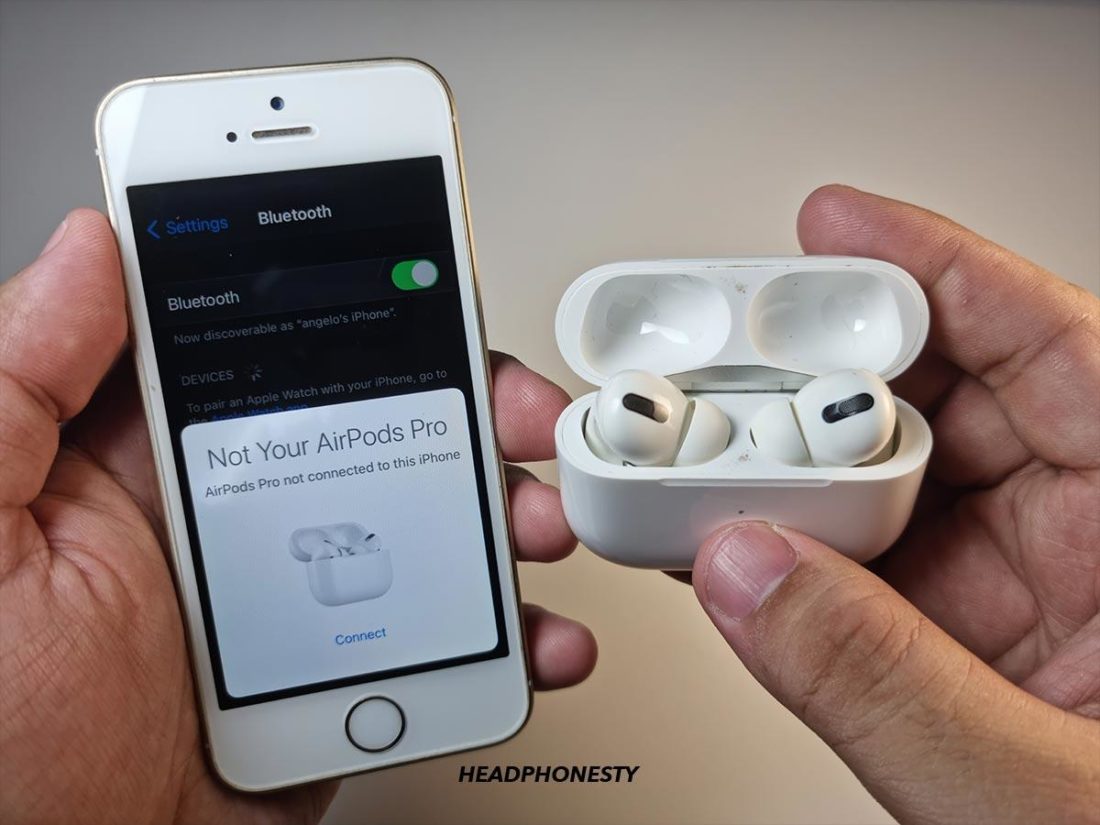
Resetting AirPods - Place your AirPods near your device and connect them.
Reconnecting AirPods to iPhone
3. Clean the AirPods
As you wear your AirPods, earwax and dirt can build up over time. This can block the proximity sensors and lead to connection issues.
The solution? Try clearing earwax and dirt buildup from your AirPods every 72 hours. Here’s what you’ll need:
- 70% isopropyl alcohol
- cotton swabs
- a toothpick
- an old toothbrush
- lint-free cloth
Here’s a step-by-step guide on how to clean your AirPods:
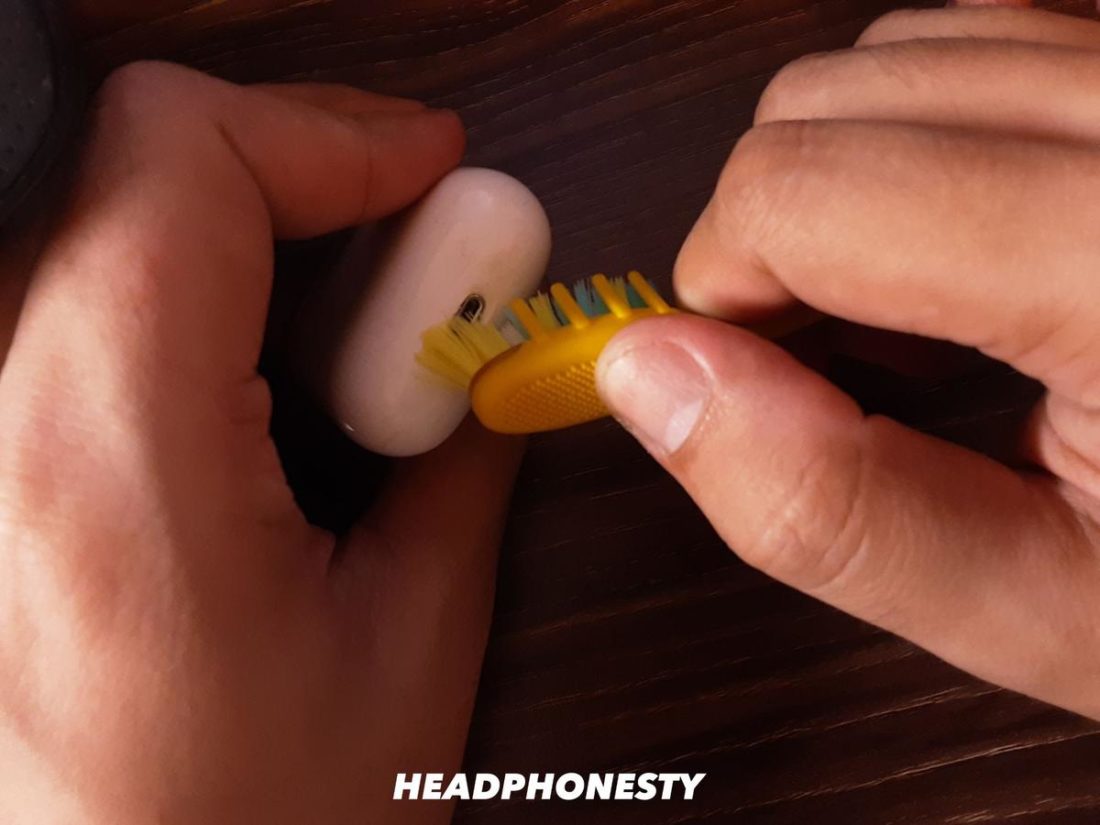
- Dampen the toothbrush and a cotton bud with alcohol.
- Carefully brush the crevices on the AirPods and charging case.
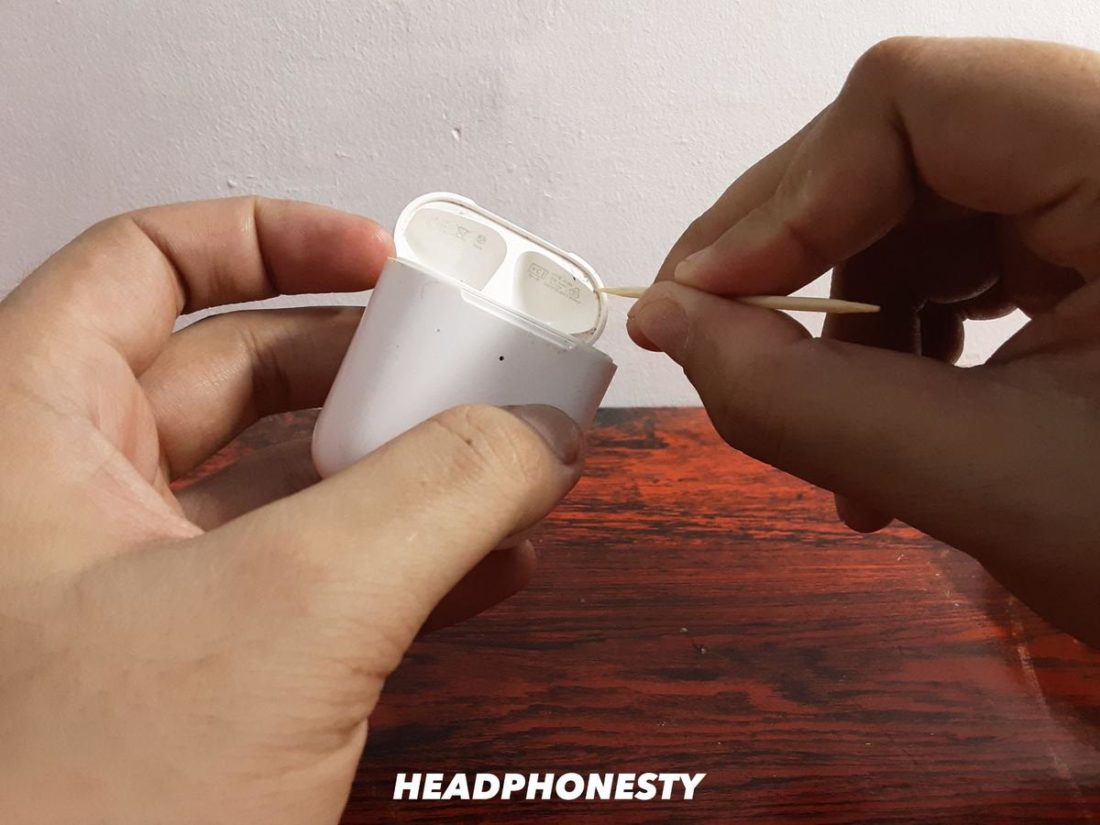
Brushing the AirPods with toothbrush or cotton swab - Use a toothpick to pick out stubborn debris.
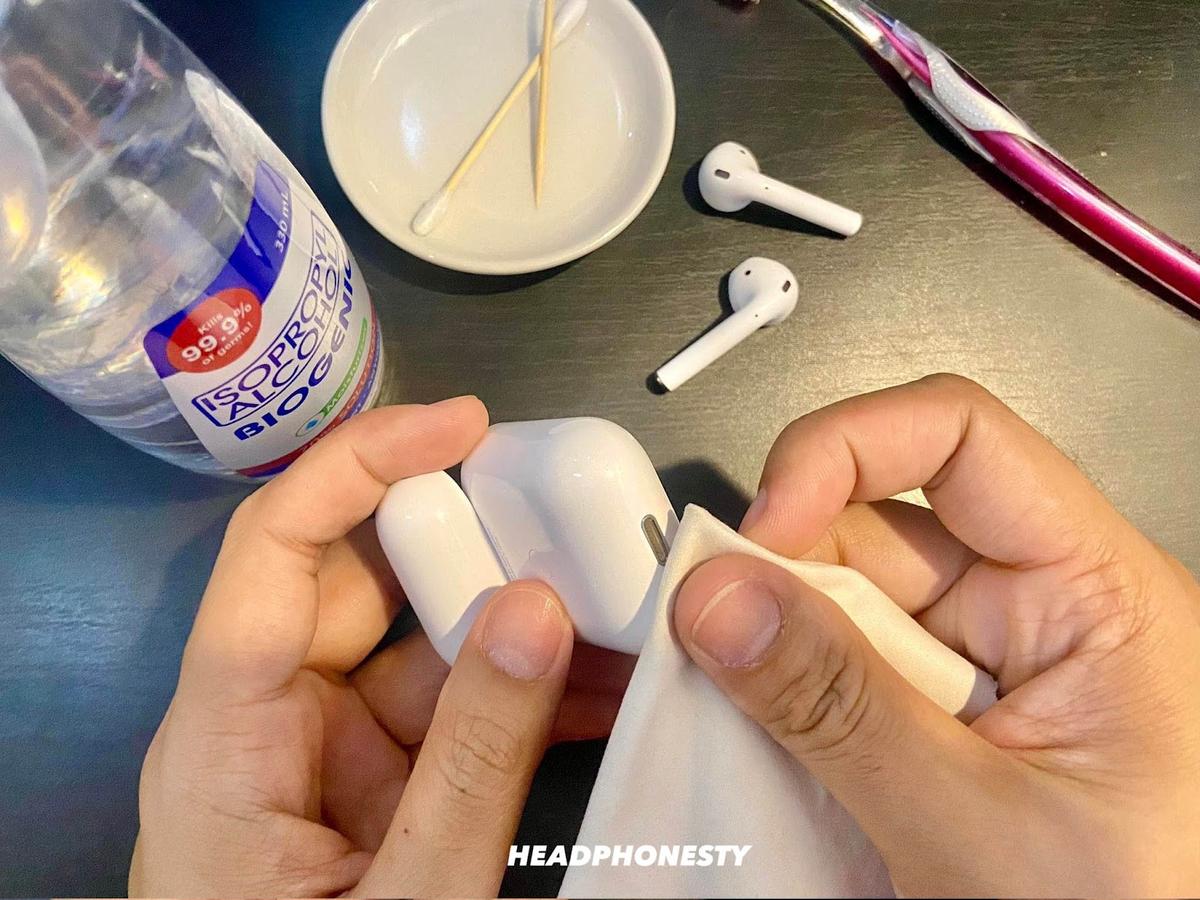
Using a toothpick to reach inside your AirPods - Wipe away any loose dirt with a lint-free cloth and alcohol.

Wiping AirPods off with a cloth
4. Update Your AirPods’ Firmware
All information processing in electronics, including AirPods, is handled by firmware. When users report issues like connection problems, Apple releases firmware updates to solve them.
That said, having outdated firmware means you could end up with connection issues already fixed in the latest release. So it’s recommended to keep your AirPods’ firmware updated.
The first step is to check which firmware version your AirPods are using. Here’s how to do just that:
- Open Settings > Bluetooth.
‘Bluetooth’ in Settings. - Tap the (i) button beside your AirPods’ name.
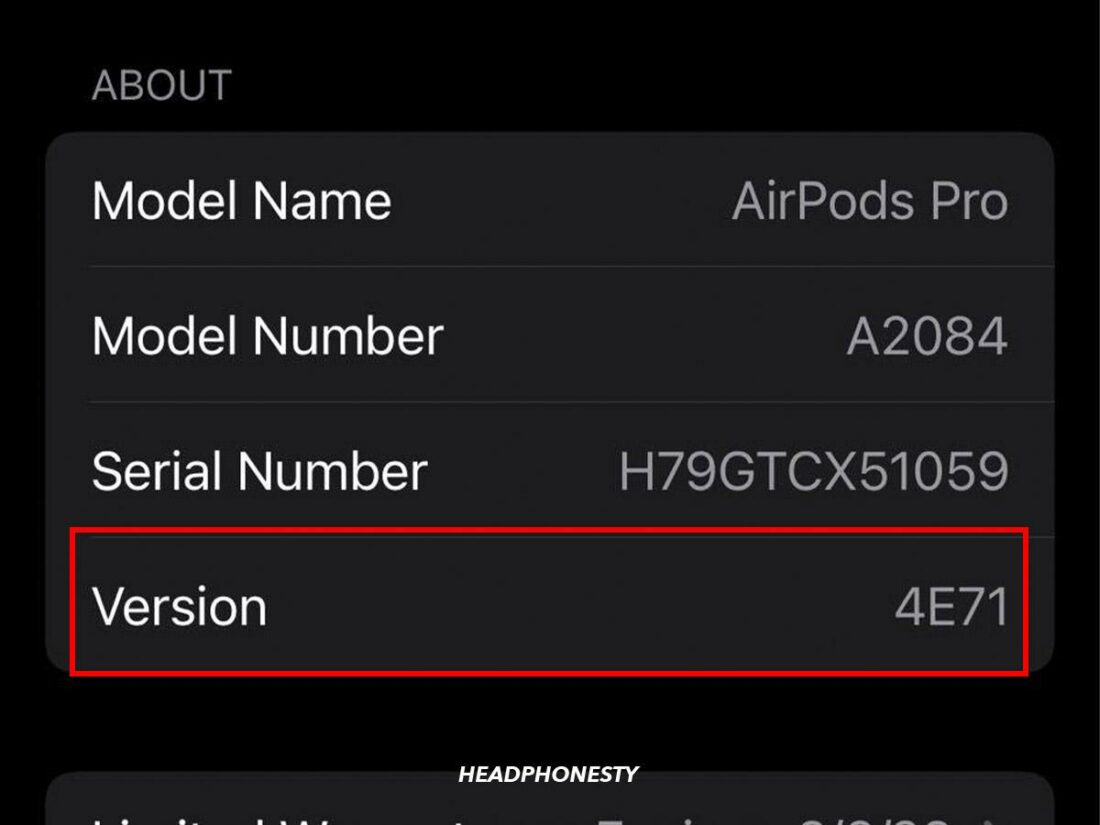
(i) button in Bluetooth settings. - Check the Version to see what firmware your device is running.
AirPods’ firmware version.


As of March 2023, these are the latest firmware versions for AirPods:
- AirPods Pro 2nd Gen: 5B58
- AirPods Pro 1st Gen, AirPods 2nd and 3rd Gen, and AirPods Max: 5B59
- AirPods 1st Gen: 6.8.8
5. Disable Other Apps
Many third-party apps require Bluetooth permission to operate correctly on your device. But when these apps run, they may prevent other devices, including AirPods, from establishing a Bluetooth connection with your phone.
This instance was especially relevant during the COVID-19 pandemic, which led many of us to download tracing apps.
If you suspect this is the case, try disabling Bluetooth permissions for third-party apps. Here’s how:
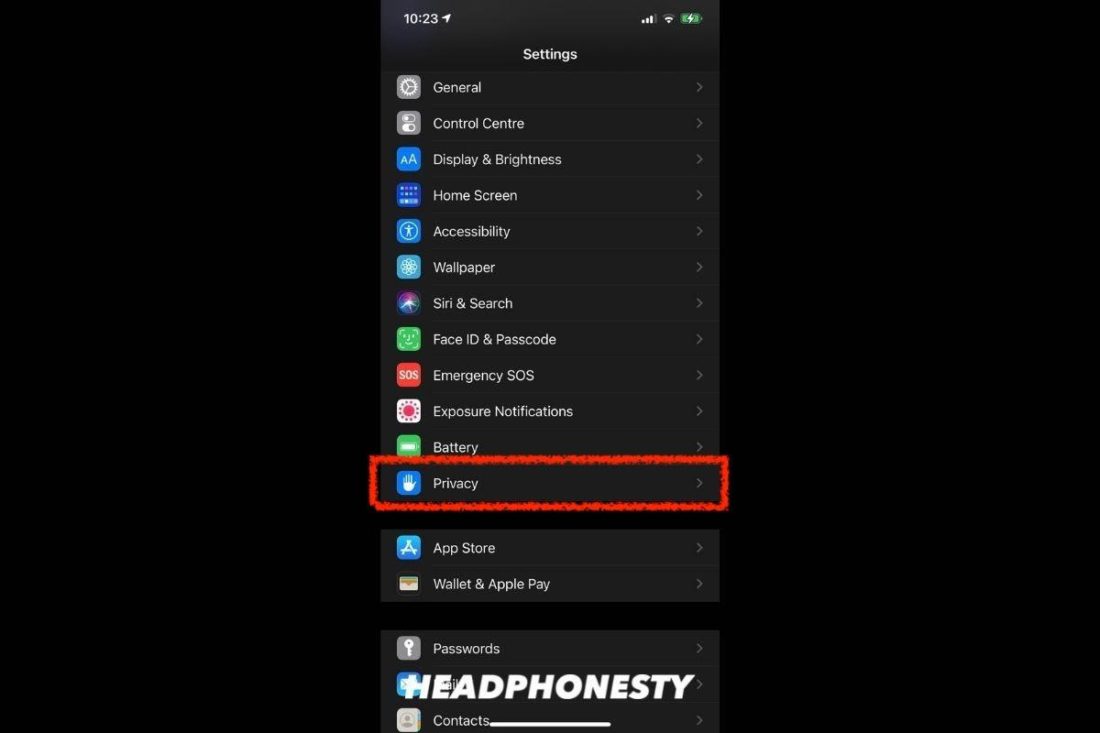
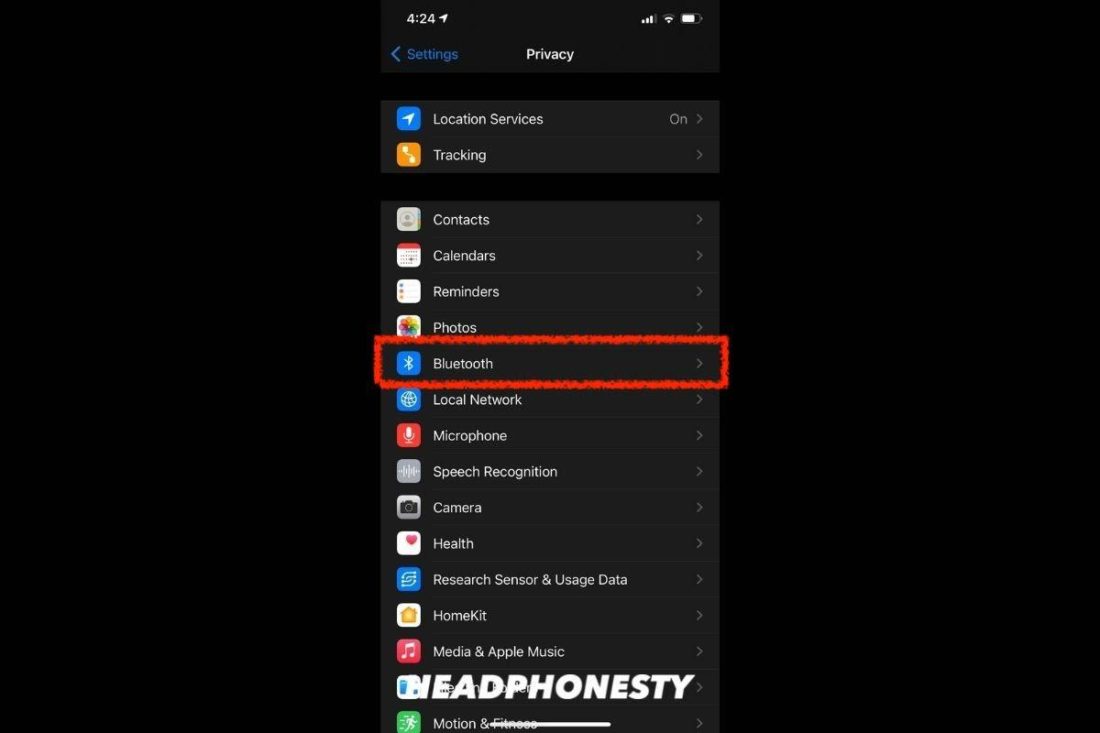
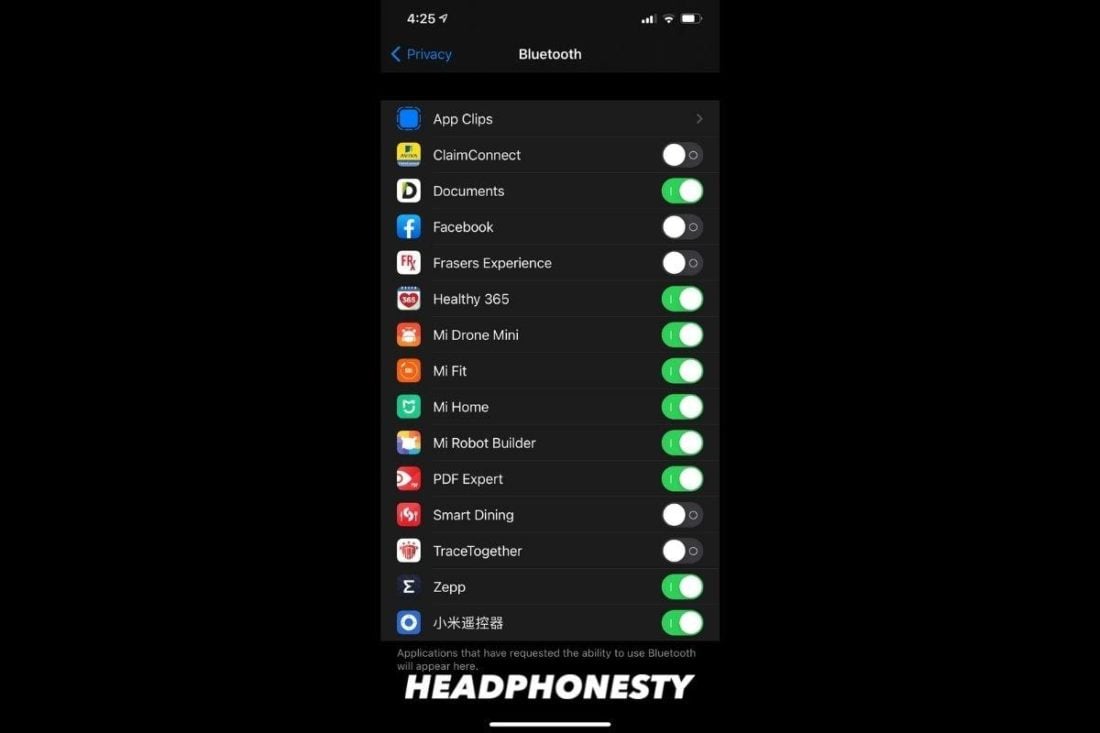
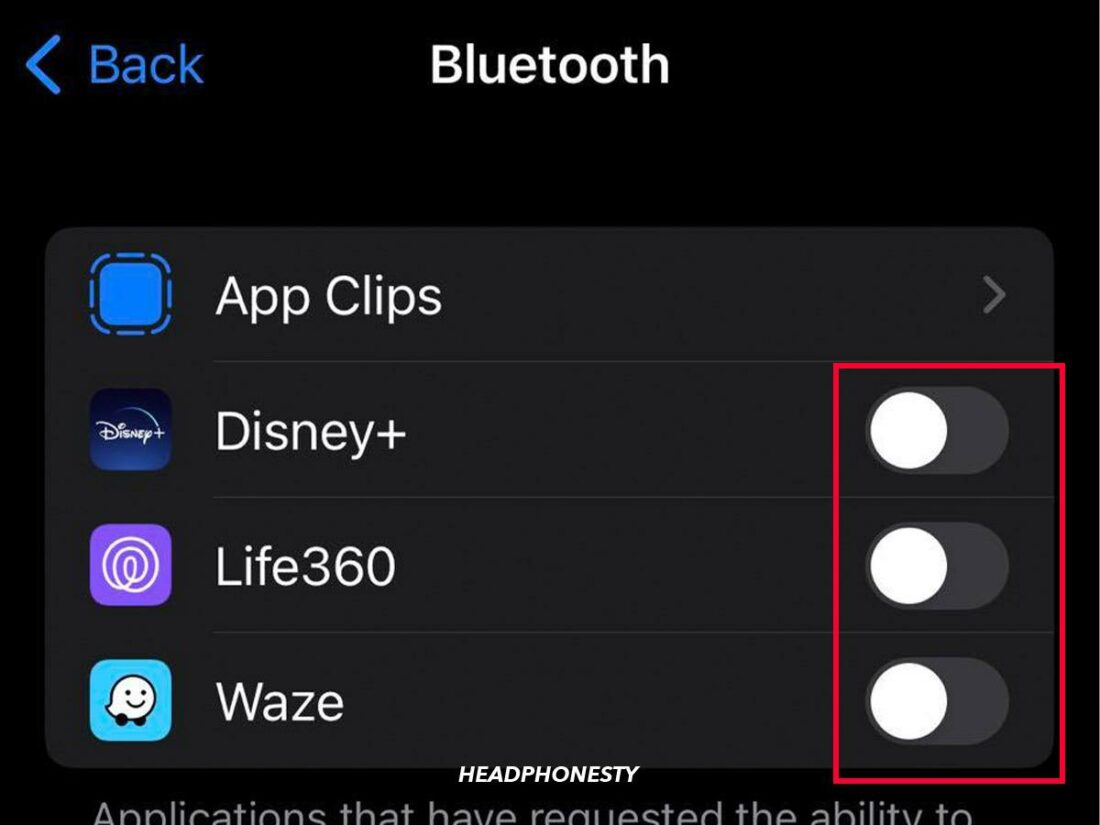
- Go to Settings and select Privacy.

Getting to the privacy settings - Select Bluetooth.
Privacy settings for Bluetooth. - You’ll see a list of apps that use your device’s Bluetooth.
Apps that have requested Bluetooth permissions are shown. - Toggle all of them off and check if the problem persists.
Turn off all the toggle switch.
6. Restart Your Audio Source
Aside from your AirPods, your iPhone or iPad can also have software-related issues that cause connectivity issues. Luckily, you can resolve this by restarting your device. Here’s how:
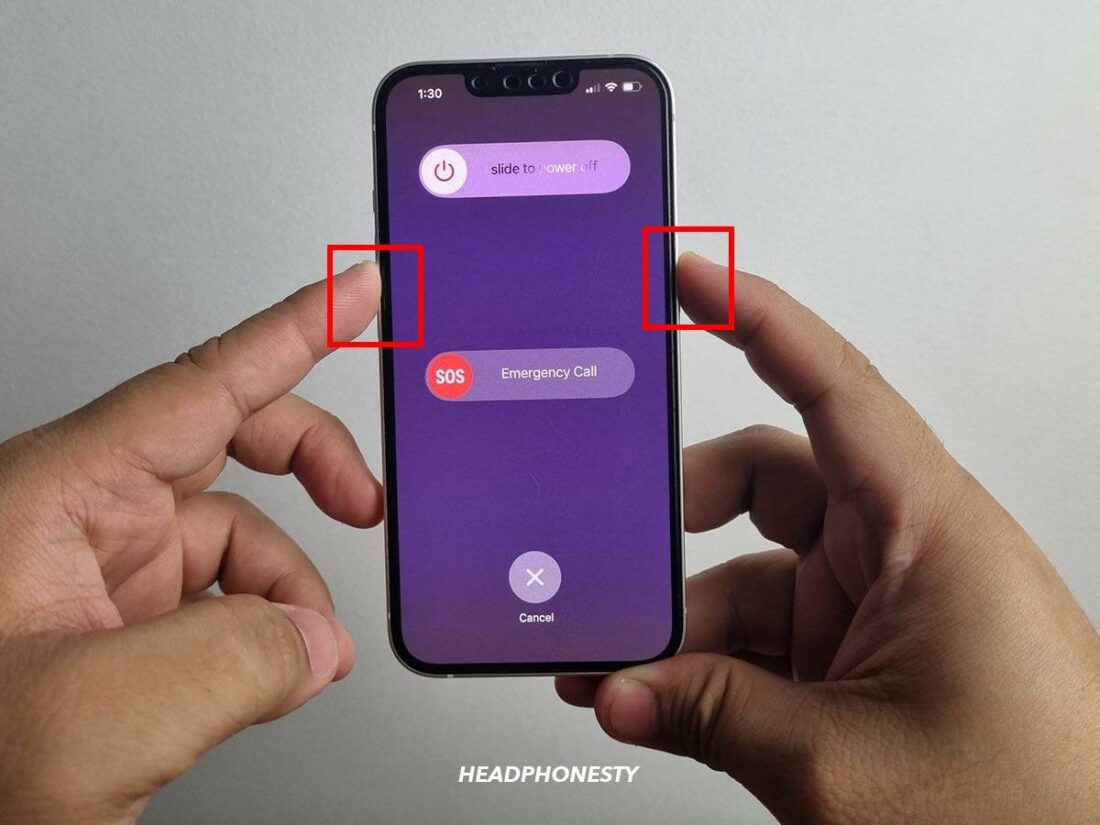
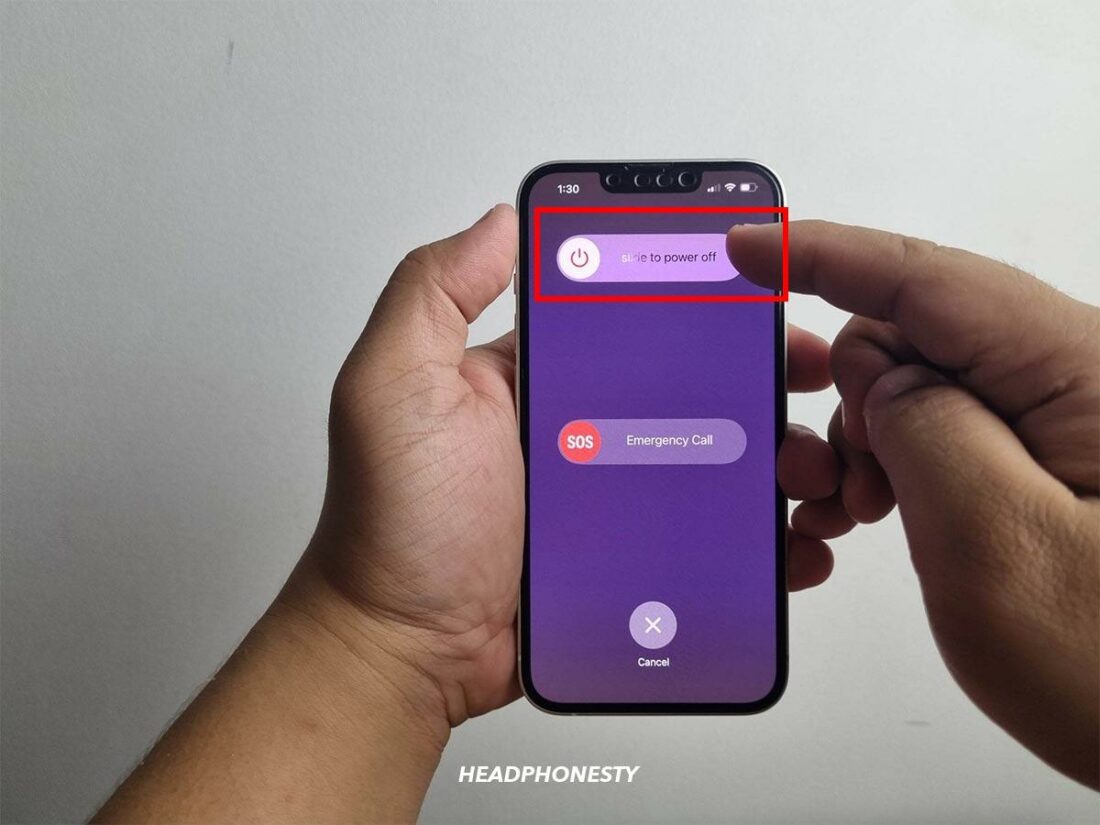
- Press and hold the side button on your iPhone until the power-off slider appears.
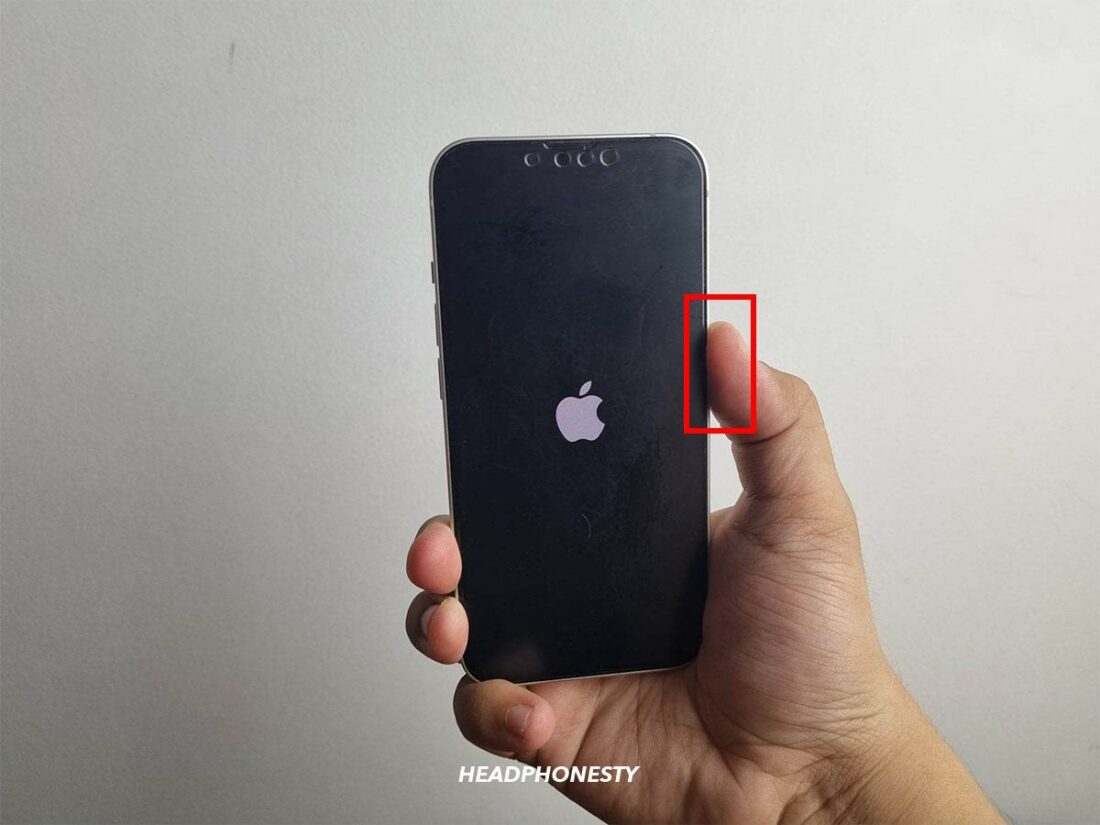
Press and hold side buttons. - Drag the slider and wait 30 seconds for your iPhone to turn off. If your device is frozen or unresponsive, force-start your device.
Drag the slider. - Press and hold the side button until the Apple logo appears.
Press and hold the side button.
7. Manually Connect AirPods to Your iPhone
Apple’s automatic pairing system relies heavily on firmware. When there are bugs in the firmware, there’s a high chance it won’t work.
Fortunately, manually pairing your AirPods with your iPhone or iPad can bypass the software-related bugs in the automatic pairing system.
Here’s how to manually connect your AirPods:
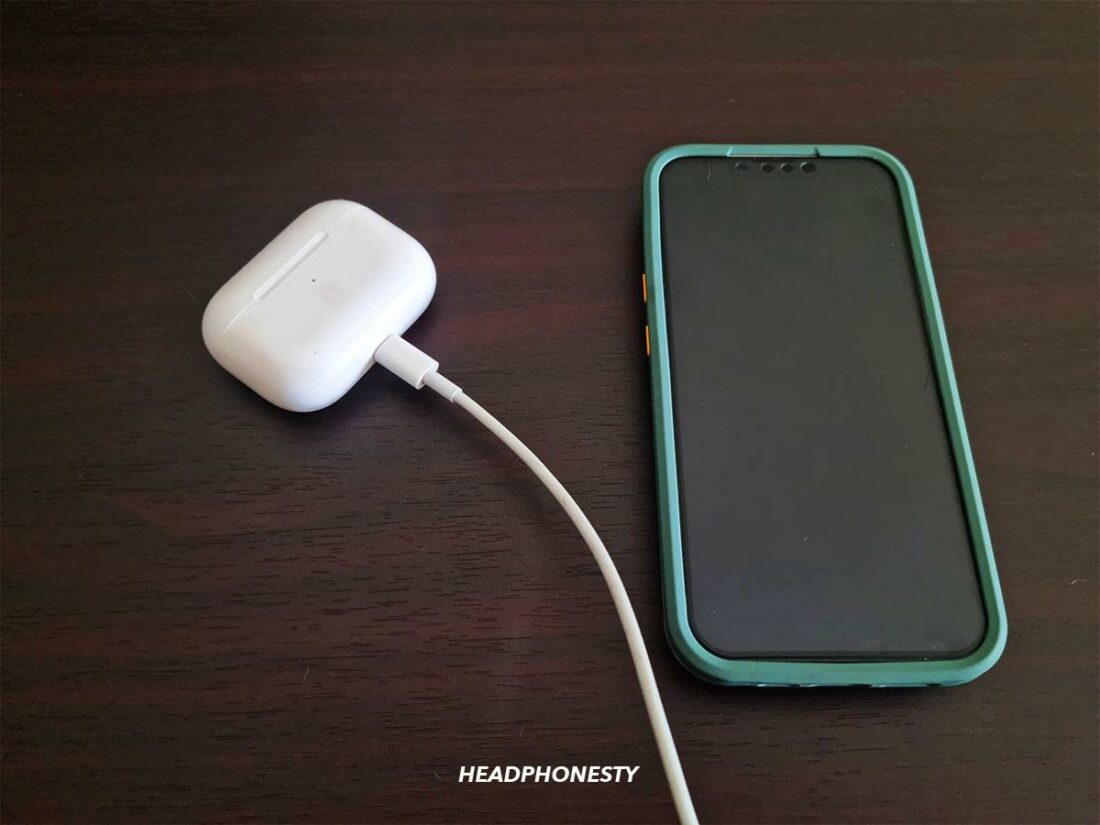
- Put your AirPods in their case and close the lid.
AirPods inside their charging case. - Place the case next to your iPhone and open the lid again.
Place your AirPods near your iPhone. - Hold the setup button for 10 seconds until the status light flashes white.
Setup button on the charging case. - Go to Settings > Bluetooth, then select your AirPods from the list of devices.
Select Airpods under Bluetooth settings.
8. Check Your iOS/iPadOS Version
Similar to how Apple releases new firmware versions for AirPods, they also release bug fixes for every new iteration of iOS, so it’s vital to keep your device updated.
Additionally, for AirPods to work with Apple devices, certain firmware requirements must be met. If you’re using a version lower than the recommended iOS range, you may experience connectivity issues.
To avoid this, make sure your iOS devices are updated. Doing so doesn’t only fix bugs; it also improves your device’s performance.
For the latest software requirements of each AirPods model and the different Apple devices, refer to the table below:
| AirPod variant | iPhone or iPod touch | iPad | Apple Watch | Apple TV | Mac |
|---|---|---|---|---|---|
| AirPods (1st Gen) | iOS 10 or later | iOS 10 or later | watchOS 3 or later | tvOS 11 or later | macOS Sierra or later |
| AirPods (2nd Gen) | iOS 12.2 or later | iOS 12.2 or later | watchOS 5.2 or later | tvOS 12.2 or later | macOS 10.14.4 or later |
| AirPods (3rd Gen) | iOS 15.1 or later | iPadOS 15.1 or later | watchOS 8.1 or later | tvOS 15.1 or later | macOS 12 or later |
| AirPods Pro (1st Gen) | iOS 13.2 or later | iPadOS 13.2 or later | watchOS 6.1 or later | tvOS 13.2 or later | macOS 10.15.1 or later |
| AirPods Pro (2nd Gen) | iOS 16 or later | iPadOS 16.1 or later | watchOS 9 or later | tvOS 16 or later | macOS Ventura |
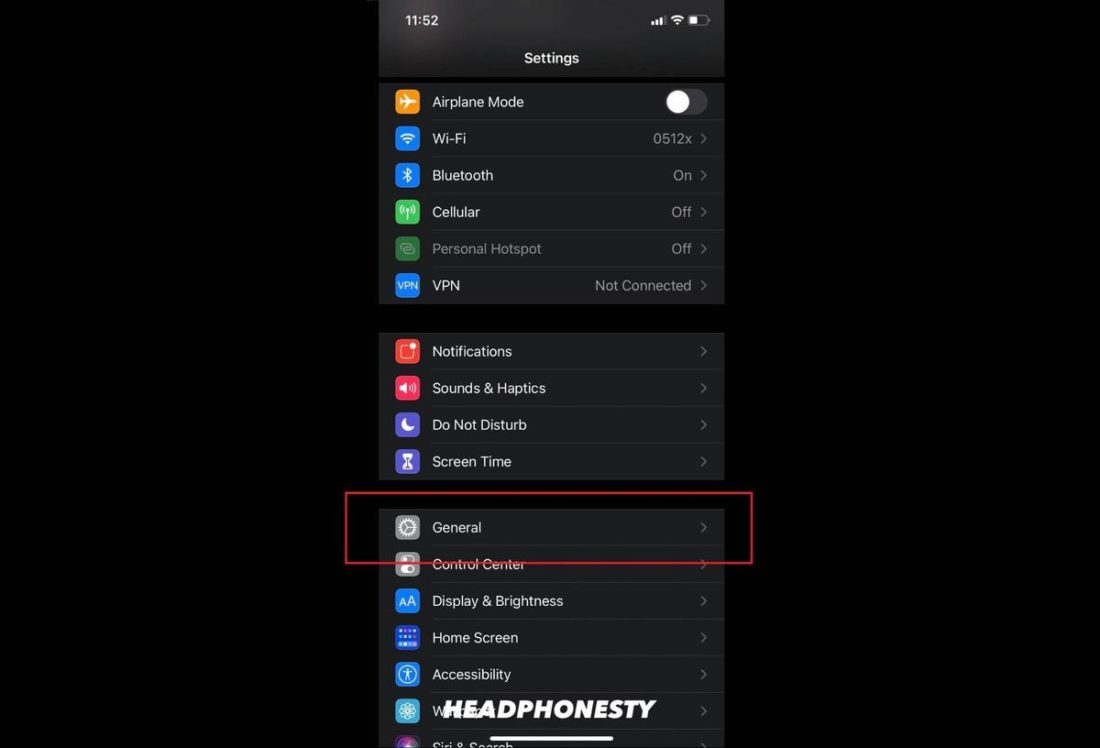
To check for and install the latest iOS/iPadOS software update, follow these steps:
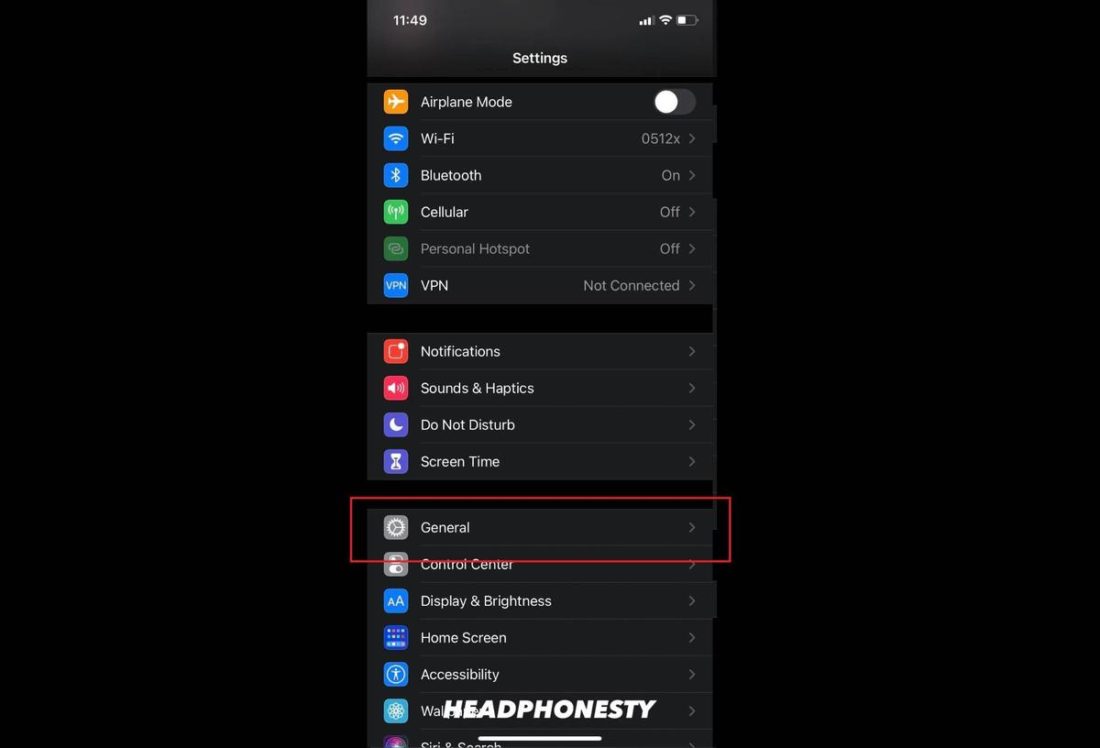
- Head to Settings > General.

General iPhone Settings - Choose Software Update to check if there is an update available.
Checking Software version on iPhone

9. Clear the Bluetooth Connection List
Every Bluetooth device has a unique identity. When you use your phone with Bluetooth devices, your phone stores their information and settings in its memory. The more devices you pair, the less storage capacity the cache has, which can cause Bluetooth connection problems.
Luckily, completely removing these other existing Bluetooth connections will refresh your device and fix the issues. Here’s how to do so:
- Go to Settings > Bluetooth.
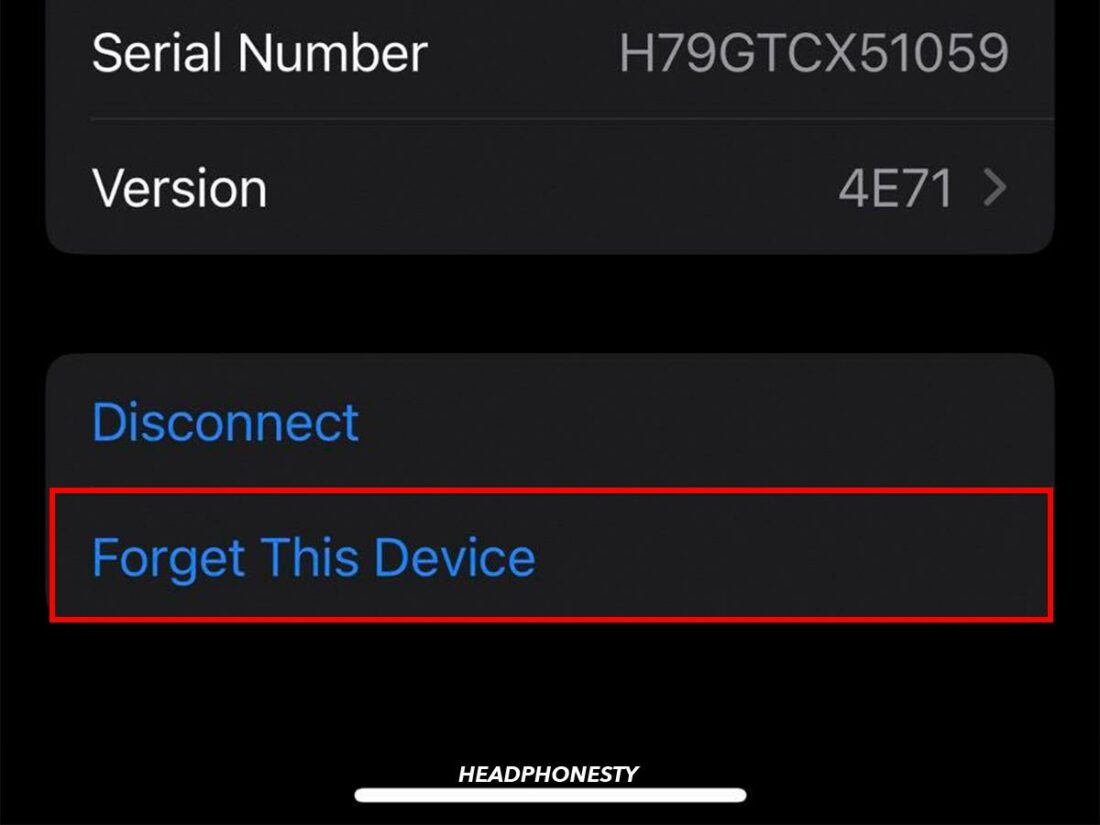
Select Bluetooth. - Tap the ‘i’ icon beside your AirPods.
Click the “i” icon beside your AirPods name. - Select Forget This Device. Do this for all Bluetooth devices on the list.
Select Forget This Device.


10. Turn Off Automatic Switching
Apple’s Automatic Switching feature allows your AirPods to switch between paired devices. For example, if you have a Mac and an iPhone, the AirPods can detect which one is playing audio and choose it as the primary audio source.
However, it sometimes switches unintentionally, which could lead you to think your AirPods aren’t connected. If this is your situation, you can fix it by disabling the Automatic Switching feature. Here’s how:
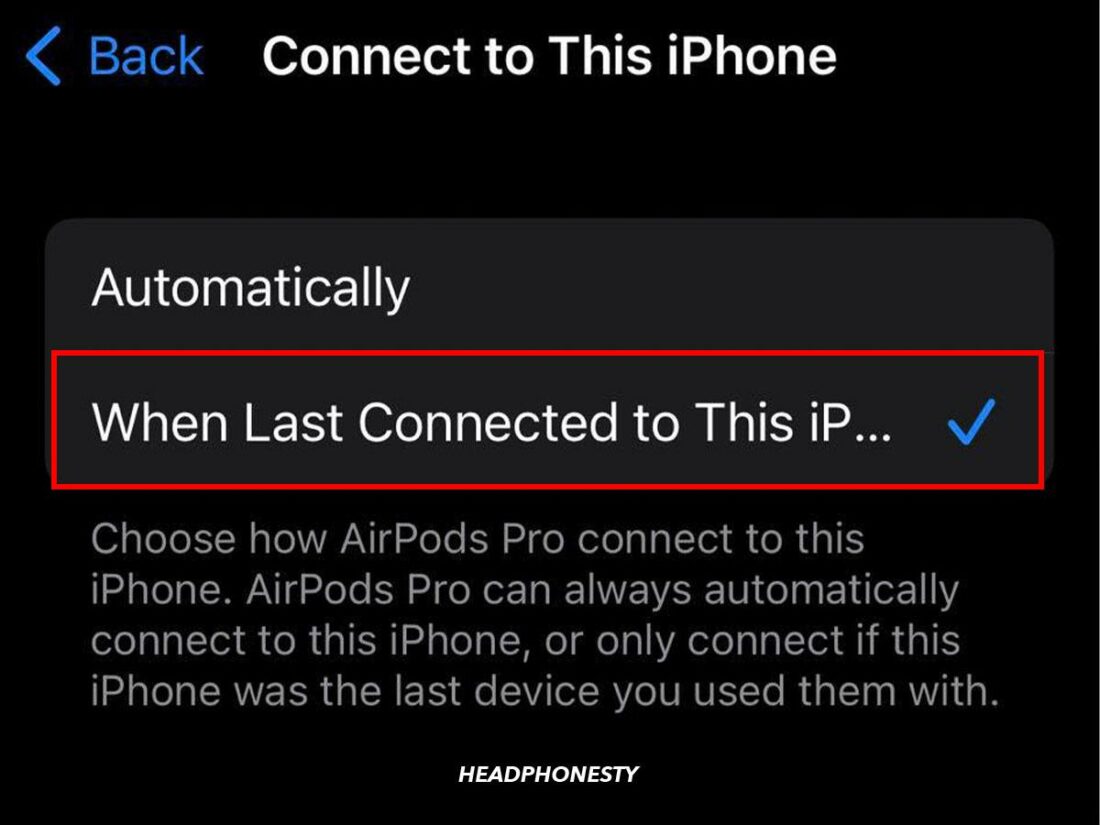
- Go to Settings > Bluetooth.
‘Bluetooth’ in Settings. - Tap the (i) icon beside your AirPods’ name.
(i) button in Bluetooth settings. - Select the Connect to This iPhone menu, and choose When Last Connected to This iPhone.
Select ‘When Last Connected to This iPhone’.
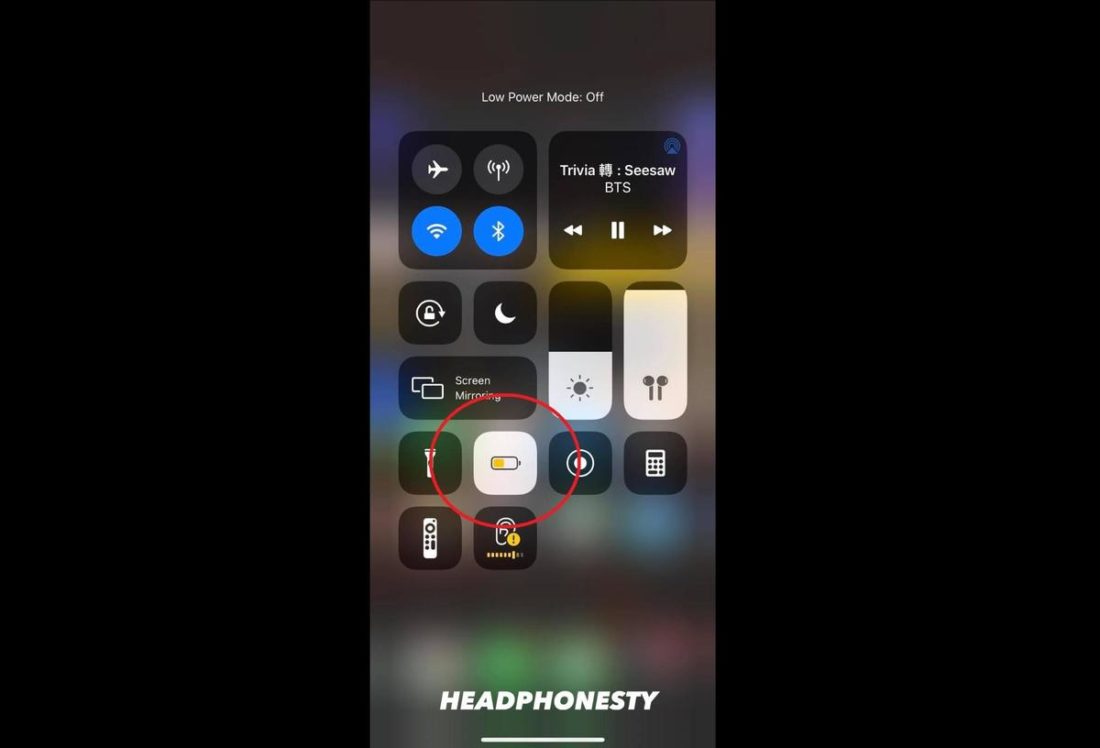
11. Turn Off ‘Low Power Mode’
Low Power Mode limits the background processes to preserve battery life. It also sacrifices performance, possibly resulting in unstable Bluetooth and wireless connections.
To determine if Low Power Mode is causing your AirPods connection issue, turn it off using these steps:
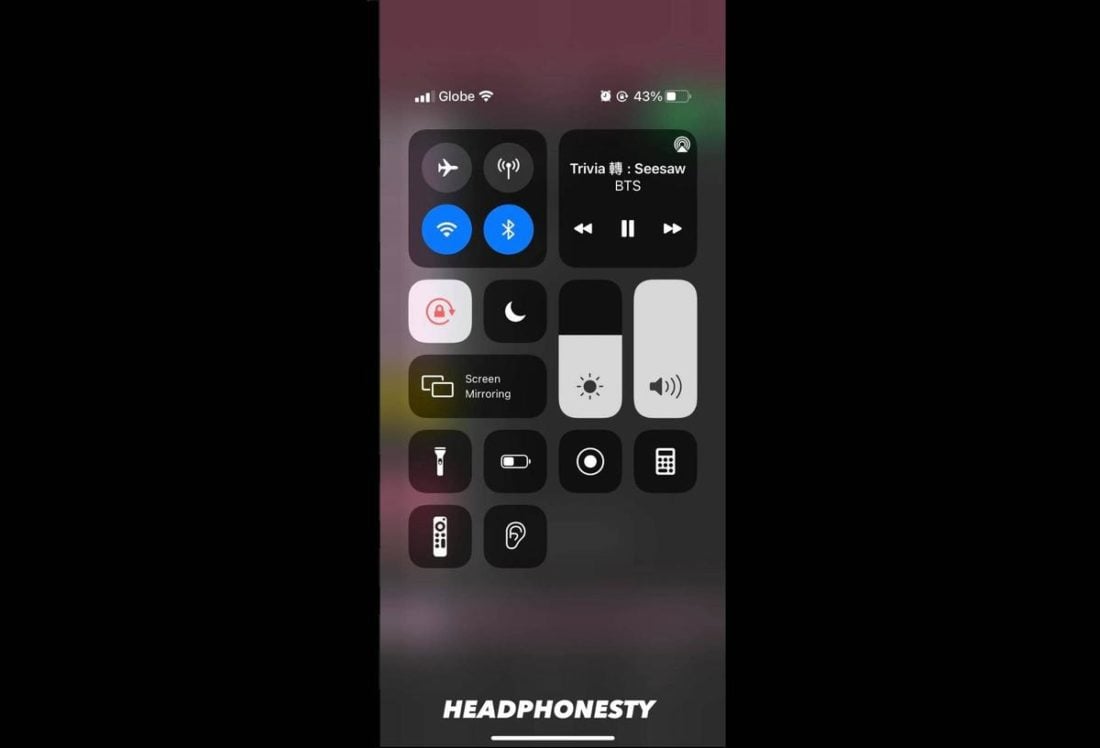
- Swipe down from the top part of your screen.
Pulling down the Control Center on iPhone - Tap the Battery icon to disable Low Power Mode.
Low Power Mode in Control Center
12. Reset Network Settings
Resetting your device’s network settings removes information related to wireless connections, which includes your Wi-Fi and Bluetooth devices.
This reset removes all bugs causing pairing issues with your AirPods, allowing your phone to establish brand-new connections with your devices.
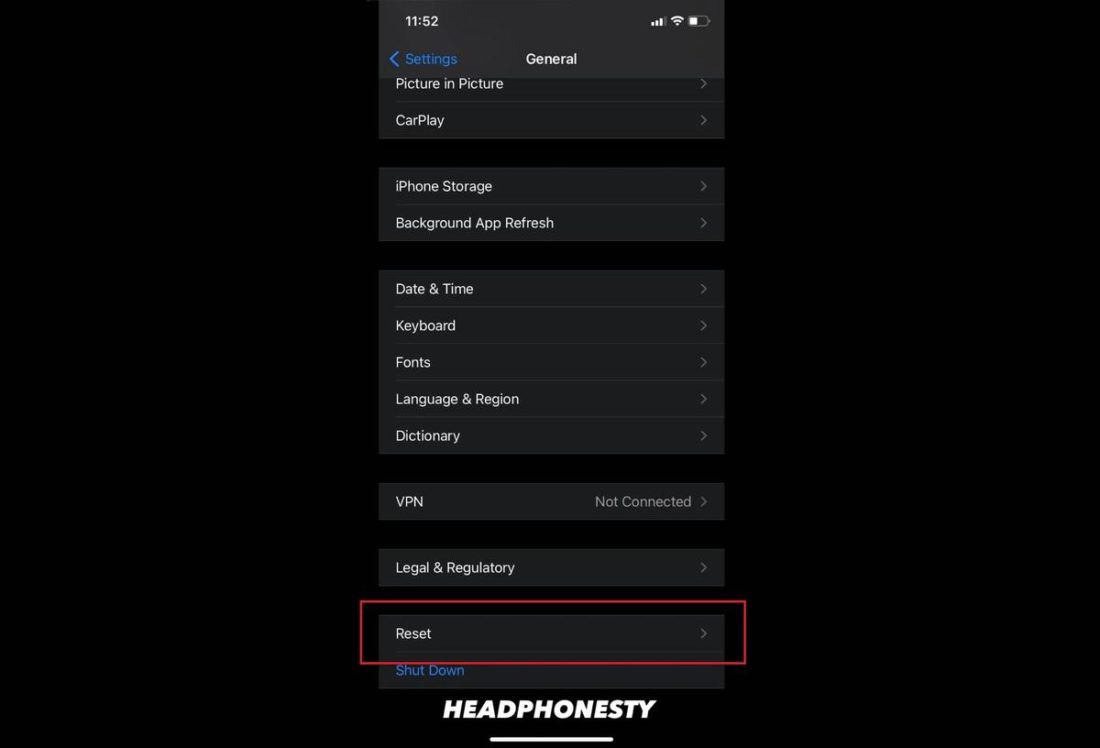
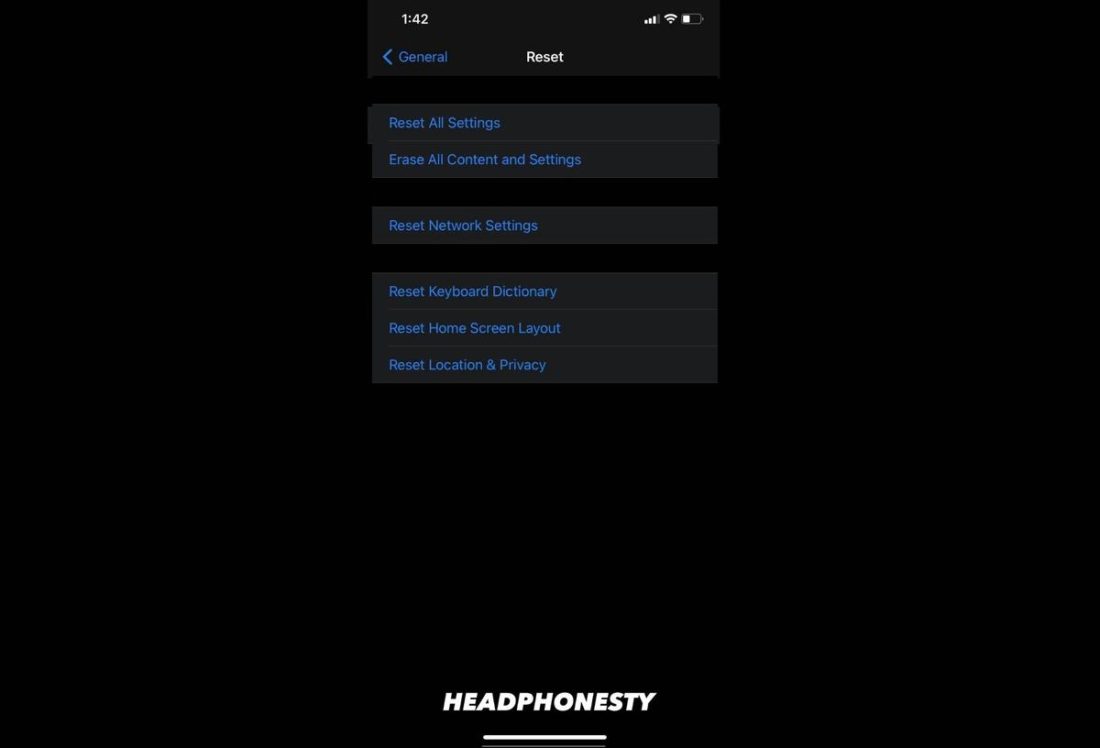
To reset your Network Settings for iOS/iPadOS 14 or earlier, follow these steps:
- Head to Settings > General.
General Settings - Tap Reset.
Resetting settings on iPhone - Select Reset Network Settings and type in your passcode to confirm.
Resetting Network settings on iPhone
For iOS/iPadOS 15 or later, here’s how you can apply the reset:
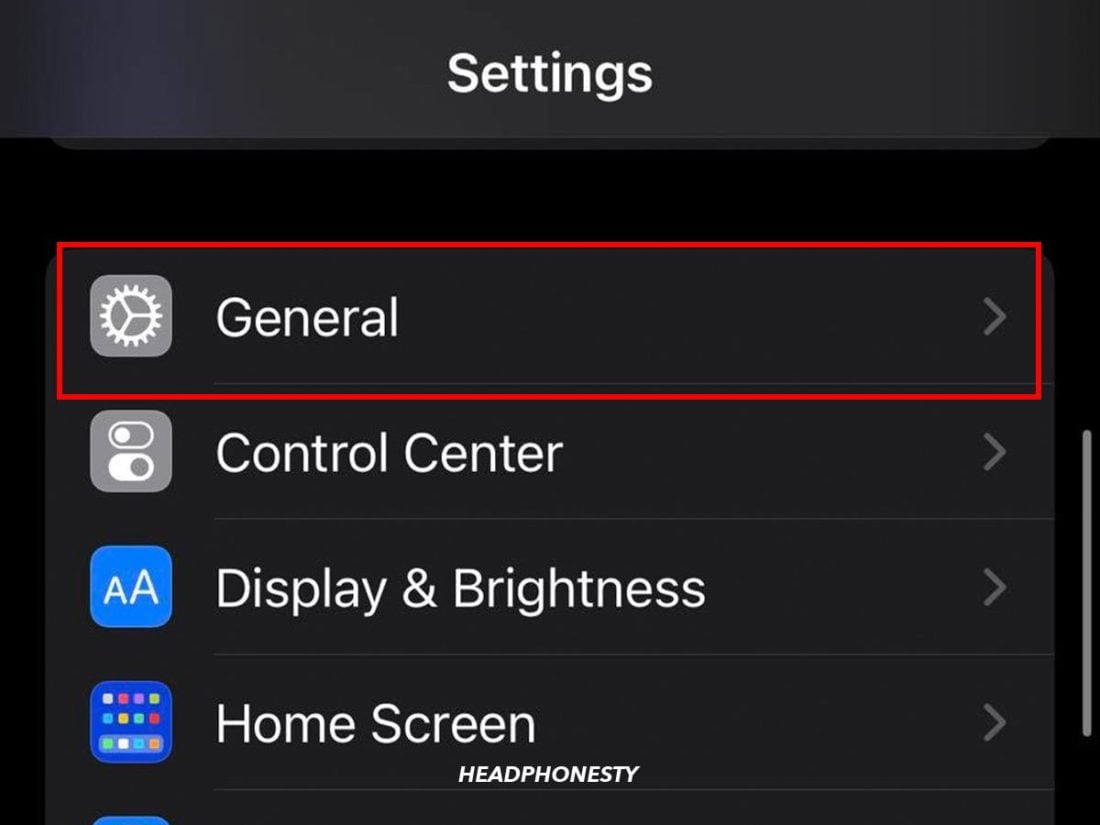
- Go over to Settings > General.
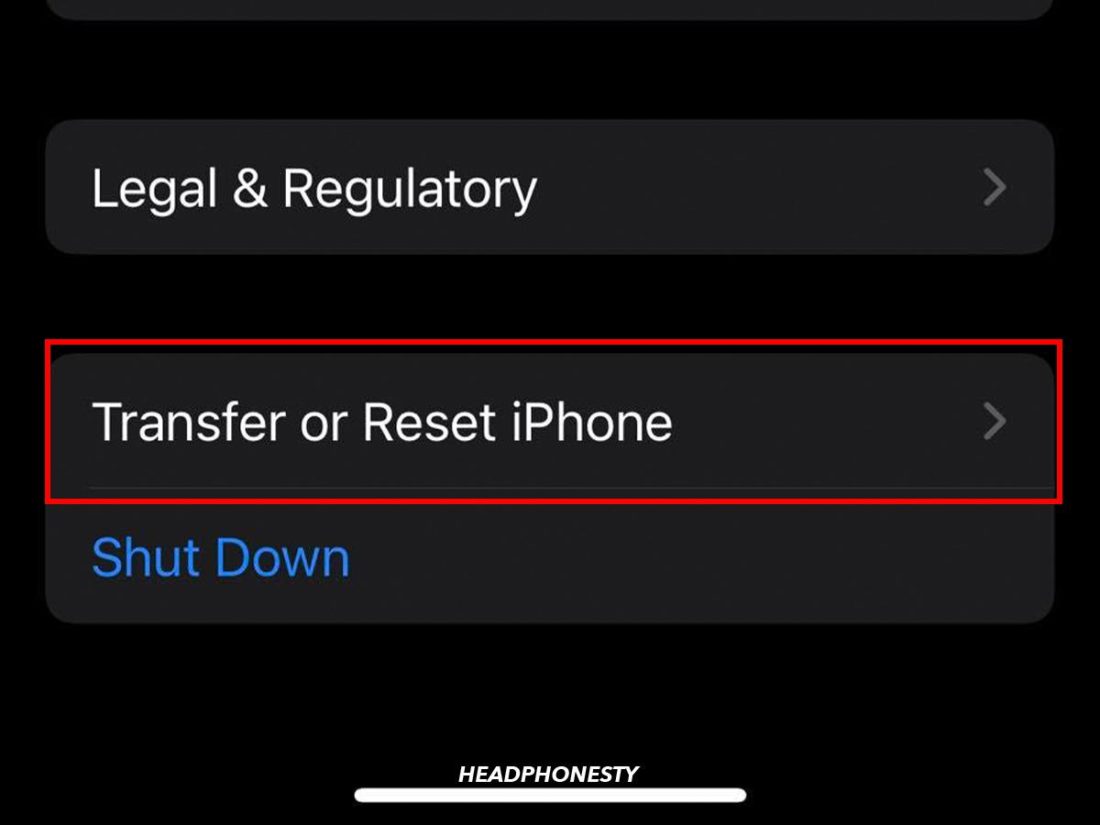
Going to General settings - Click Transfer or Reset [Device].
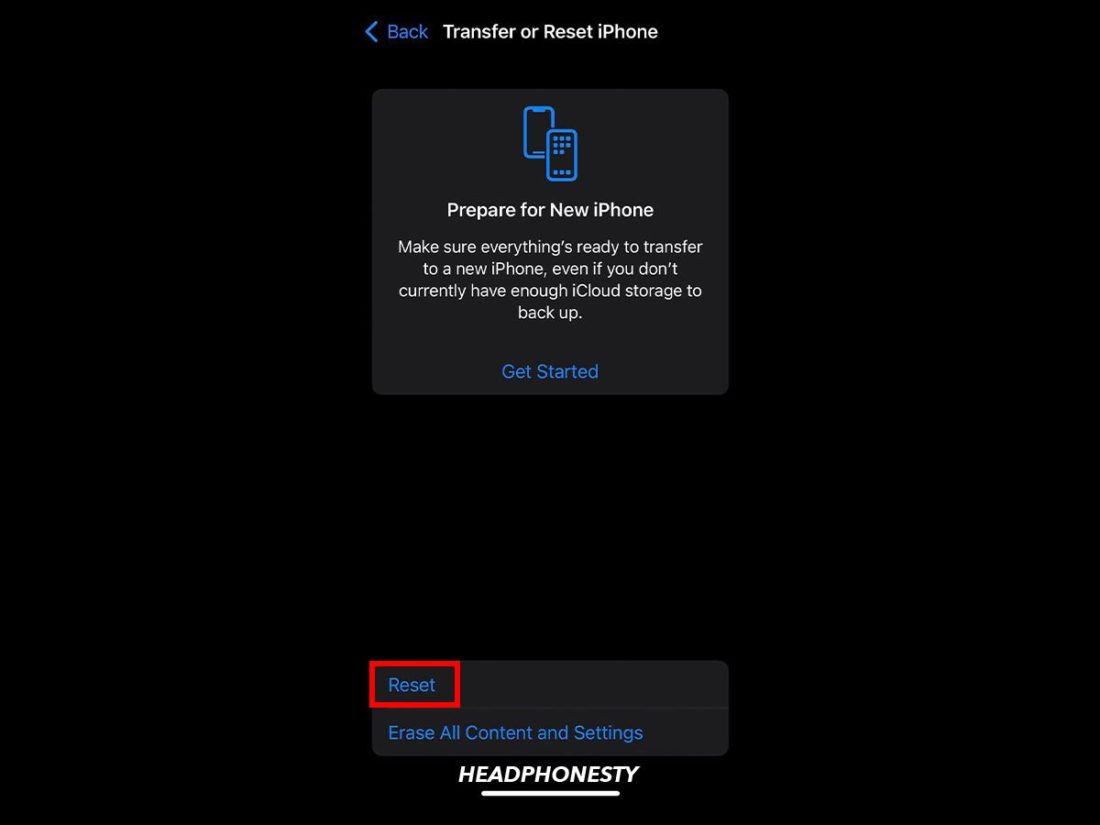
Transfer or Reset iPhone - Then Reset > Reset Network Settings.
Resetting Network Settings on iOS
13. DFU Restore Your iPhone
DFU mode stands for Device Firmware Update mode and is a special recovery mode built into all iPhones.
Restoring your device from DFU mode fixes problems in the firmware, not just the software. It does this by restoring your phone’s factory default settings and deleting any conflicting settings that might have caused your issue.
This method results in losing all data like pictures, videos, and messages – so you should do an iCloud backup before doing it.
Before you enter DFU mode, you should:
- Back up your iPhone/iPad.
- Install the latest version of iTunes/Finder on your device.
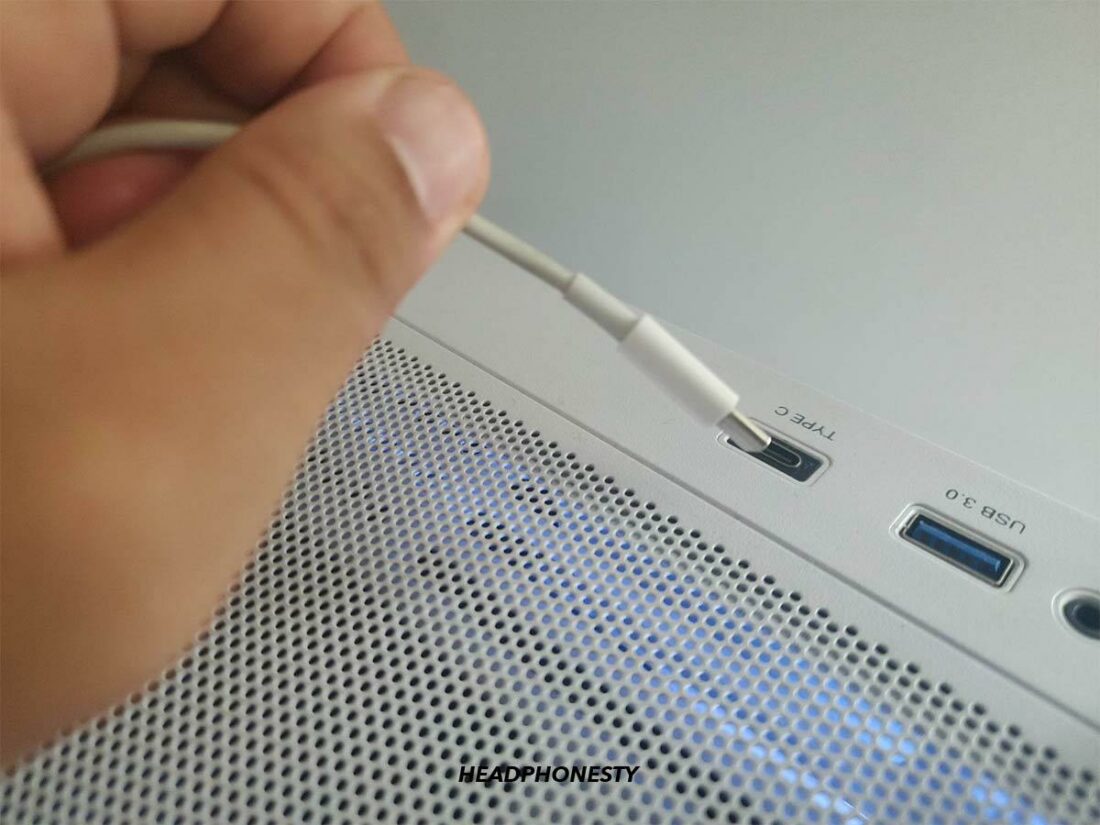
- Get a compatible USB cable to connect your iPhone and PC or Mac.
- Make sure your connection is secure to avoid disrupting the reinstallation process.
- Ensure your device is not water damaged, as DFU mode will not work to restore a damaged device.
- Make sure that your iPhone is an iPhone 8 or later.
Follow these steps to enter DFU mode on your iPhone or iPad:
- Connect your iPhone/iPad to a PC/Mac using a USB cable.
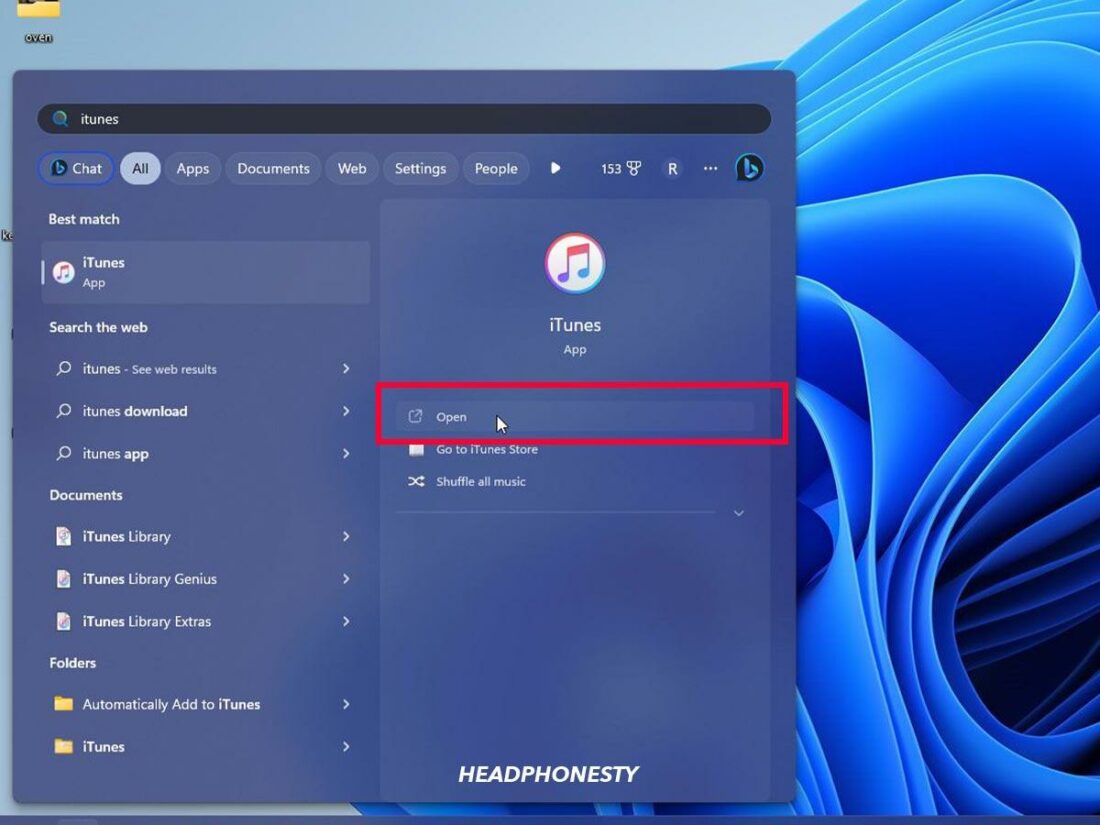
Connect your iPhone to your PC. - Launch iTunes/Finder app on both devices.
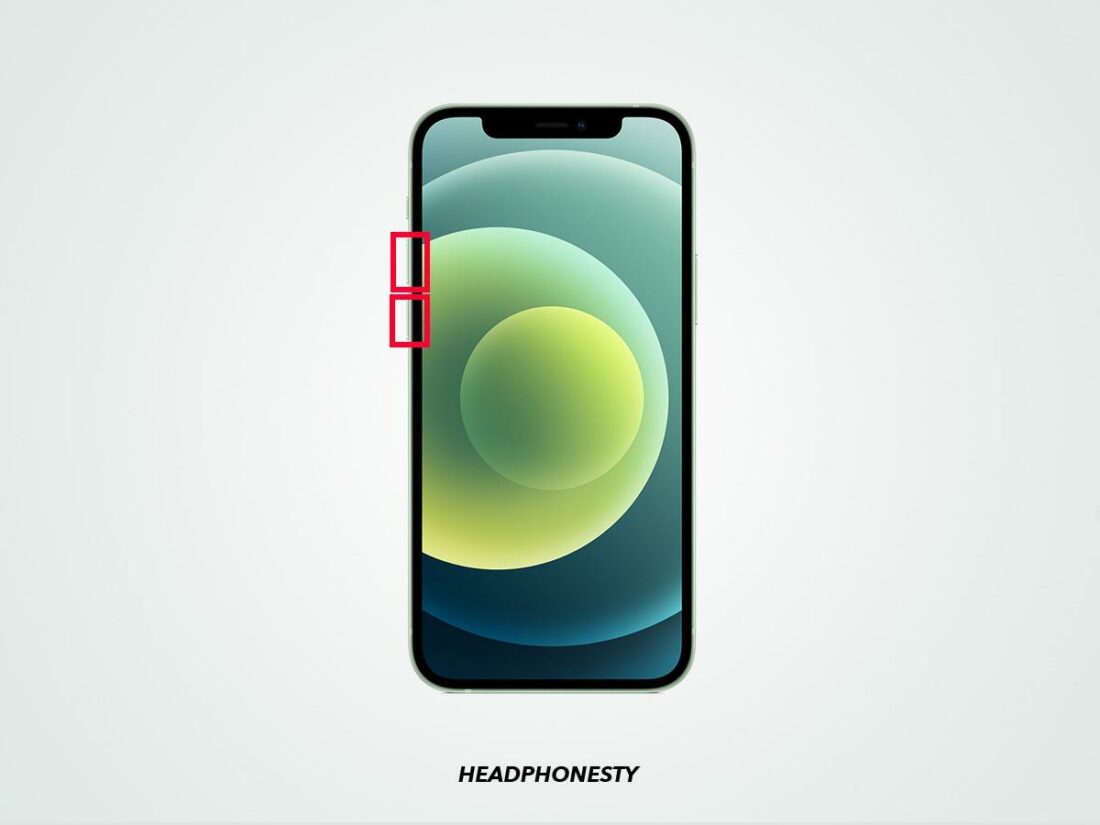
Launch iTunes. - Press and release the Volume Up button, then the Volume Down.
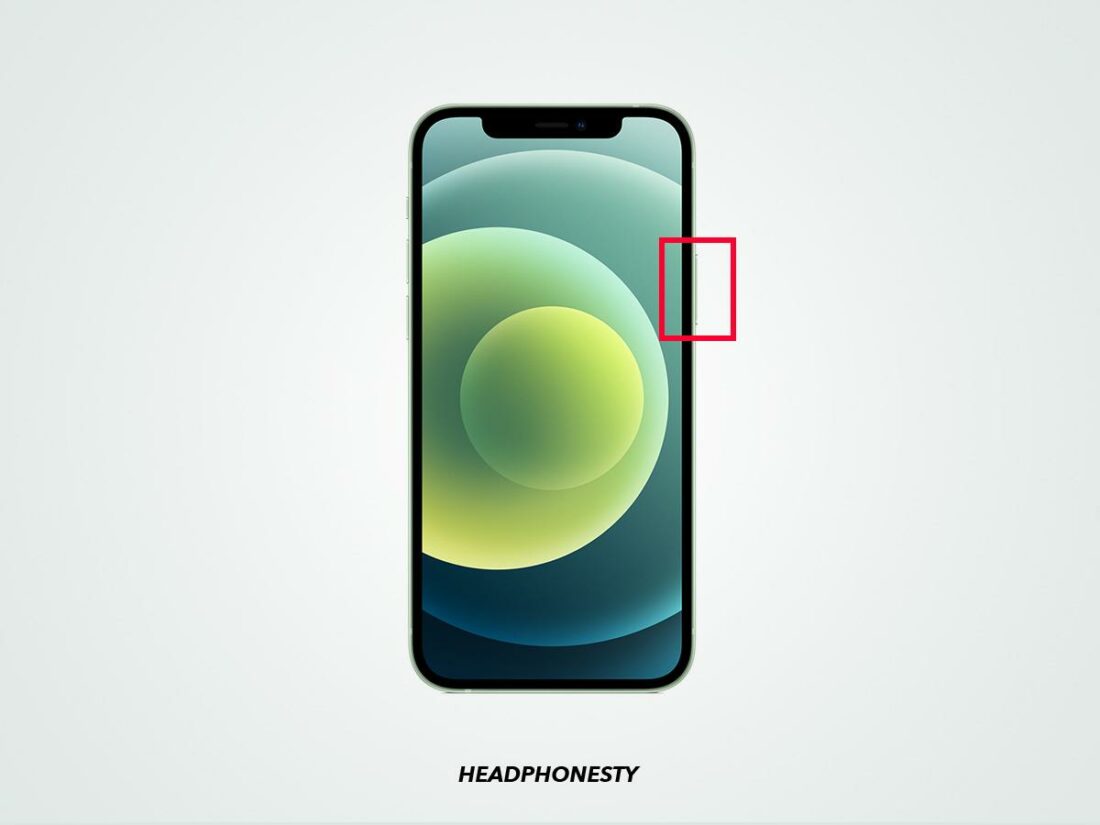
Press and release the Volume Up button, then the Volume Down. - Press and hold the Power button for ten seconds or until the screen goes black.
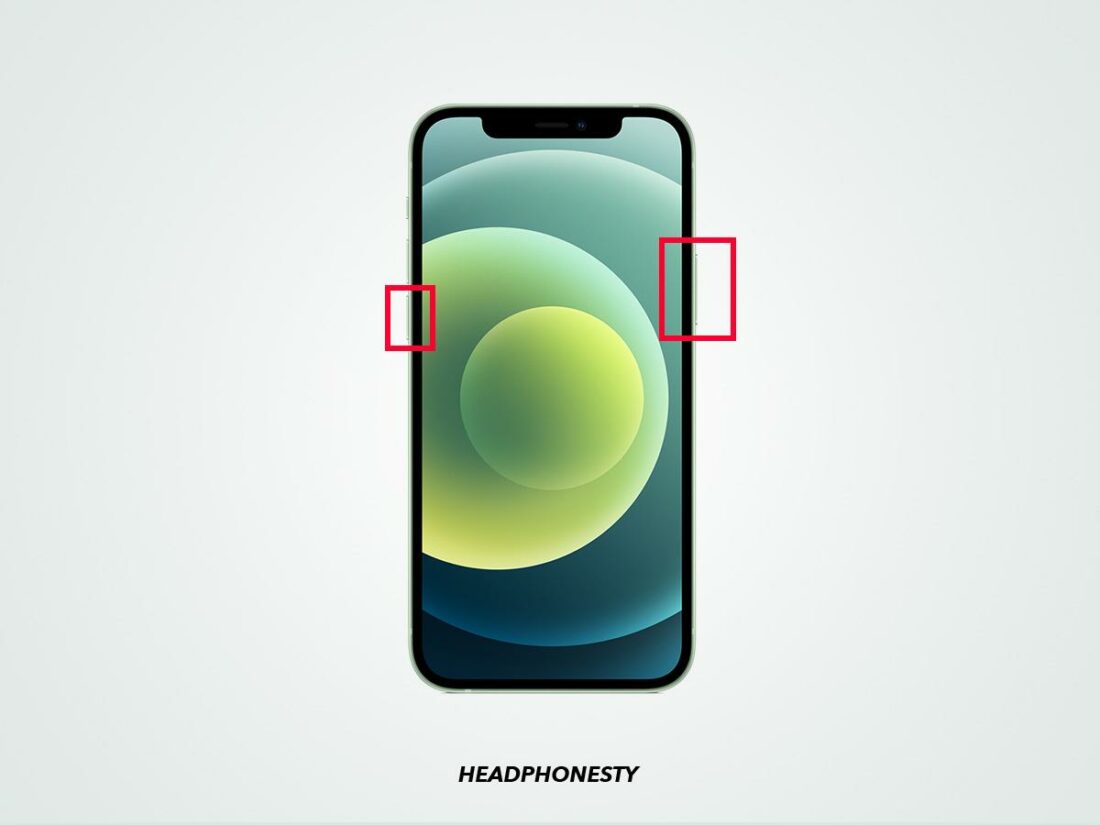
Press and hold the Power button for ten seconds. - Hold the Power and Volume Down buttons for five seconds.
Hold the Power and Volume Down button for five seconds. - Keep holding the Volume Down button and release the Power button until iTunes/Finder detects your device.
iTunes detected the iPhone. - Click on Restore iPhone.
Click on Restore iPhone button.


14. Contact Apple Support
As always, the experts will know best! If your AirPods still won’t connect after a reset, or if they say they’re connected but aren’t working, then it’s worth reaching out to Apple Support with your problem.
To contact Apple Support directly, you can call the number listed for your country or contact them online via chat or email.
Conclusion
With these solutions, your AirPods should pair seamlessly with your iPhone or iPad, allowing you to listen to music and podcasts without problems.
You should also be equipped with all the necessary knowledge to fix this issue if it arises again. Although, there are other solutions to try if your AirPods keep disconnecting.
Do you have any more solutions that we haven’t mentioned? What worked for you? Let us know in the comments so everyone can try them out too!
wow what a amazing article.it’s very help to me.thanks.
Thanks – a helpful article. Making bluetooth forget my airpods and then reconnecting worked for me!
Very helpful! Thank you!
Having trouble connect apple AirPods generation 2 to iPhone 13 Pro wit the latest update 16.5.1