
Wondering how to connect AirPods to MacBook computers? This guide will show you everything you need to know.
One of the best things about AirPods is how easily they pair with other devices within the Apple ecosystem, including MacBooks. However, the process can be confusing at first.
Let’s say you’re excited to watch a live stream of an event on your Mac. There are people around, and you don’t want to bother them.
The only option is to use the AirPods, but you’ve never connected them to your computer before. The anticipation only adds to the pressure – and the event will end soon!
Don’t worry, we’ve got you covered. Read on to learn more about how to connect AirPods to MacBook computers in record time. Let’s begin!
In This Article
- Requirements for AirPods to Connect to a MacBook
- How to Connect AirPods to MacBook When Using Them on Your iPhone
- How to Connect AirPods to MacBook When Not Using Them on Your iPhone
- 3 Settings Hacks to Improve Your AirPods Experience on Mac
- What to Do if AirPods Are Not Connecting to Your MacBook
- Conclusion
Requirements for AirPods to Connect to a MacBook
To get the basics out of the way, start by making sure you have the right software. For your AirPods to connect to your MacBook, you need to have the latest version of macOS installed.
Apple recommends upgrading to certain versions of MacOS, depending on your AirPods model:
- AirPods (2nd generation) – macOS Mojave 10.14.4 or later
- AirPods (3rd generation) – macOS Monterey or later
- AirPods Pro (1st generation) – macOS Catalina 10.15.1 or later
- AirPods Pro (2nd generation) – the latest version of macOS
Once this is out of the way, you can begin the process of linking the two devices.
How to Connect AirPods to MacBook When Using Them on Your iPhone
Your Mac should recognize your AirPods automatically if you have previously used them with an iPhone that shares the same Apple ID as your Mac.
If this is the case, just follow these steps:
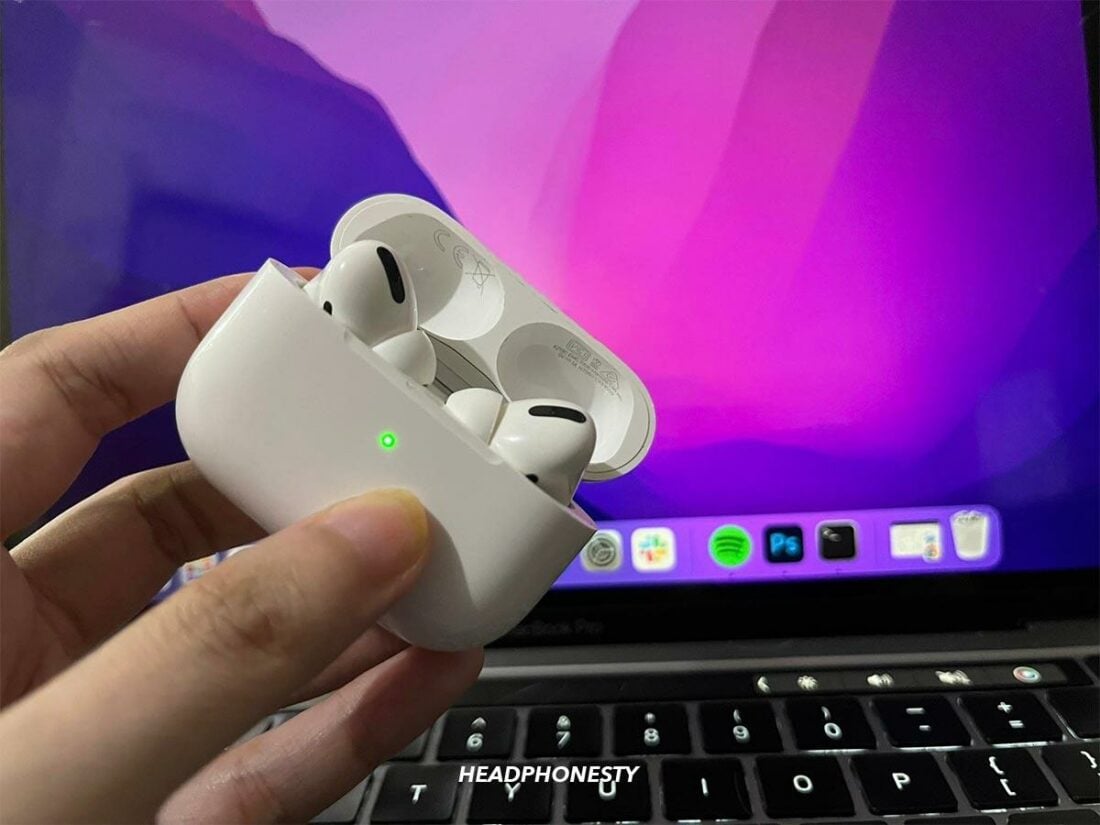
- Keep the AirPods in their charging case and open the lid.

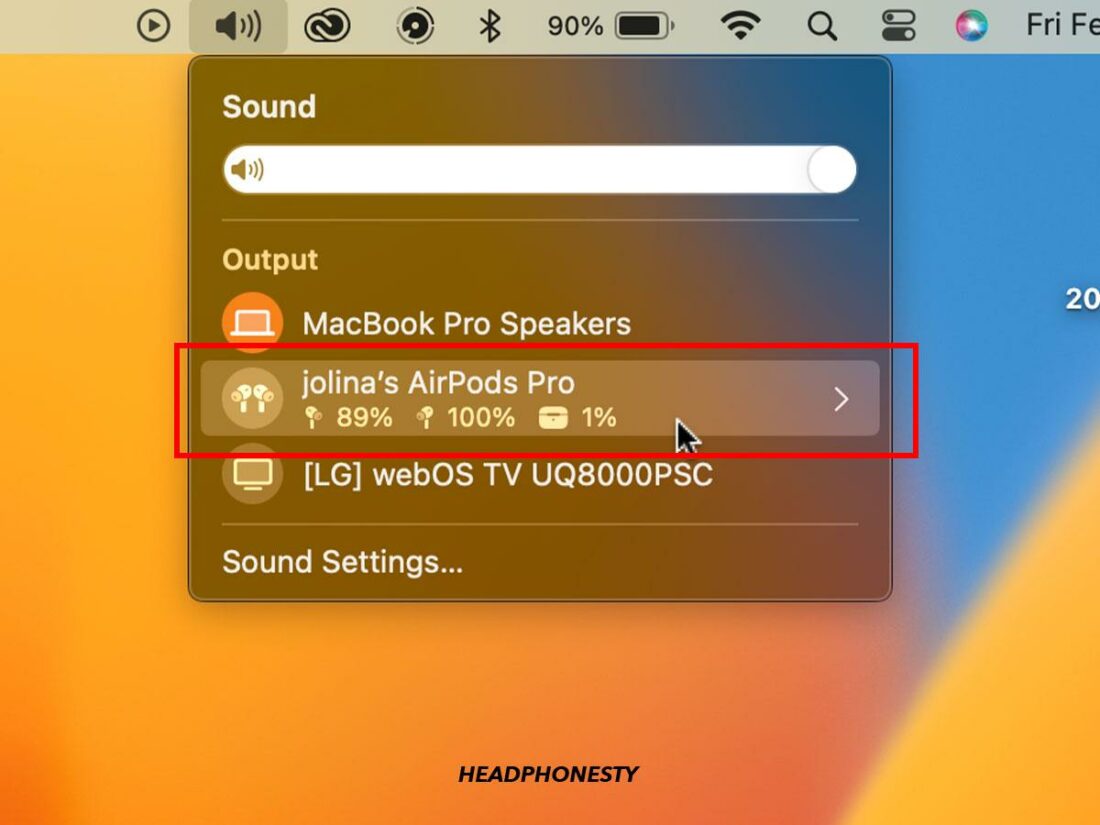
Open AirPods Charger lid - On your Mac, click on the Volume Control icon from the menu bar on top of the screen.
Volume control icon - Select your AirPods from the list under Output Device.
Select Airpods


Having trouble? Make sure that your iPhone and Mac are logged in with the same Apple ID. Follow these steps to check:
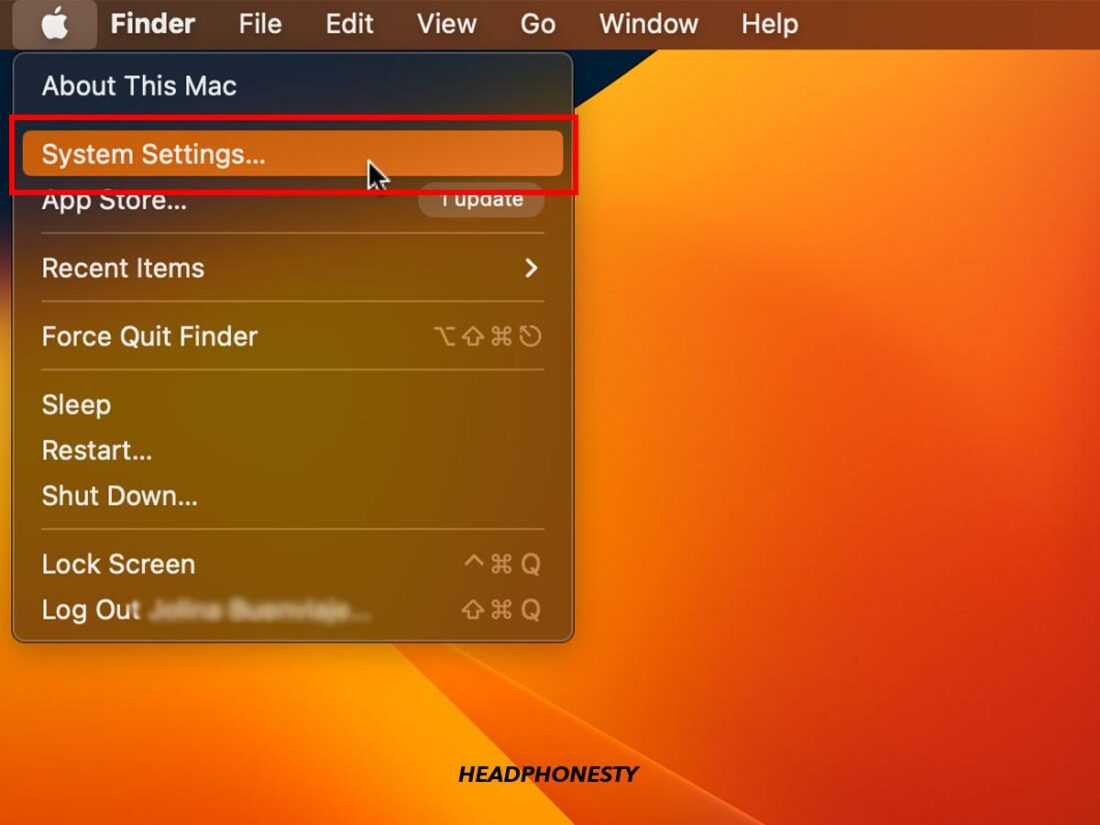
- On your Mac, open the Apple menu in the corner of your screen.
Apple icon - Go to System Settings.
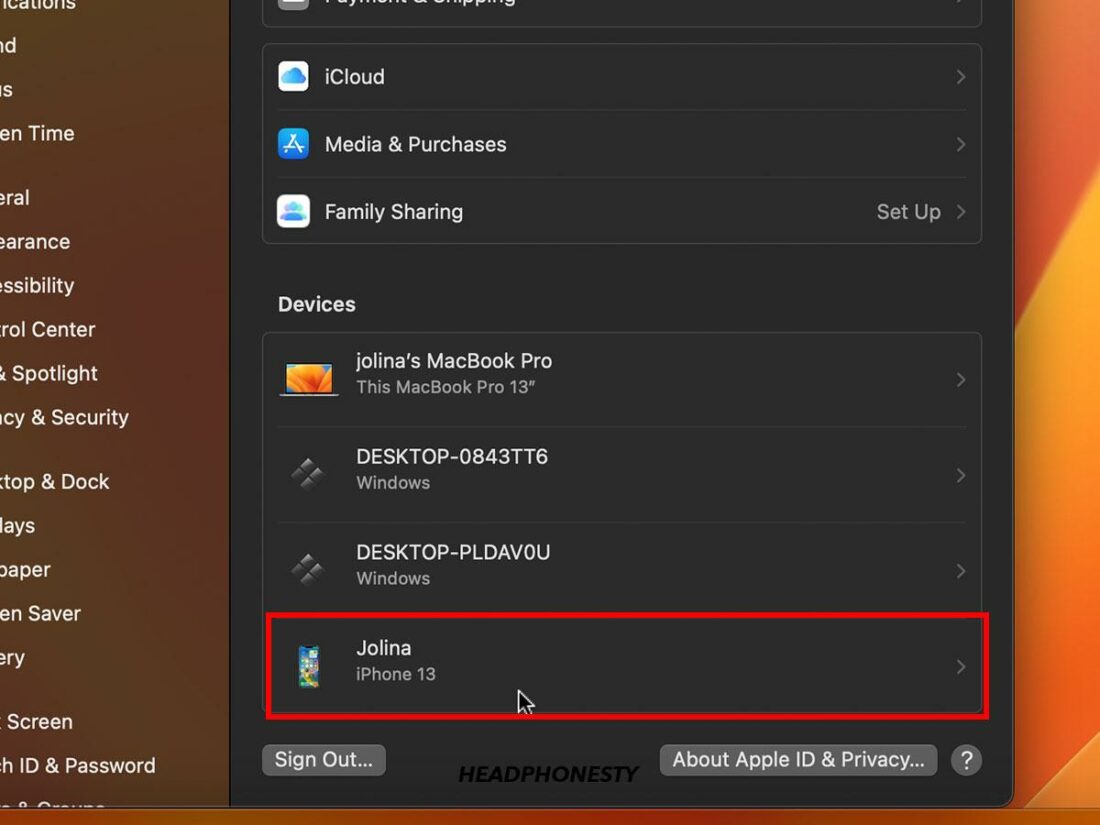
System Settings - Click Apple ID and check for your iPhone in the device column in the bottom left.
iPhone

Additionally, you may need to turn on the Handoff feature.
Here is how to turn it on:
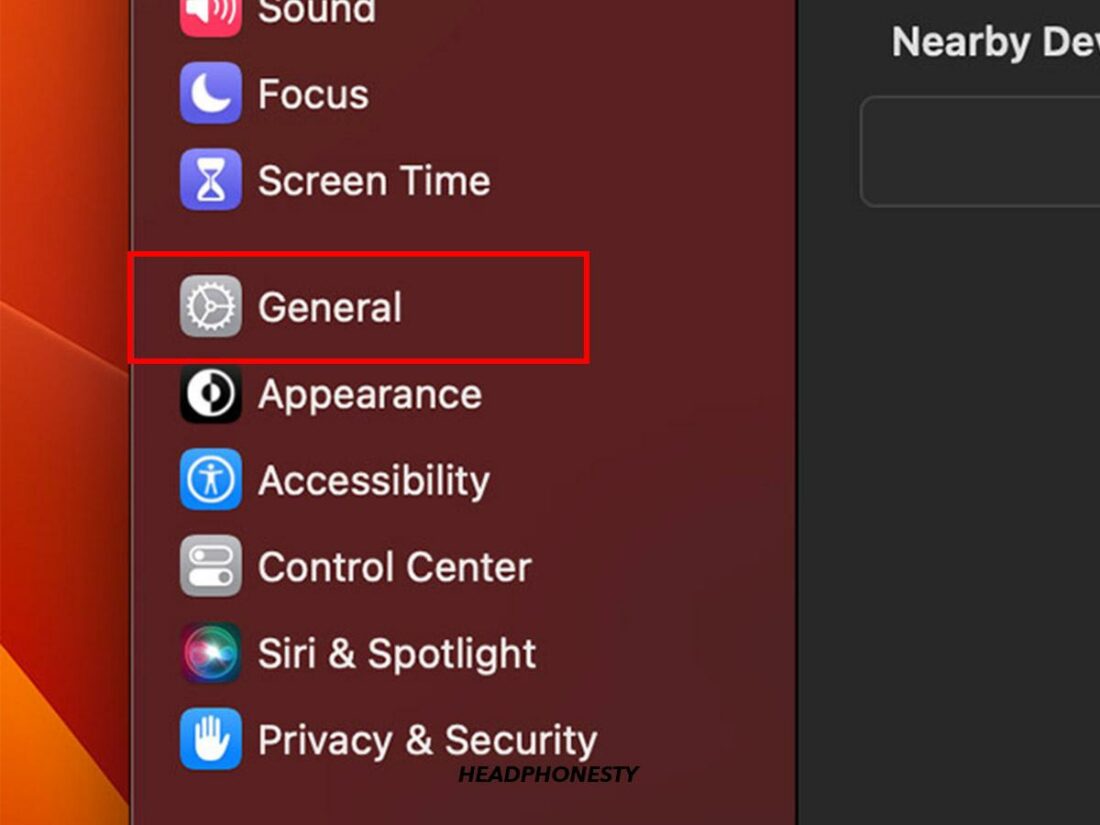
- From System Settings, click on General.
General - Click the “AirDrop & Handoff” and then turn on the “Allow Handoff between this Mac and your iCloud devices” toggle switch.
Allow Handoff between this Mac and your iCloud devices

How to Connect AirPods to MacBook When Not Using Them on Your iPhone
Getting AirPods to connect to your Mac will require extra effort if they’re not already linked to your iPhone.
The process is similar to connecting other Bluetooth devices to your computer. Simply follow the steps below:
- Keep the AirPods in their charging case and open the lid.
Open AirPods Charger - Long-press the button on the back of the case. The status light will start to flash white. This is how you make the AirPods discoverable.
Press the setup button - On your Mac, access the Apple menu in the corner of your screen.
Apple icon - Select System Settings.
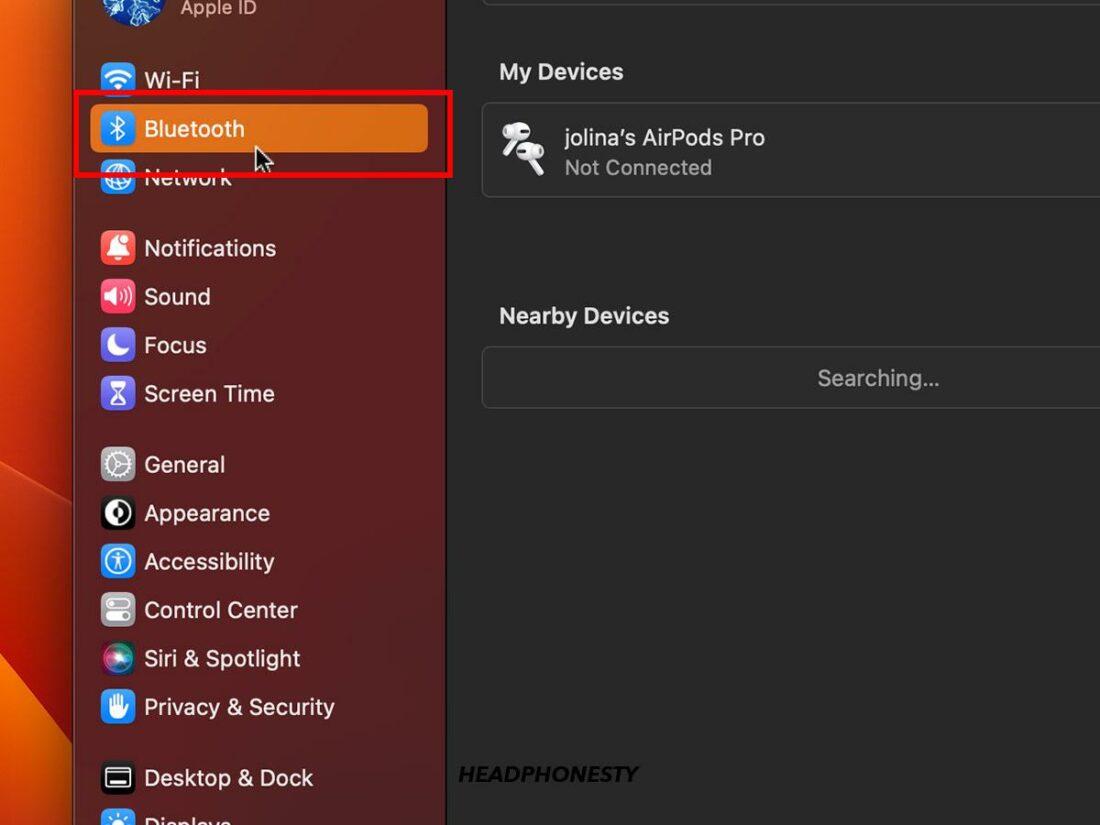
System Settings - Go to Bluetooth.
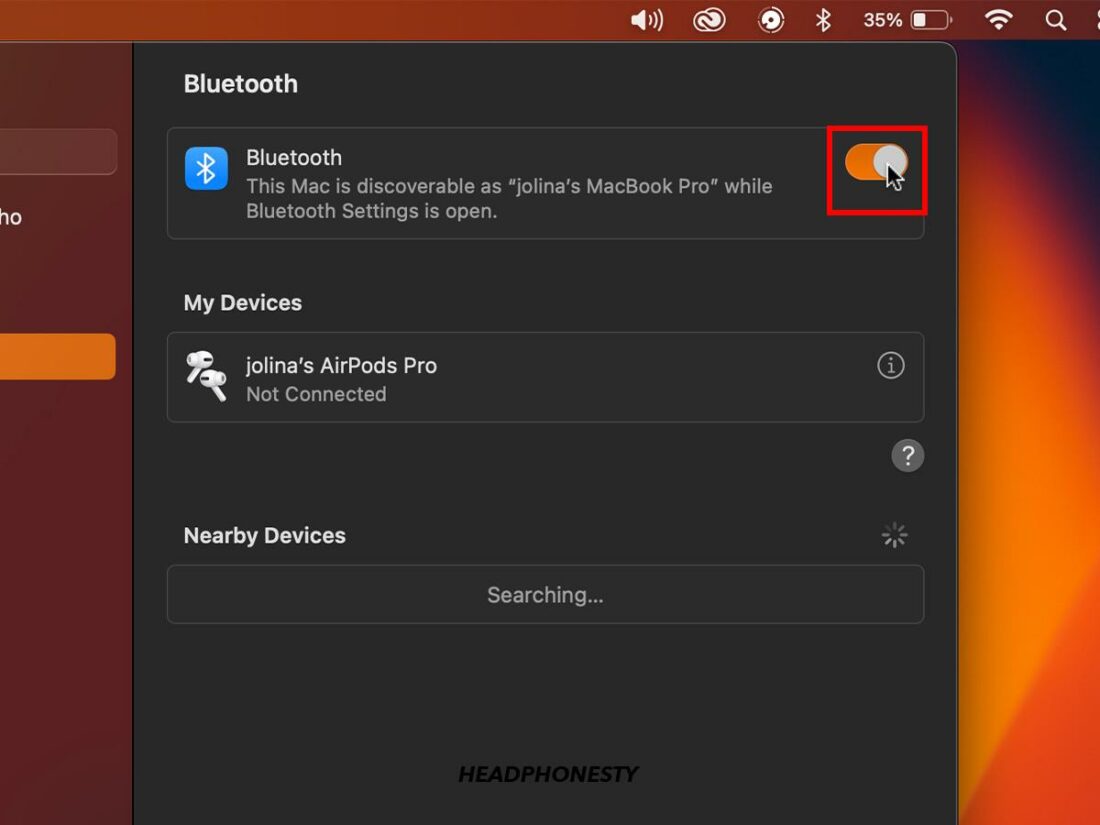
Bluetooth settings - Select Turn Bluetooth On.
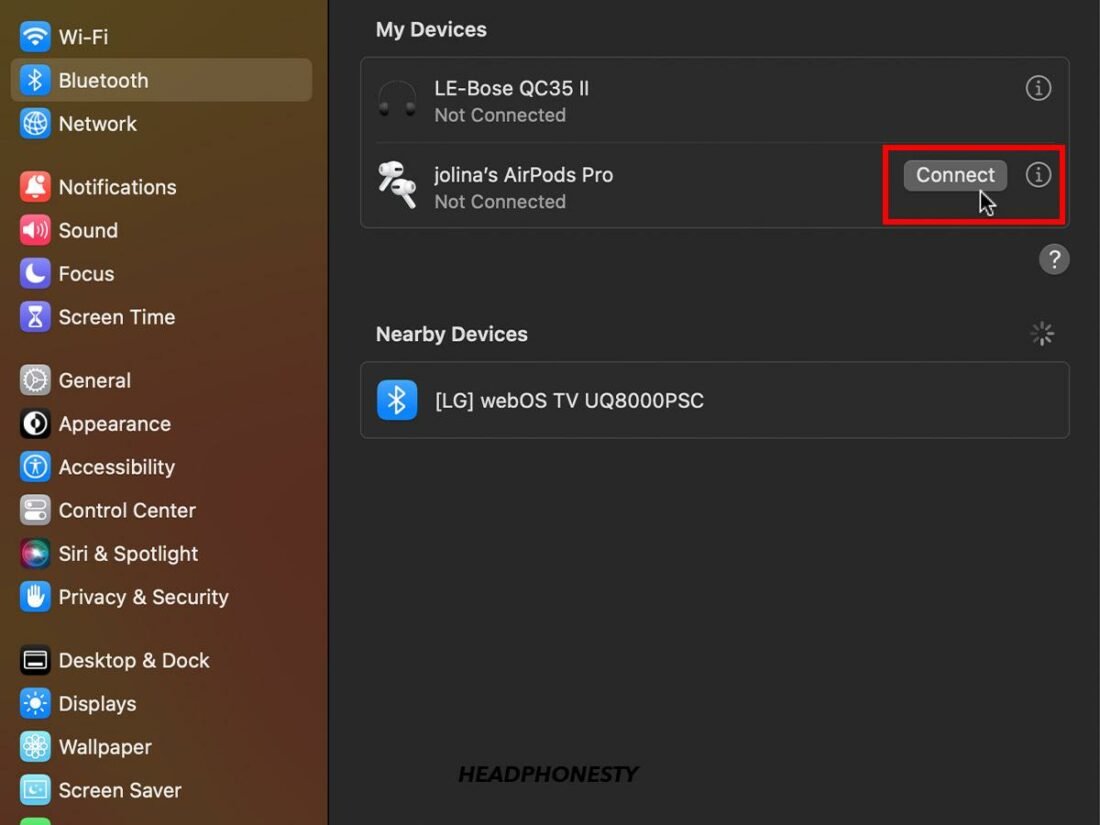
Bluetooth toggle switch - From the list of available devices, locate your AirPods and click on Connect.
Connecting to AirPods on Mac
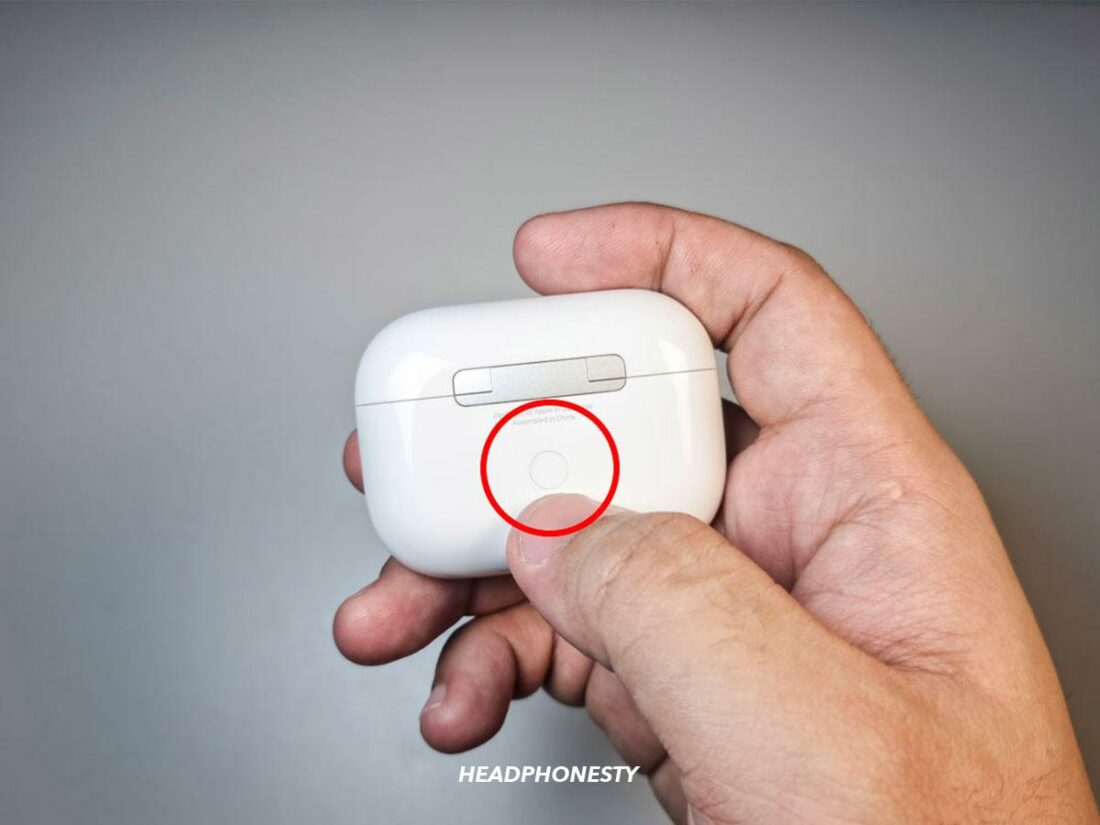


The status light for AirPods 1st and 2nd generation sits between the headphones inside the charging case. For AirPods 3rd generation and to connect AirPods Pro to Mac, look for the status light on the front of the case. On AirPods Max, the status light is on the right earphone.
3 Settings Hacks to Improve Your AirPods Experience on Mac
AirPods are a joy to use on iOS devices, but there are still things you can do to bring your audio experience to the next level. We have three fun hacks to get you started:
- How to change Mac audio output
- How to turn on Spatial Audio on your Mac
- How to change noise control modes on AirPods from your Mac
1. How to change Mac audio output
Once your AirPods are paired with your Mac, they will connect to it every time the two devices are turned on and within range. Take the headphones out of their case, put them on, and you’re good to go.
That said, you might get a notification on your computer if the AirPods were last connected to another device, like your iPhone. The notification will ask you if you want to connect them to your Mac instead.
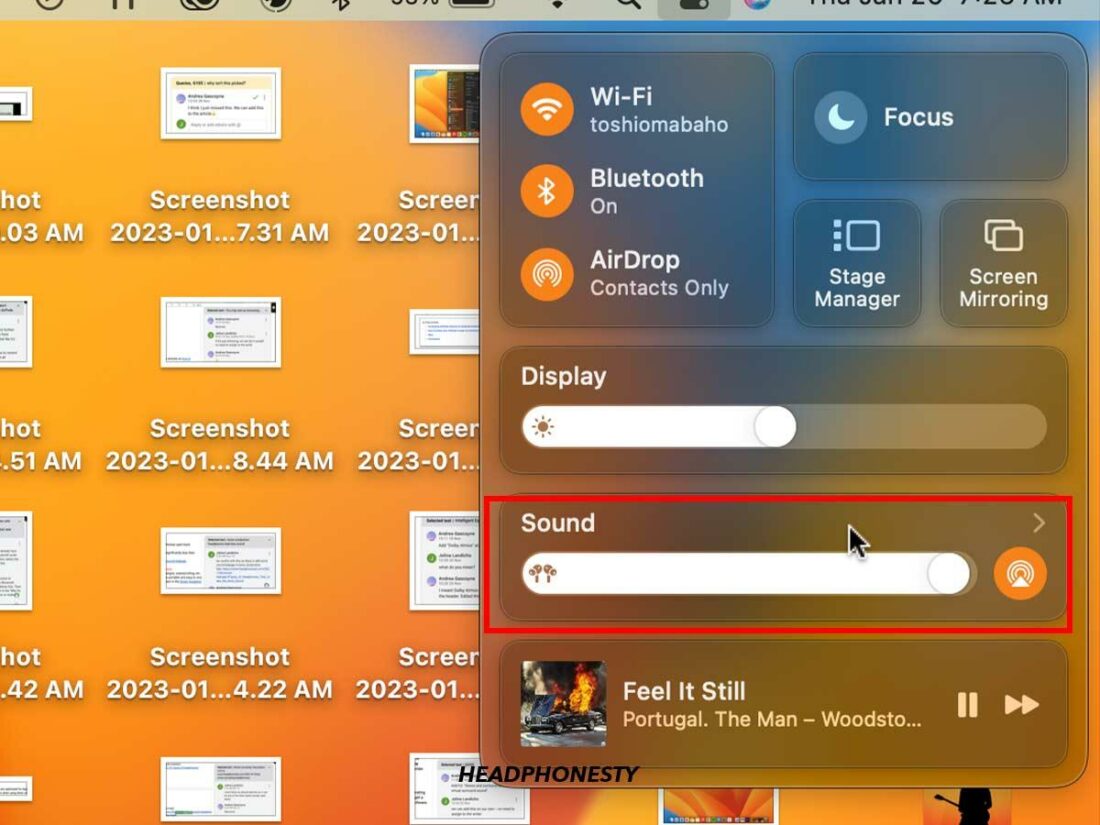
Or, you can do it manually by changing the Mac audio output from the Volume Control icon we mentioned in the previous section.
If the Volume Control icon doesn’t appear in the menu bar, we suggest adding it so it’s always visible. It lets you switch between speakers and AirPods in a couple of clicks.
Follow these steps:
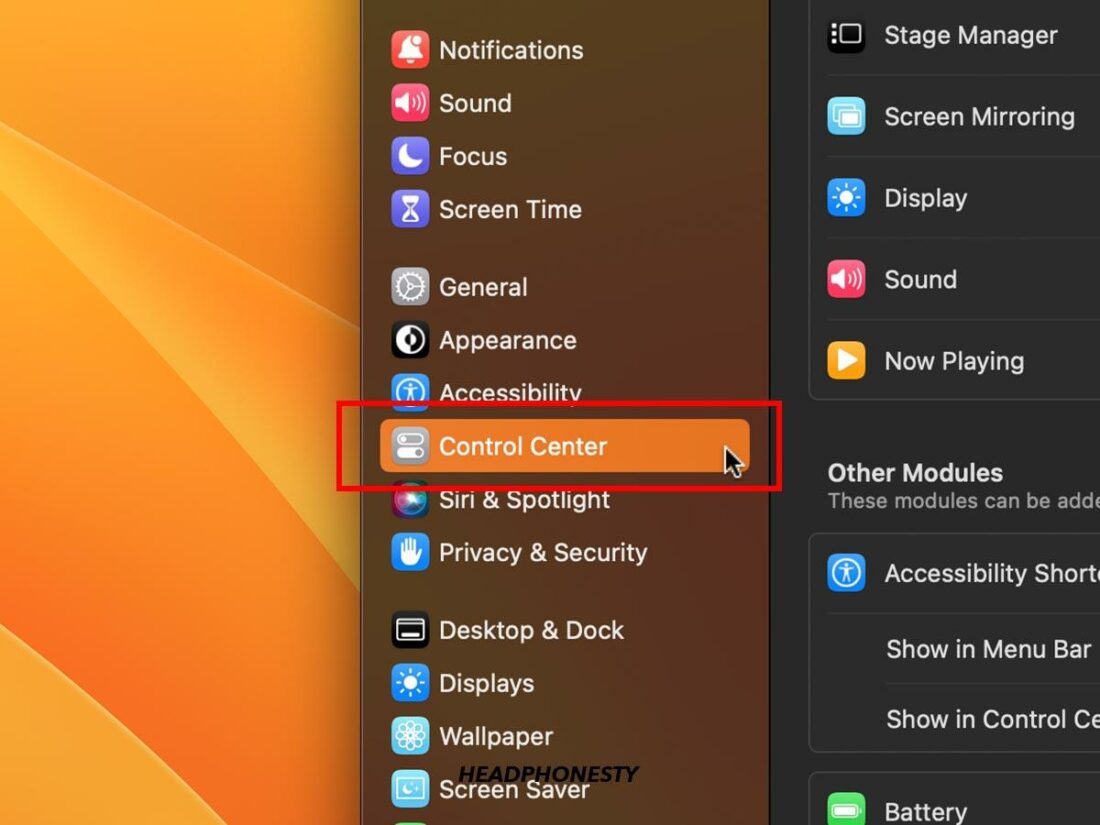
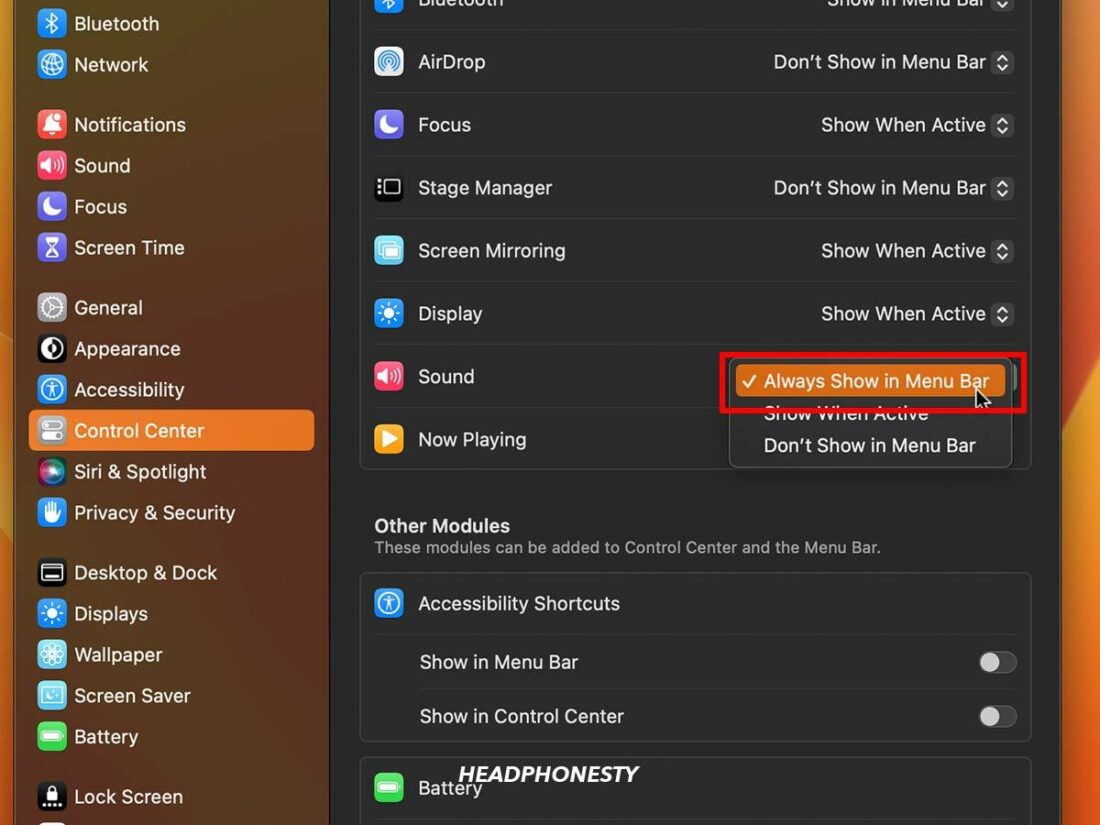
- Tap on the Apple menu at the top of your screen.
Apple menu - Select System Settings.
System Settings - Go to Control Center.
Control Center - Look for Sound, then select “Always show in menu bar” from the dropdown list.
Always Show in Menu Bar


Apple also has a neat feature that automatically lets users switch between devices when using AirPods. For instance, you can listen to a playlist on your Mac and answer a call on your iPhone, without having to sacrifice one activity for the other.
For this to work, your devices need to be signed in with the same Apple ID. Sometimes, you might get a notification about your AirPods on your Mac. When that happens, click on the Connect button to confirm that you want to switch to another device.
2. How to turn on Spatial Audio on your Mac
Spatial Audio is the name of Apple’s audio technology meant to make your listening experience more immersive. In layperson’s terms, it’s a type of 3D sound or virtual surround sound.
Spatial Audio is best experienced while wearing AirPods, as the sound also tracks your head movements for a more realistic effect.
To turn on the feature on your Mac, follow these steps:
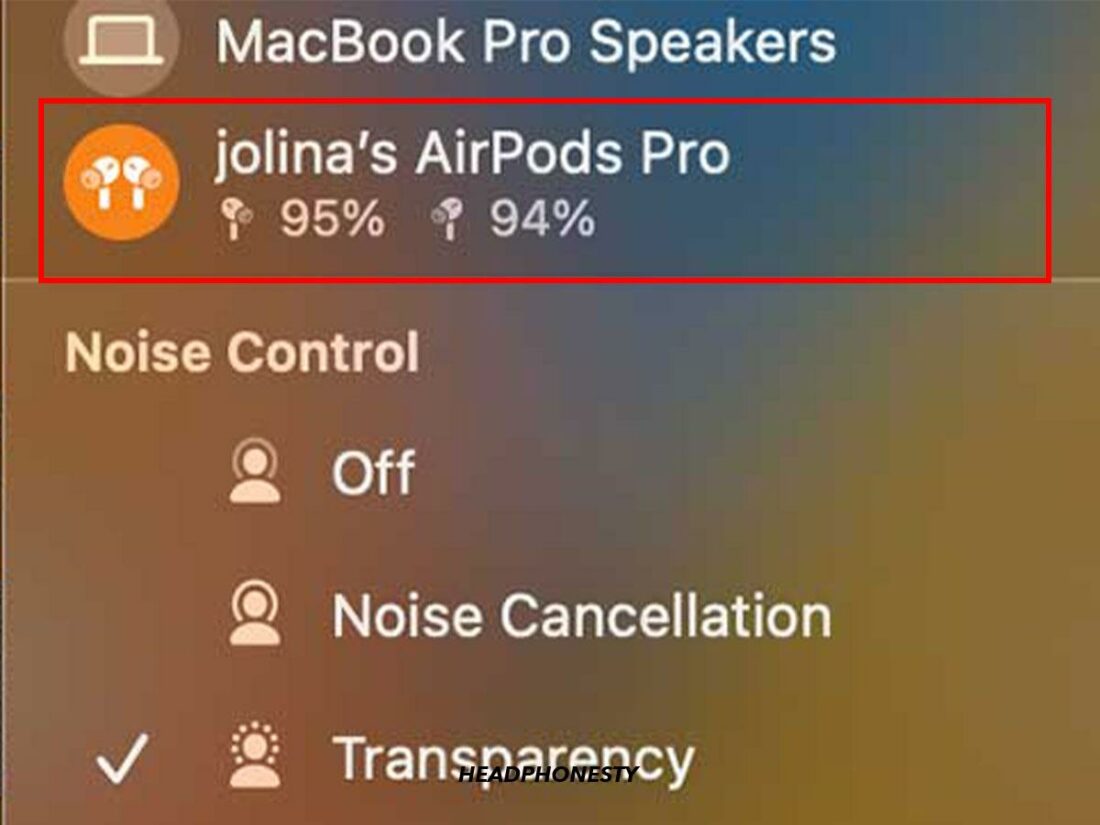
- With your AirPods connected to your Mac, click the Volume Control icon in the menu bar.
Volume control - Select your AirPods from the list.
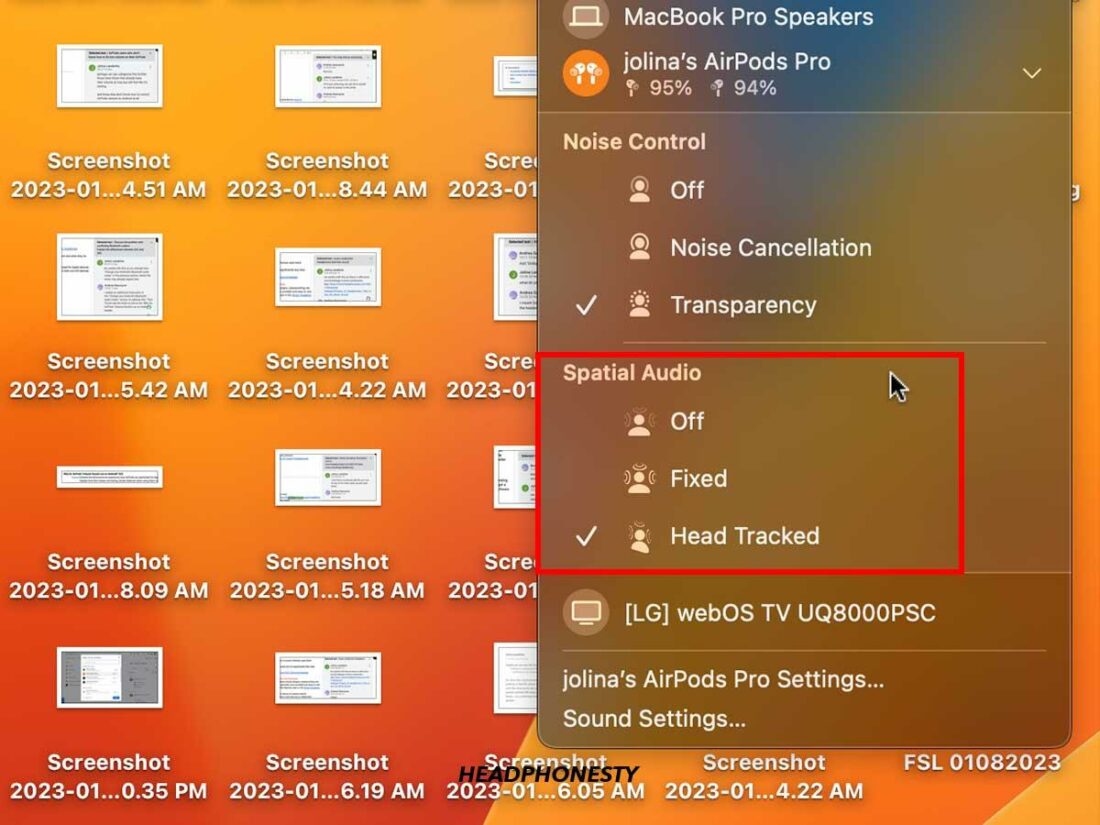
Select your AirPods - You’ll see three options under Spatial Audio: Off, Fixed (Spatial Audio without head tracking), or Head Tracked (the sound follows the movement of your head). Select the one you want to enable.
Spatial Audio


3. How to change noise control modes on AirPods from your Mac
If you have AirPods Pro or AirPods Max, you can switch between three noise-control modes:
- Active Noise Cancellation
- Transparency
- Off
Active Noise Cancellation uses incorporated microphones to cancel external sounds. Meanwhile, Transparency mode uses microphones to let sounds in, so you’re more aware of what’s going on around you.
Choosing the Off option will prevent your AirPods from using the microphones. They will rely on passive noise isolation to keep distractions at bay.
To switch between the three noise control modes from your Mac, follow these steps:
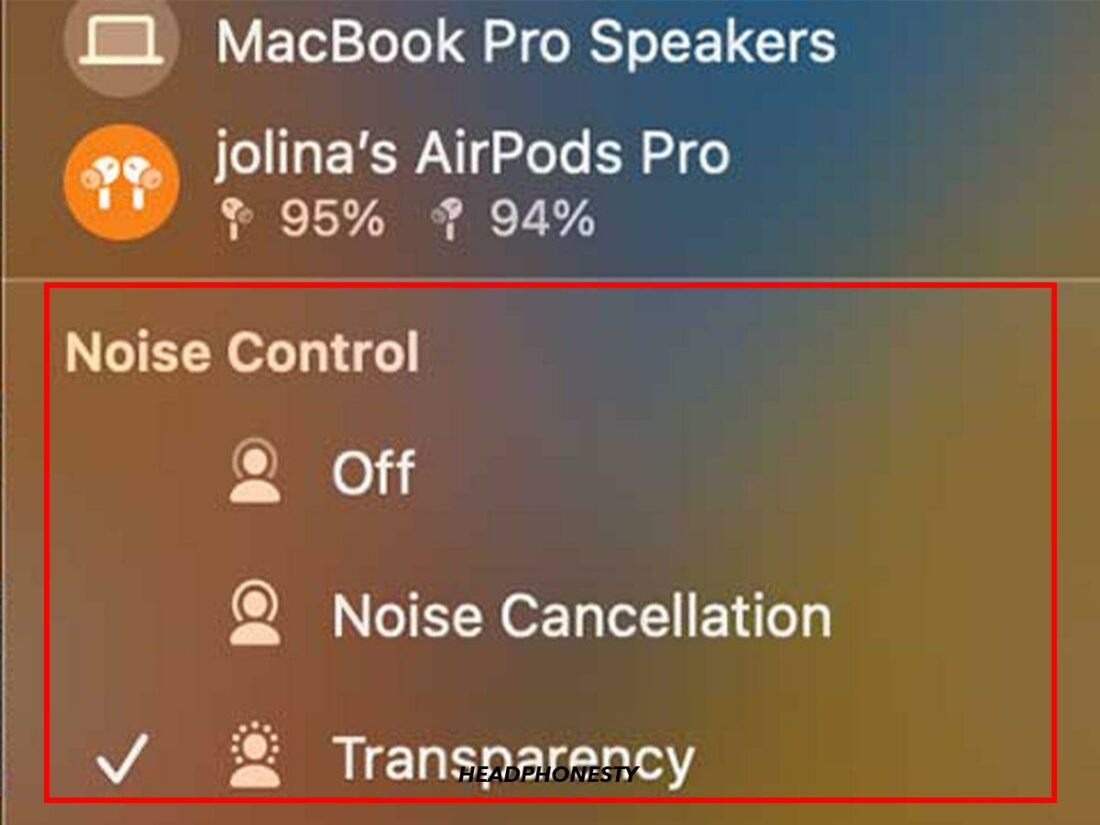
- With your AirPods connected to your Mac, click the Volume Control icon in the menu bar.
Volume Control - Select your AirPods from the list.
Select your AirPods - Click on Noise Cancellation, Transparency, or Off.
Noise Control
What to Do if AirPods Are Not Connecting to Your MacBook
In spite of your best efforts, setup or connectivity issues may still come up occasionally.
Yet, simple solutions go a long way to ensuring that your AirPods and Mac function well together. Here are four things you can try:
- Reset your AirPods – resetting your AirPods can fix most problems. If you don’t know how to do this, check out our complete guide on how to reset your AirPods.
- Clean your AirPods – dirt can influence the way your headphones function, so it’s a good idea to clean your AirPods regularly.
- Update your AirPods’ and Mac’s firmware – Apple releases updates to fix common issues, so double-check that your AirPods’ firmware is up-to-date.
- Reset your Bluetooth – if connectivity issues are the bane of your existence, resetting your Bluetooth might do the trick.
Conclusion
That’s it! By now, we hope you know how to seamlessly connect your AirPods to your Mac and make the most of your audio experience.
You can listen to your favorite ambient sounds at work without bothering your colleagues. Enjoy music at home at maximum volume and no neighbors will complain. And when the outside world gets too much, you can switch to Active Noise Cancellation mode and get lost in your own little world.
Are there any points you wish we could have expanded upon? Please let us know in the comments. We’re sure other users can benefit from your feedback as well!
thanks for such an great information.